Since the 2010’s we have seen a renaissance in 3D printing, but this wide adoption has also seen several small scale affordable and stream-lined laser engraving, laser cutting, and plotting machines hitting the market. After exploring generative art in plotting, I also wanted to explore the laser medium. With impressive build quality, plug and play operation, in addition to excellent engraving and cutting capabilities, the Aufero Laser 1 is the next contender in this new era of afforable high quality prototyping machines. https://auferolaser.net/products/aufero-laser-1-best-portable-diode-laser-engraver

But first, my quick rant on laser safety:
- Do not rely on safety features,
- Assume a laser it is always powered and never look into the diode, even if it is not plugged in,
- Be aware of where the laser is pointing; immediate and serious eye damage will result from exposure. Also be aware of what surface the laser is pointing at; never point at a reflective surface, this causes the path of the laser to be unpredictable and can end up pointing at a person or animal,
- While ever powered on, always wear protective goggles,
- The best amount of exposure is no exposure. Even with goggles, avoid looking at what the laser is directed at. Even the reflection of the laser off a non reflective surface will cause eye damage. So if possible, during operation, only look through an digital camera (not advised for a camera you care about, I am uncertain how much damage you could inflict even looking at what the laser is directed to), or even just turn away, but keep close and aware in case of a fire,
- Do not allow any child or animal in the room while using the engraver, use in a sectioned off area,
- Lasers are hot, do not use near flammable surfaces and operate in a well ventilated area. Always be present during engraving in case of fire,
- Eyes are not the only thing to worry about, skin can be easily burned by the laser.Leave the laser engraver unplugged if you are not using it,
- Read the warning label on the laser and do your own reading, this is not a comprehensive guide into laser safety.
Main Features
Coming well packaged and preassembelled from the manufacuter, I was able to put the Aufero Laser 1 on my desk, plug it in, and have it running in less than 5 minutes for the first time. This is an impressive feat for such a poweful device at the Aufero’s low price point of $200 USD on sale and $250 normally.
The Aufero Laser 1 is a low-cost and compact laser engraving and cutting solution with a 180x180mm workspace and a 5000mm/min travel time. This is in comparison to the larger and more expensive Ortur Laser Master 2 series.
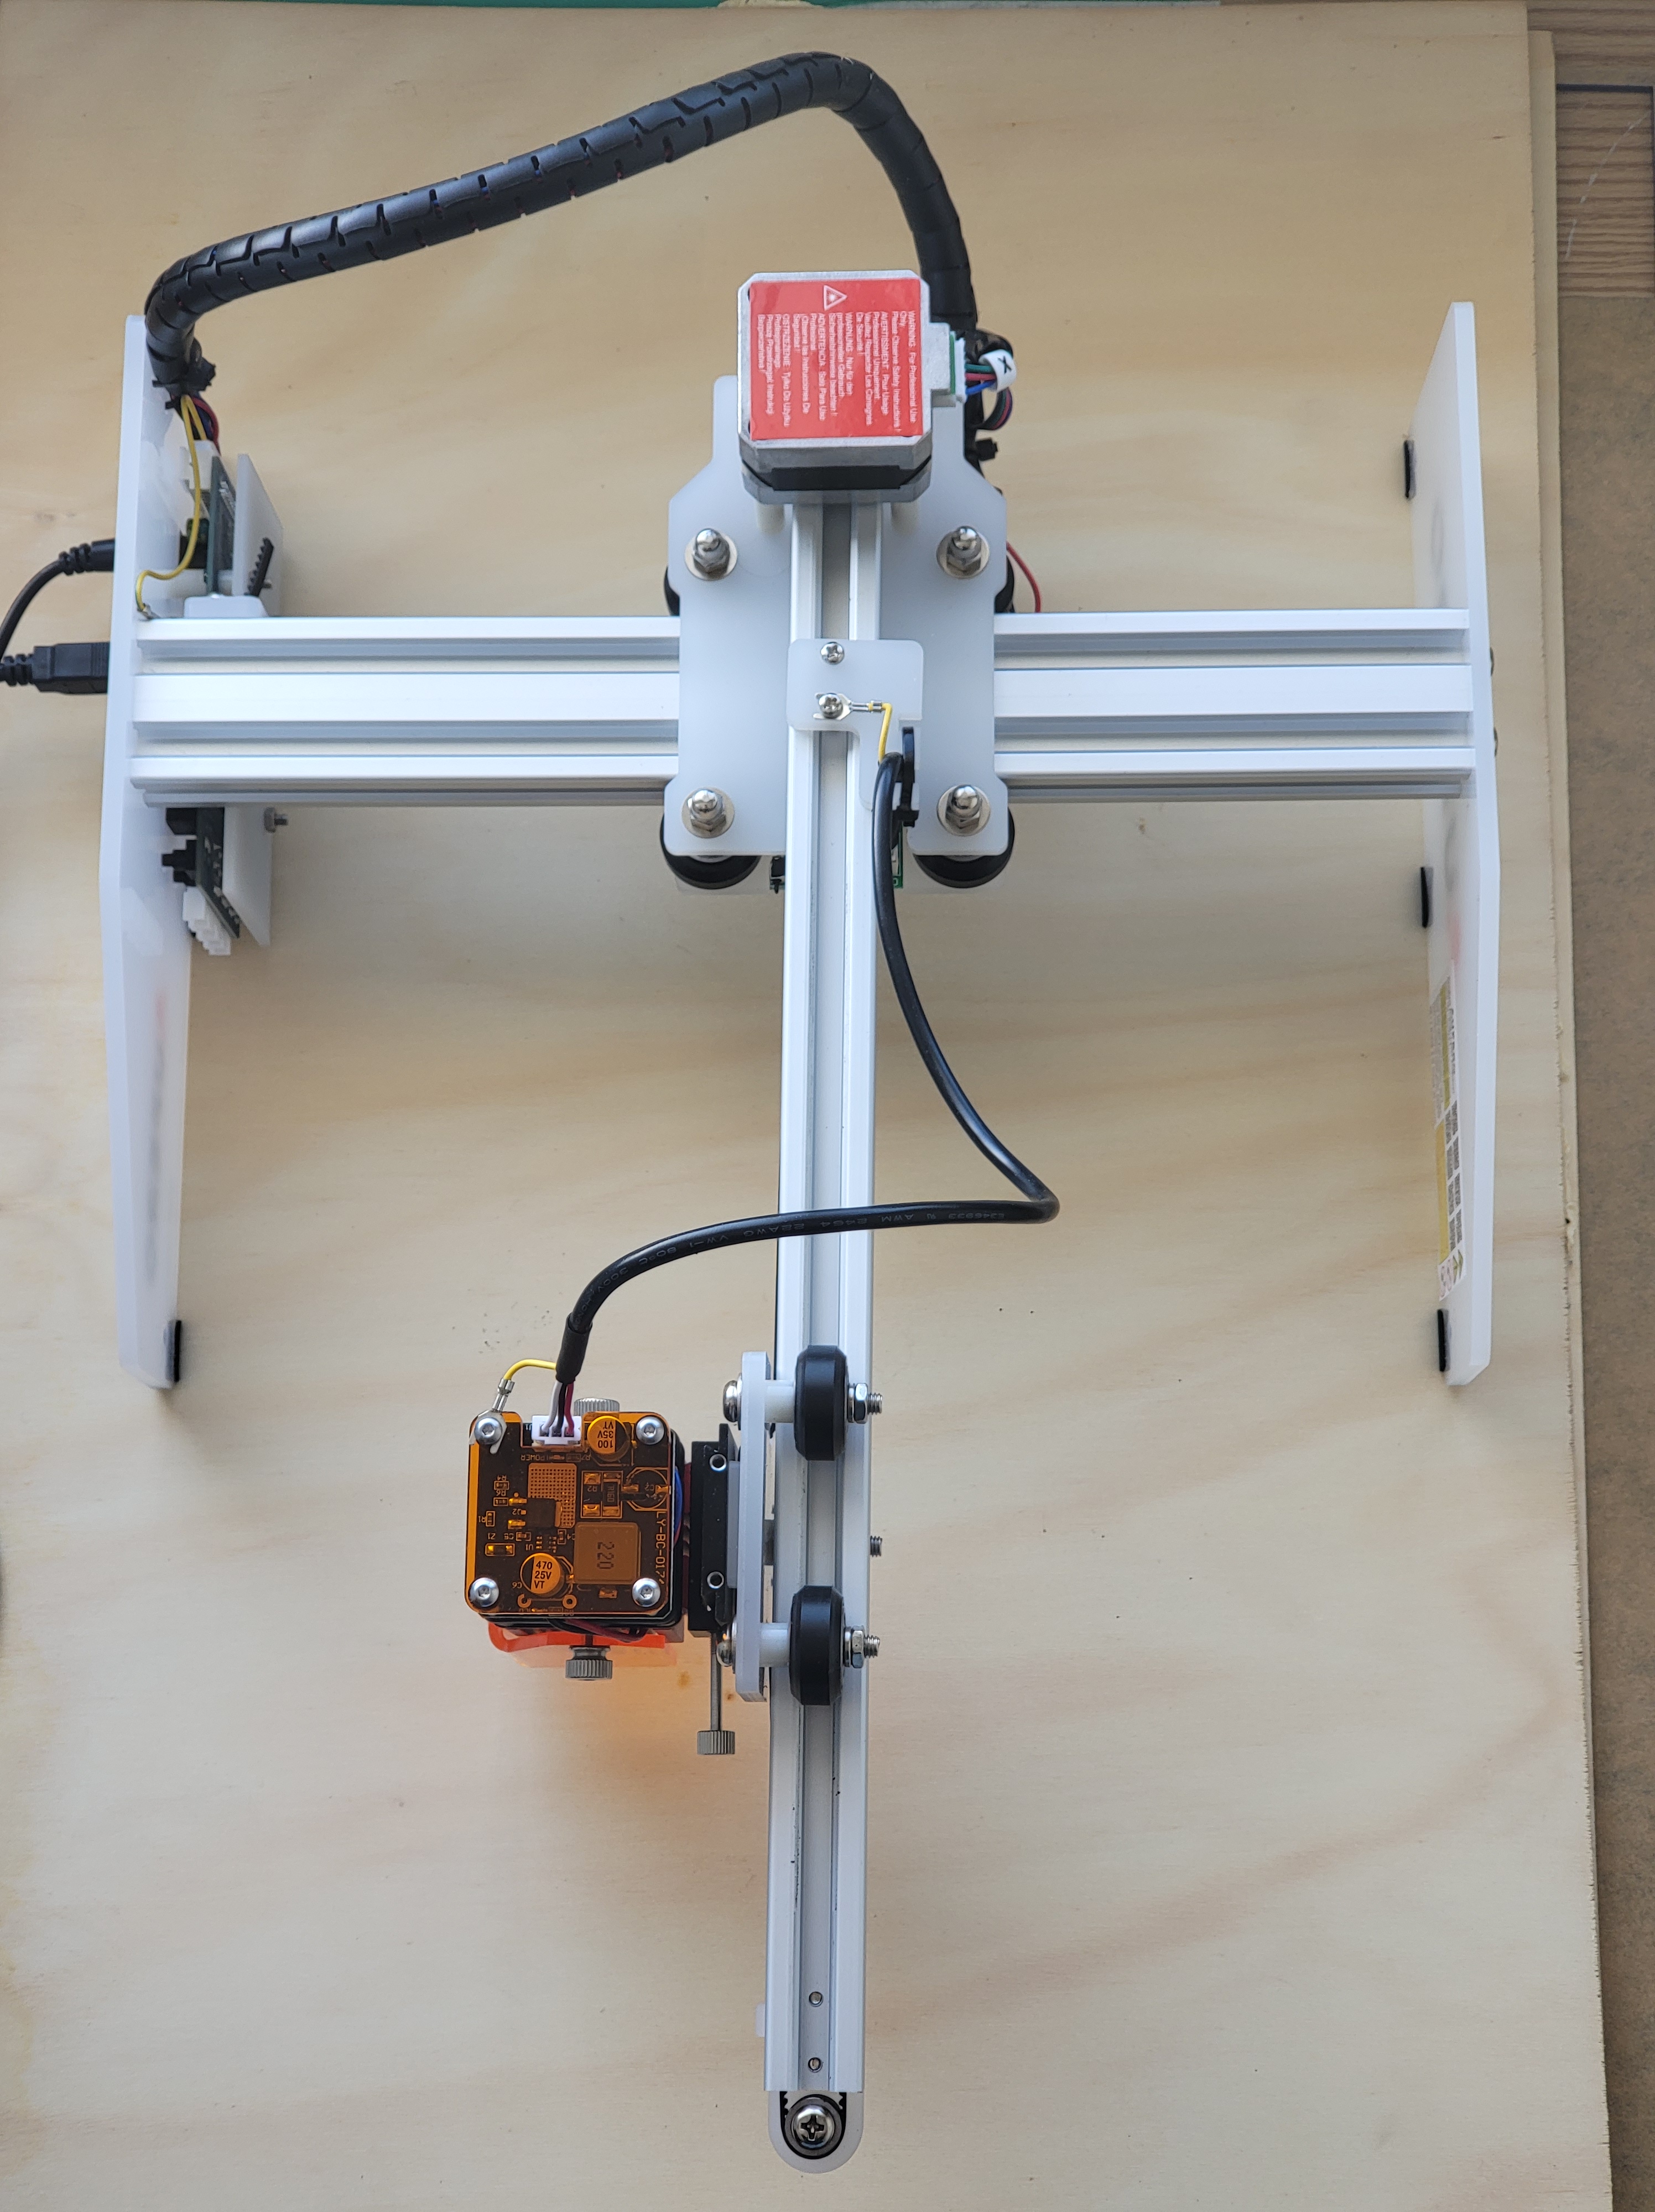
First looking at the overall design, the Aufero Laser 1 is a clean, well designed portable laser platform with excellent build quality. The attention to detail is high and there is a clear focus on designing for the convenience of the customer from modular laser attachements even to the addition of steel feet to mount the frame. The canilever design is fairly unique, cuts down the part count and keeps the form factor small and compact. I would reccomend securing the base during high speed operation however, since the cantilever can be prone to vibration and very slight tipping in the worst case scenario since the end of the laser arm is not supported on both ends, but I am yet to observe it happen myself, Ortur have balanced it well. Even the handy metallic laser focusing rod, which greatly simplifies focussing, comes with a 3D printed holder.
Powered by two NIMA17 steppers, Aufero Laser 1 has a speedy 5000mm/min travel time with a 0.81um pixel accuracy on the laser and 12.5um mechanical prevision, this is a very precise and high speed solution in a small package.
Although the build is relatively small, it is ideal for your basic developer or engraver. I have not really found myself needing a larger area for the kind of tasks that is fitting a low cost laser engraver. Those scenarios usually involve cutting large shapes, scaled fabrication etc that is more fitting a commercial laser cutter.
Aufero Laser 1 advertises engraving and cutting capabilities for paper, cardboard, wood, acrylic, leather, ceramic, stone, oxidised metal, glass and food. Ortur is very open about the capabilities of the Laser 1 and notes that for surfaces such as stone and metal, some kind of coating is required, which is what you would actually be engraving. A note from me as well, take care with food to make sure that where you engrave food is very sanitised and free from toxic particles and chemicals that might usually be present where you use your laser cutter or other fabrication tools and machinery.
Ortur have clearly worked hard to support both the paid LightBurn https://lightburnsoftware.com and open source control software, with support for both LaserGRBL https://lasergrbl.com/, which is the usual go-to G-code laser cutter controller for developers, and thee premium LightBurn laser controller for some serious laser work.
In terms of software drivers, Aufero Laser 1 can run with pretty much any modern OS with Windows 7 onwards in addition to a wide range of MAC OS and Linux distributions. Aufero Laser 1’s motherboard is avertised as ‘9th Generation’, highlighting the developmental maturity of the motherboard, with greater processing speed than the previous generation.
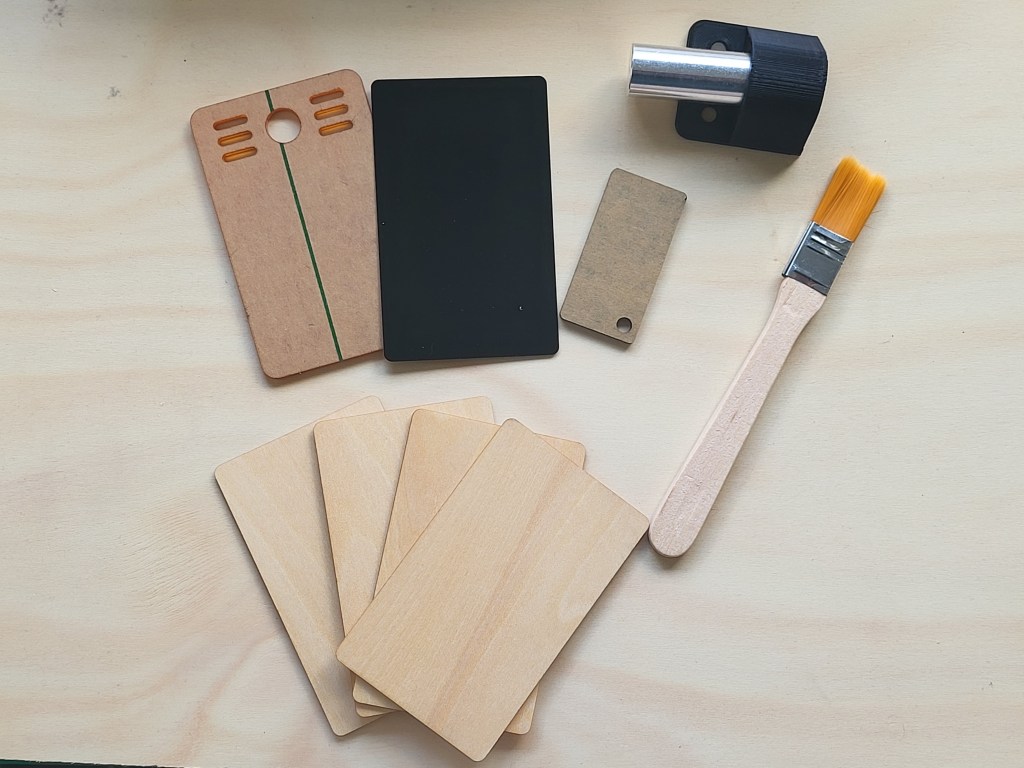
Aufero 1 comes with a couple of test materials, in addition to some focus calibrators which help you get the focal point right on your material. It even comes with a small brush to clean off excess carbon scorch.
Aufero 1 Laser Diode Options
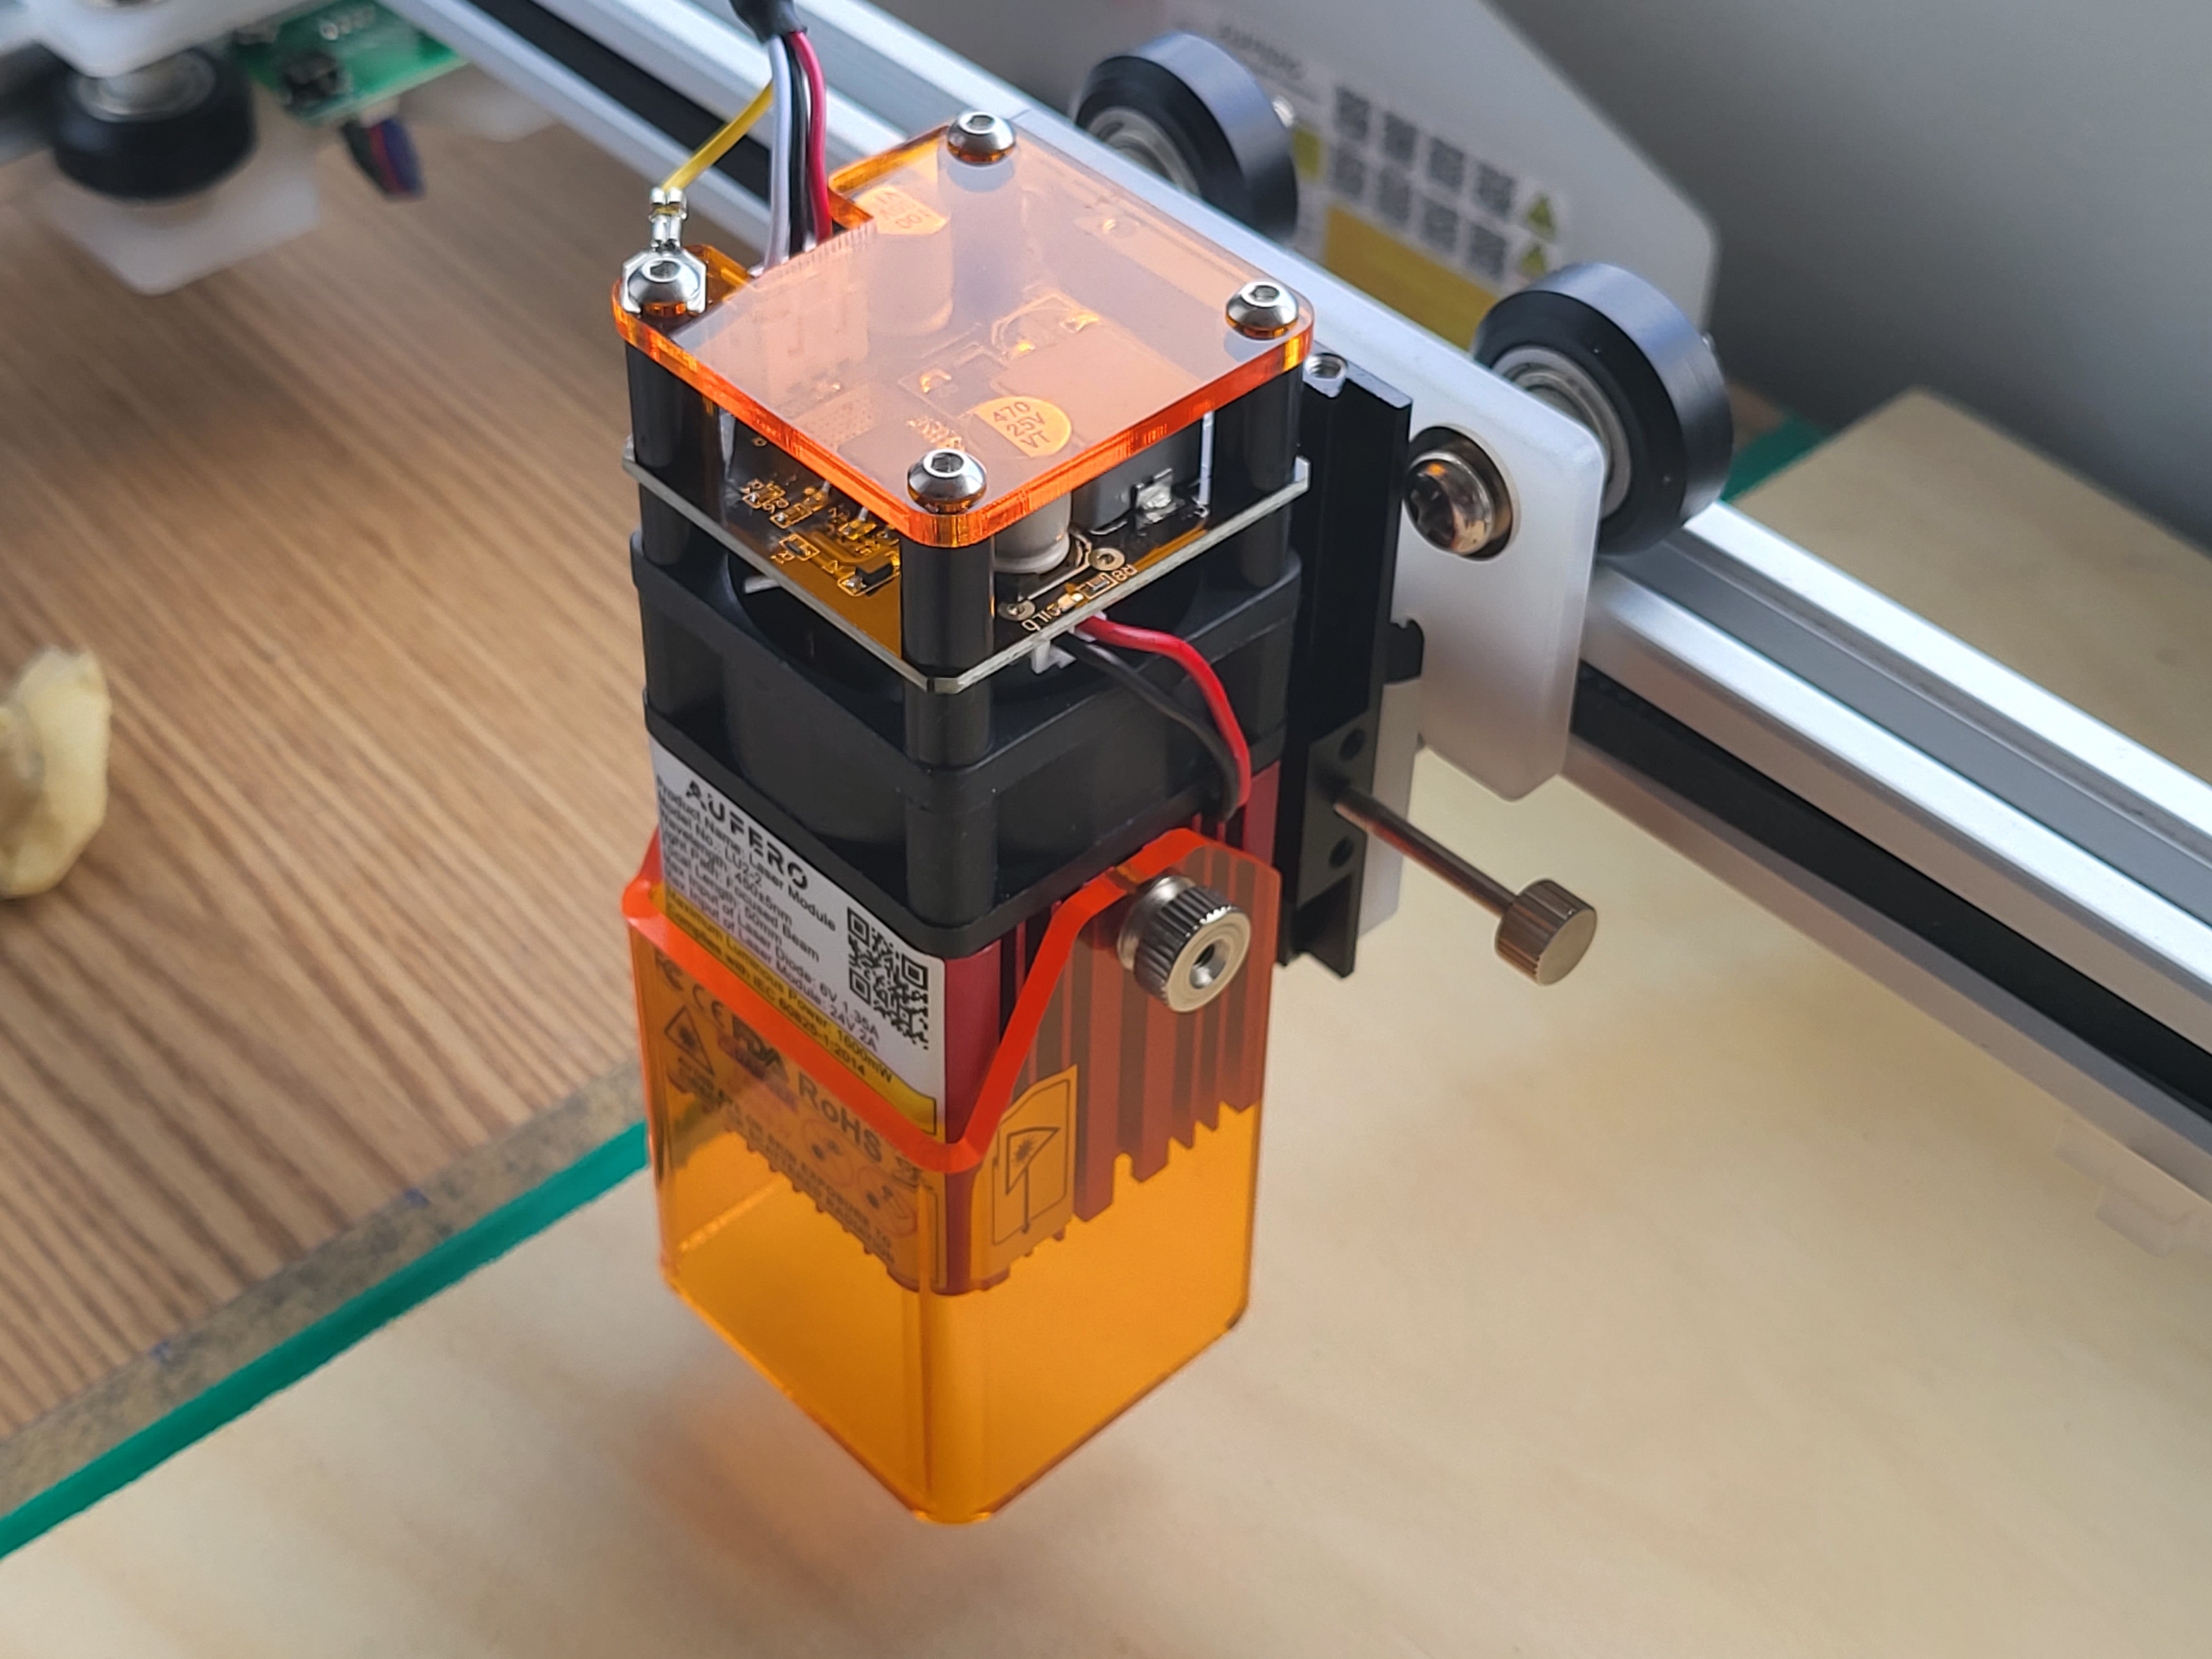
One of my favourite features in the Aufero L1 is the easy to swap and modular laser diode options which can be changed quickly for different scenarios.
Coming with three different laser diode options, with the LU2-4 series costing around $100 more than the LU2-2
- LU2-2: 1.6W with a 50mm focal length – ideal for engraving,
- LU2-4-SF Short Focus (SF): 5.5W with a 30mm focal length – excellent for cutting,
- LU2-4-LF Long Focus (LF): 5.5W, 50mm focal length – higher temperature engraving.

Lets take a look at Aufero’s engraving and cutting capabilities. The two main differences (other than power draw) between the diode options is focus and power.

Keeping things simple, the focal point is where the beam of the laser is the ‘smallest’. The main thing to understand here is that the focal point of your laser is the point in which the laser stops converging and begins the diverge, at this point it is at its most narrow.
Essentially, using a short focus (SF), you have a shorter focal length, so the distance between your laser and the workspace/material surface is shorter. But, when the focal length of the laser is set to be at the material surface, the size of the laser spot will be quite small.
- Generally requires a shorter distance between the diode and material,
- Has a smaller laser spot (focal width),
- Diverges faster, so the beam defocusses faster past the focal point, leading to a fairly wide laser spot further from the focal point, which creates a less focussed beam deeper into the material,
- The short focus provides great engraving capabilities with the smaller laser spot at the focal point, leading to a higher detail resolution,
- Overall, the short focus is ideal for engraving than cutting.
This is compared to the long focus (LF), which:
- Generally requires a greater distance between the diode and material,
- Has a larger laser spot (focal width),
- Diverges slower, leading to a fairly narrow laser spot further from the focal point,
- The long focus provides better cutting capabilities with the more focussed beam further from the laser and past the focal point,
- Compared to the short focus, it has a relatively large laser dot size at the focal point, so lower resolution detail,
- Overall, the long focus is better for cutting than engraving.
The final difference is power. Measured in Watts, the laser diodes range from 1.5W in the LU2-2 to an impressive 5.5W from the LU2-4F LF and SF. At this power, you can expect to cut through most thin flamable or low melting point materials reliavble should be very careful how you handle the laser. For thicker materials, Ortur advises multiple passed, however this often results in charring due to more prolonged exposure to the laser.
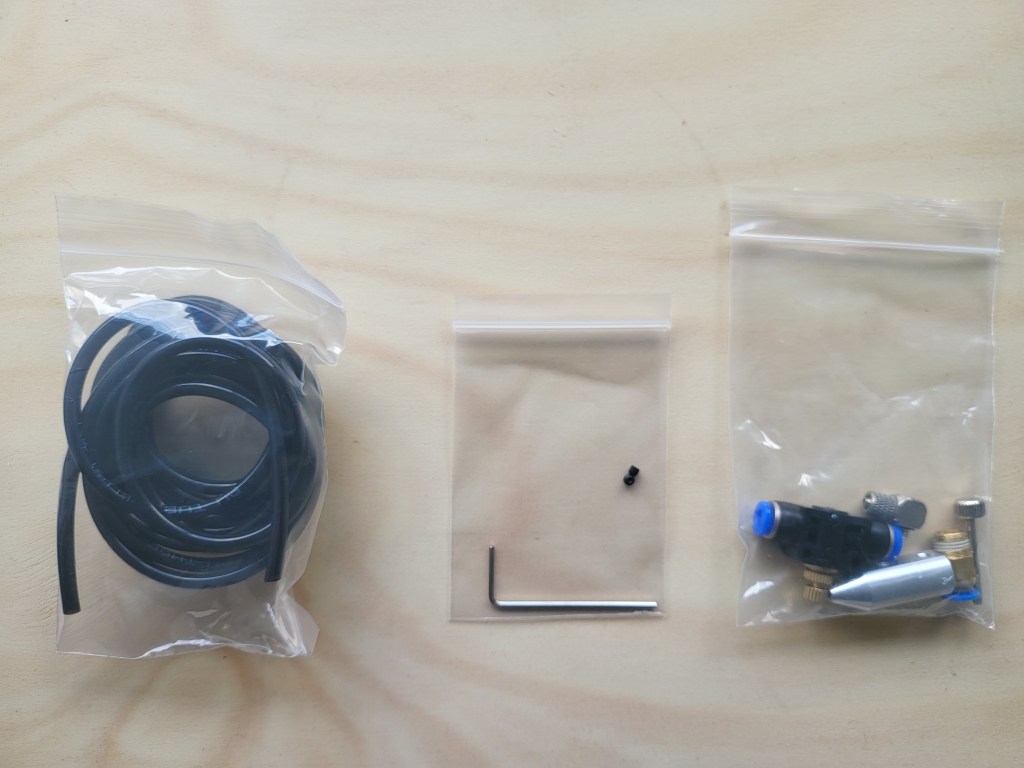
With the LU2-4 LF, an air assist nozzle is included. This here is a game-changer, very few if any low-cost laser diode engraving tools have this capability. Air assist nozzles push air through the end of the laser diode to clear debris, vapor, and smoke from the laser path. This helps prevent flare-ups, charring/scorching in higher power operation but also improves laser focus and material exposure to the laser, since the beam will not be as obstructed/scattered by vapor from cutting.
A Myriad of Safety Features
Loaded with safety features, the Aufero has really considered the concerns of the consumer, with few products offering so much in the way of bypasses and cut-offs in the event of tilts and power interrupts. I had tested the tilt sensor, which kills the laser if the Aufero is raised from the workspace, it did turn off, but after a delay of ~7 seconds. An exposure duration detector is also included to ensure the laser is not focussed on the same point too long, which should prevent most accidental flare ups. Finally, some power management and cutt-offs are included to kill the power to the laser if the USB control is disconnected, this feature did not work for me, or the delay was too long as when I manually disconnected to test the kill switch, the laser remained on and fixed in the same position. As with any and all safety features, however these should not be relied upon.
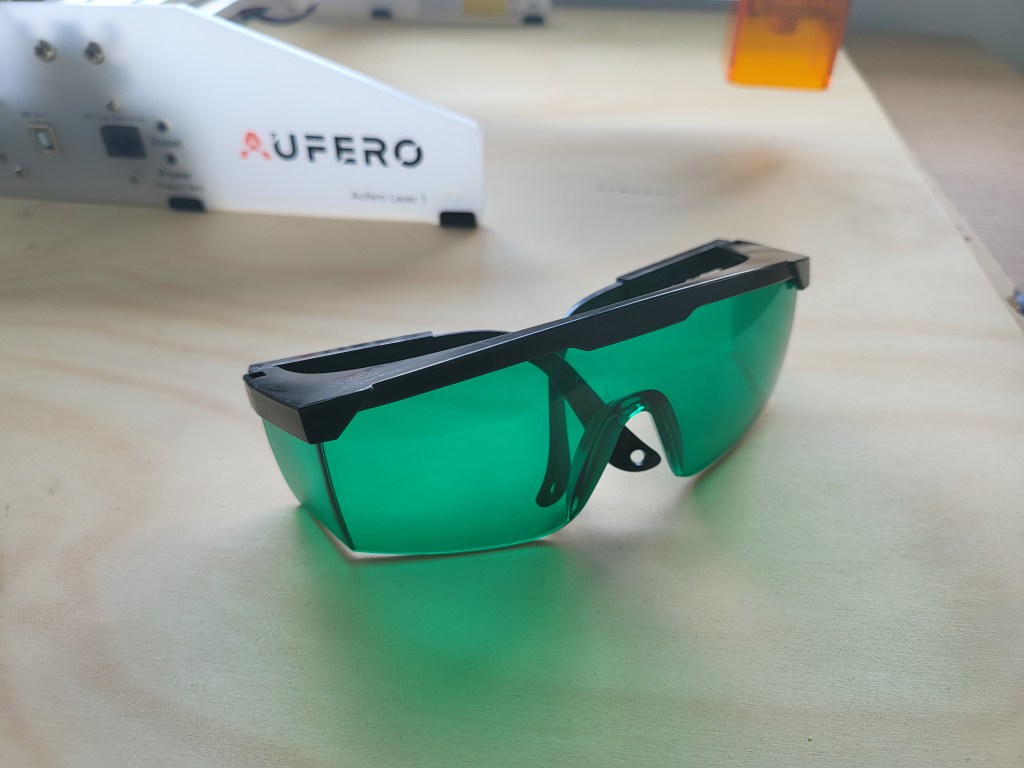
In addition to these power safety features, Aufero makes certain that as much reflected light from the workspace is filtered using tinted shielding around the laser diode and with the included safety glasses. It should be noted, that no exposure is the best exposure. The operator should still do their best to never directly observe the cutting action of the laser point itself, but still be present in the event of a flare-up or fire occurring.
Engraving and Cutting Material Tests
The first thing I noticed while running the Aufero was it had excellent relative positioning and could perform homing, which is an improvement over standard absolute position encoding from typical low cost laser engraving devices.
As an old laser technician, what I appreciate most about Aufero’s product support is the inclusion of the material calibration table. Aufero has conducted some serious testing into a variety of materials, cutting and engraving configurations, and travel speeds. This honest presentation of the performance of the Laser 1 gave me a lot of assurance and confidence in the true capabilities of the product at a glance. Even more importantly, it gave me a very quick go-to for testing. Rather than having to spend days myself experimenting on different materials, I have a quick reference table. In previous positions at a rapid fabrication lab, I needed to maintain our own well-documented logbook without a nice starting point like what Aufero is offering.

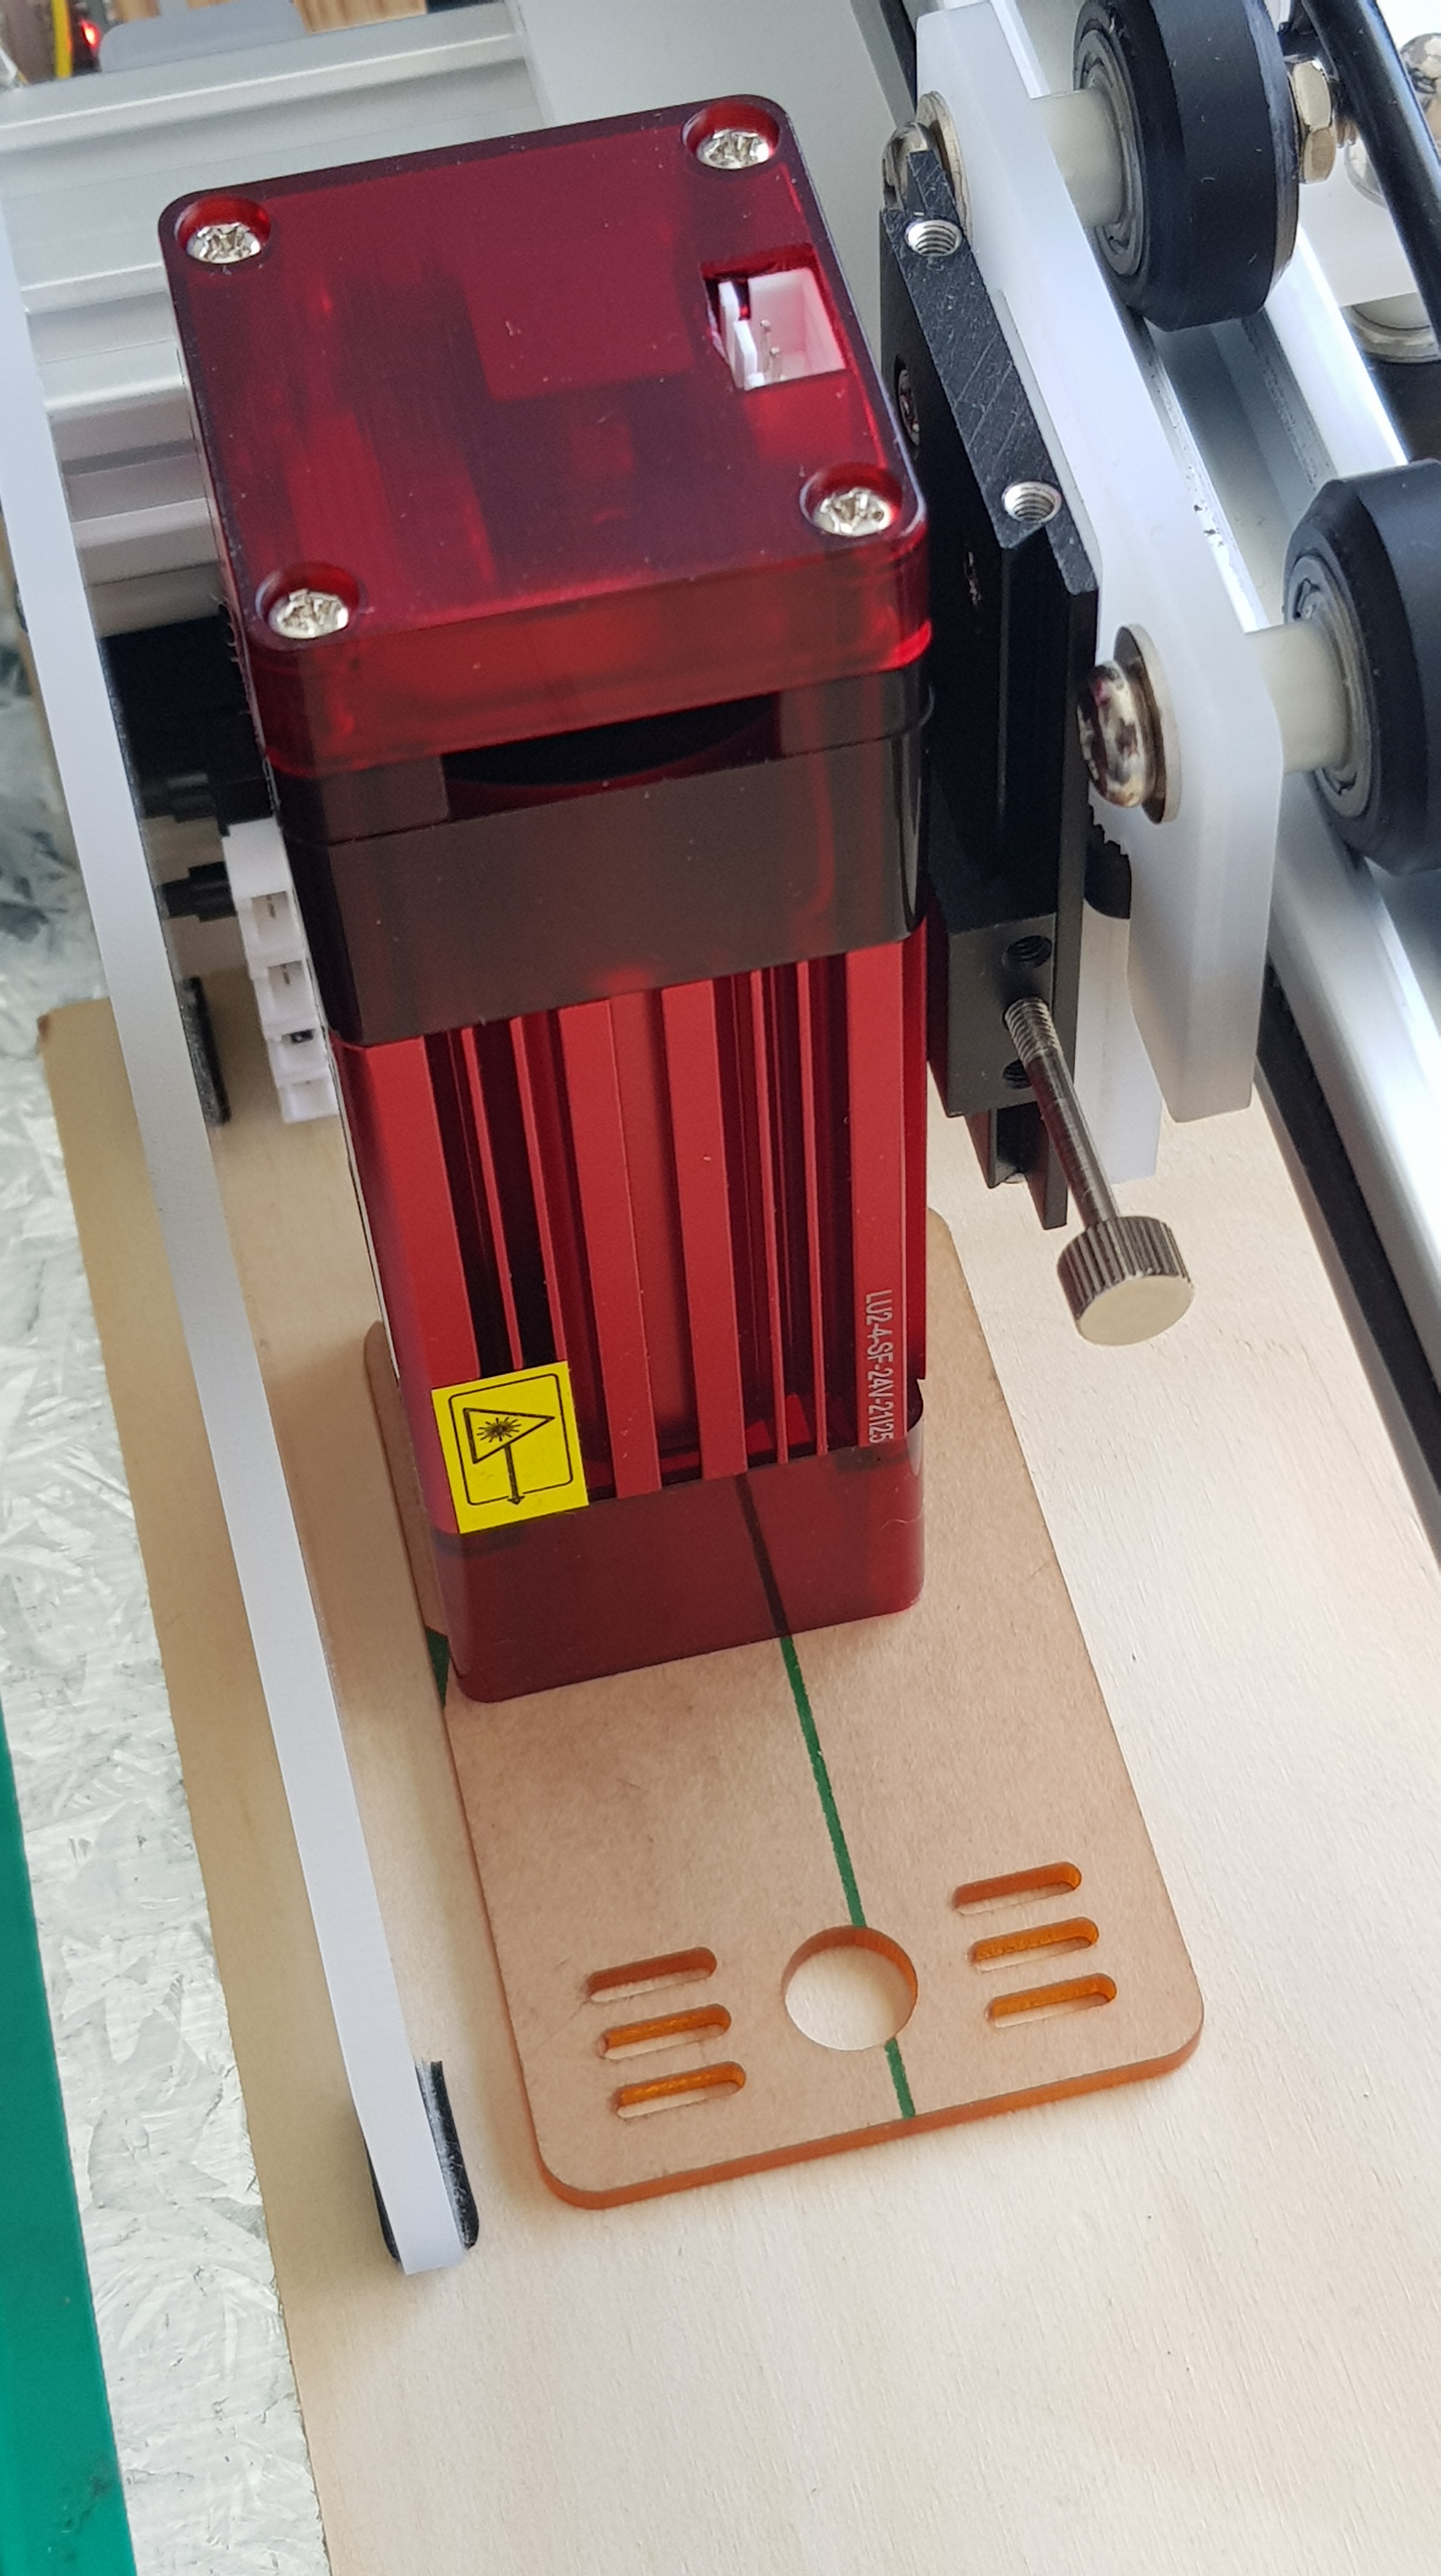
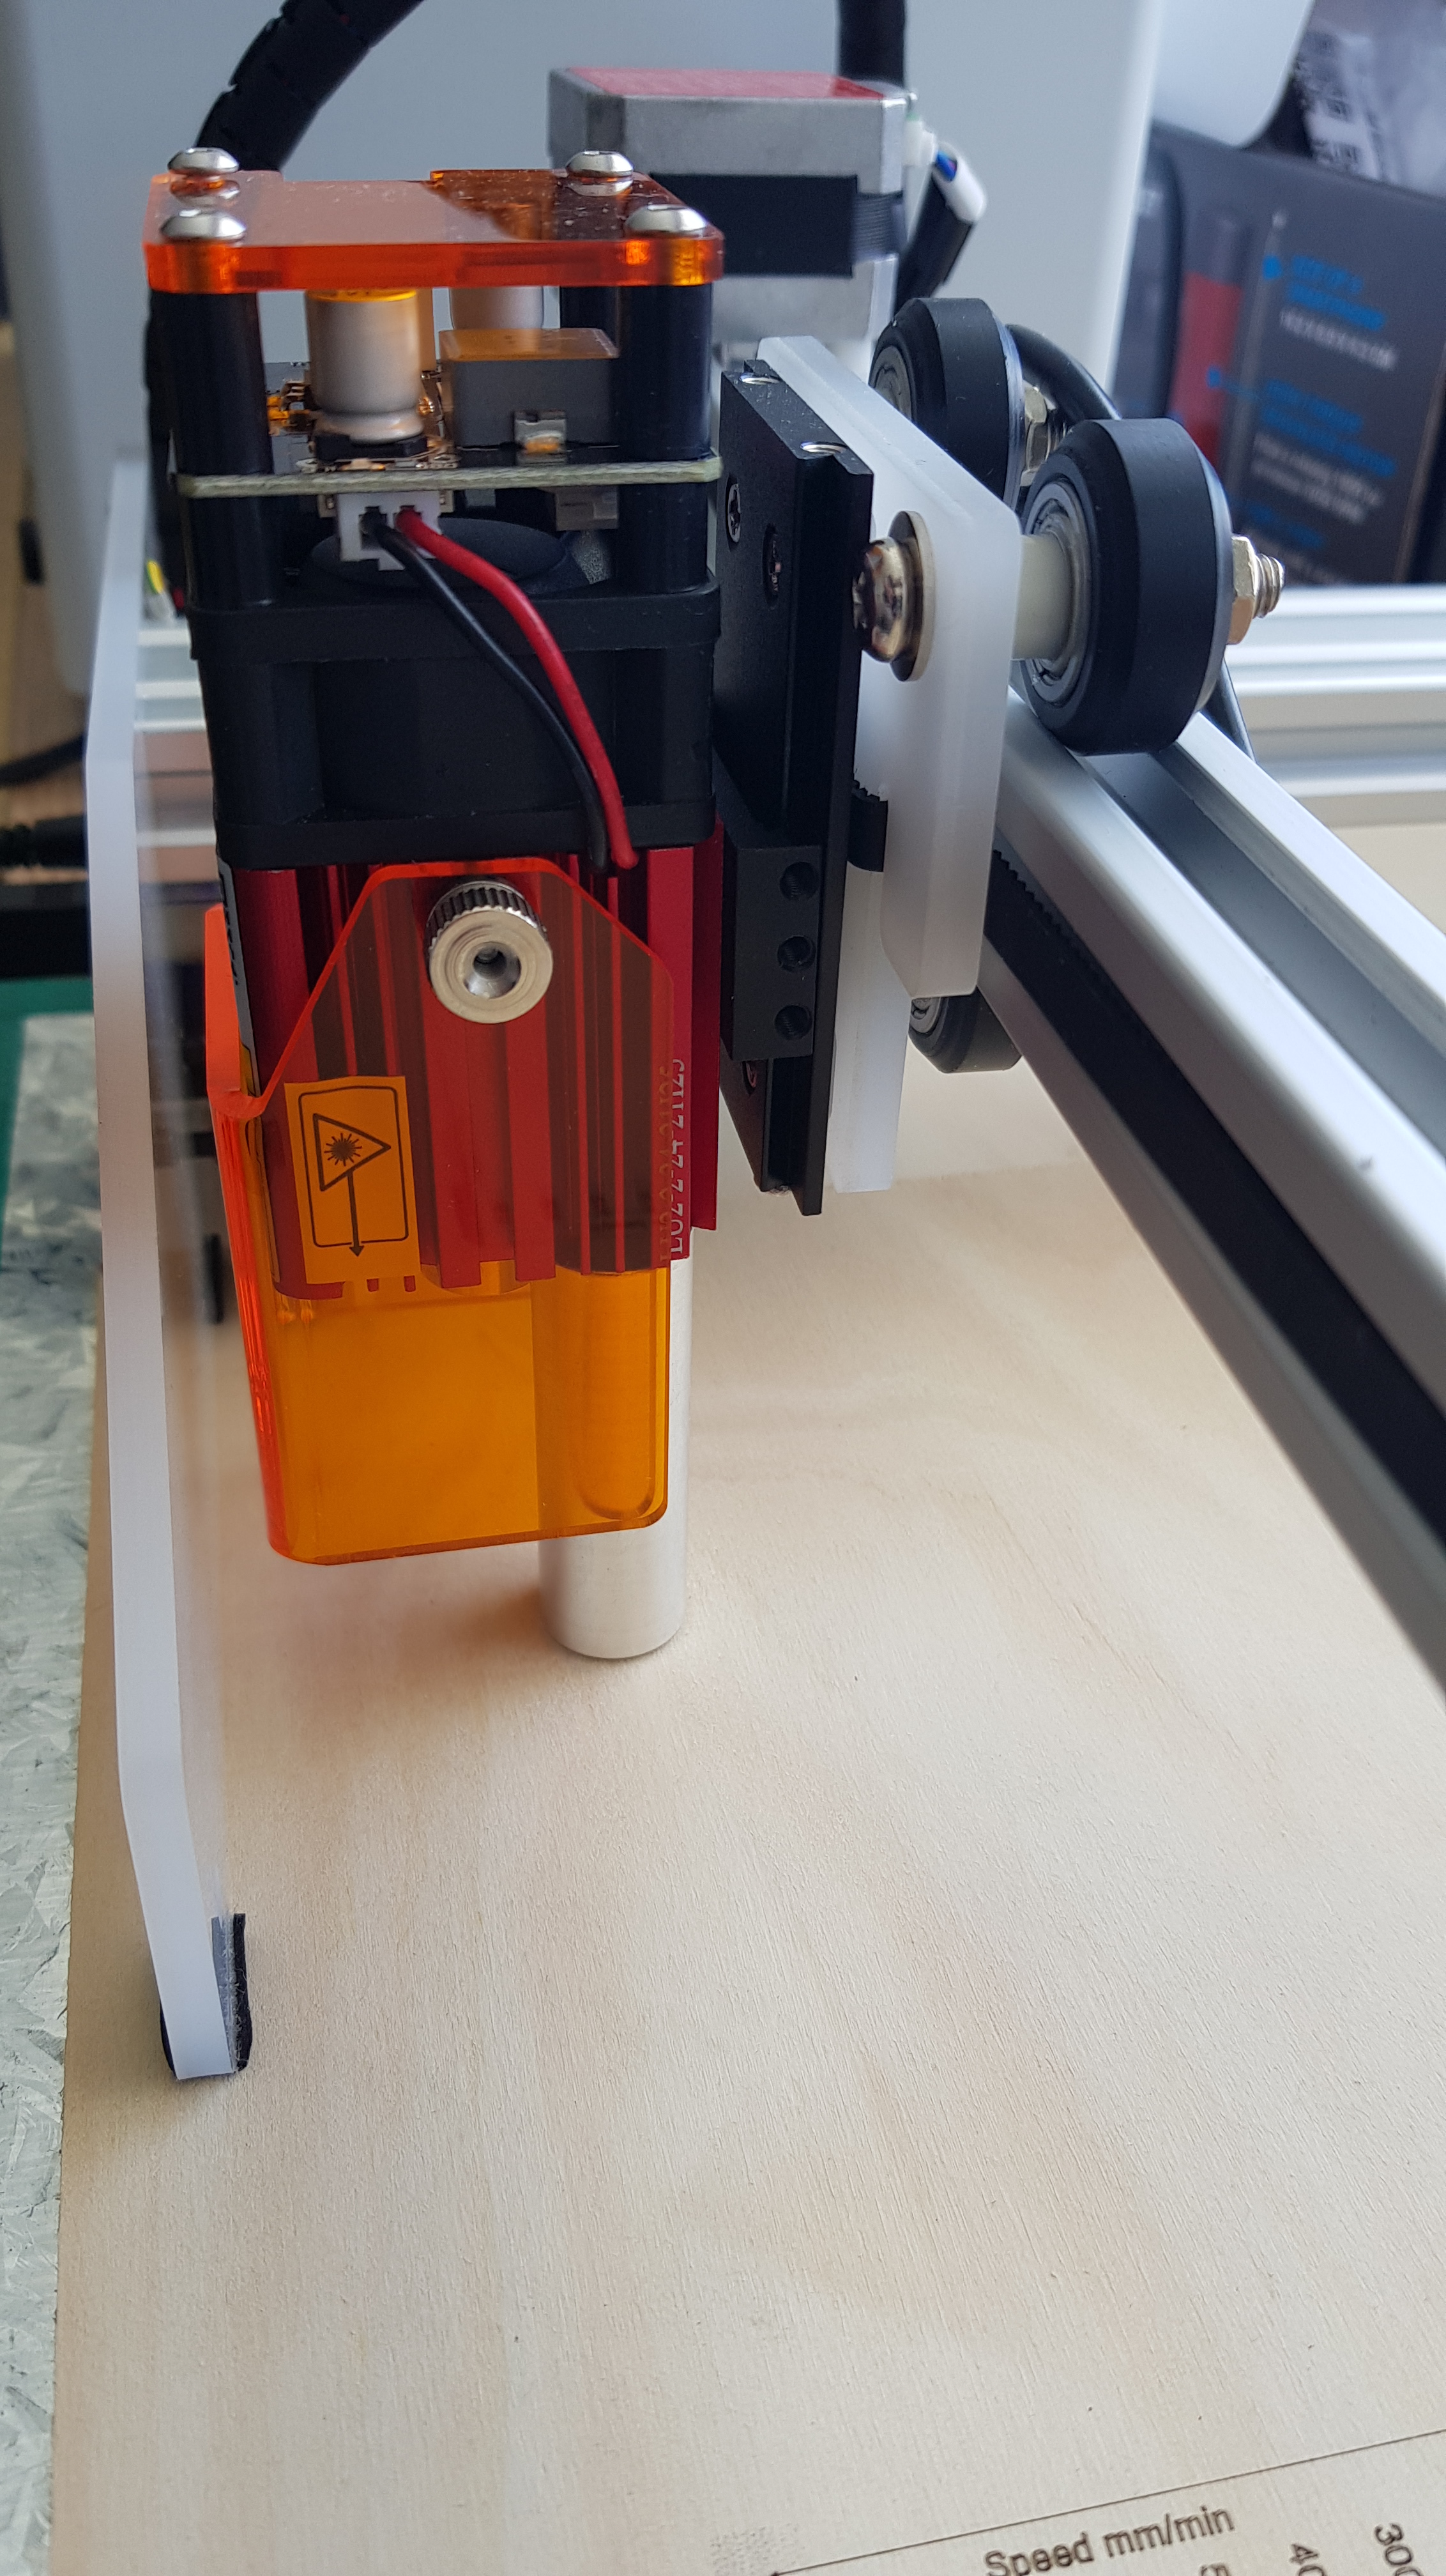
Now lets get started, slide in your diode of choice into the dovetail on the end of the workpiece arm and adjust the height based with the provided Z axis height calibration. For the LU2-4 LF and LU2-2, this is the solid metal rod, which should be alighned from the body of the laser to the workpiece or the acrylic sheet for the LU2-4 SF. Then connect leads for the laser and attach the ground cable by fastening it under the head of one of the four screws on the top of the laser housing. Attaching the ground cable is the longest part of this very short process.

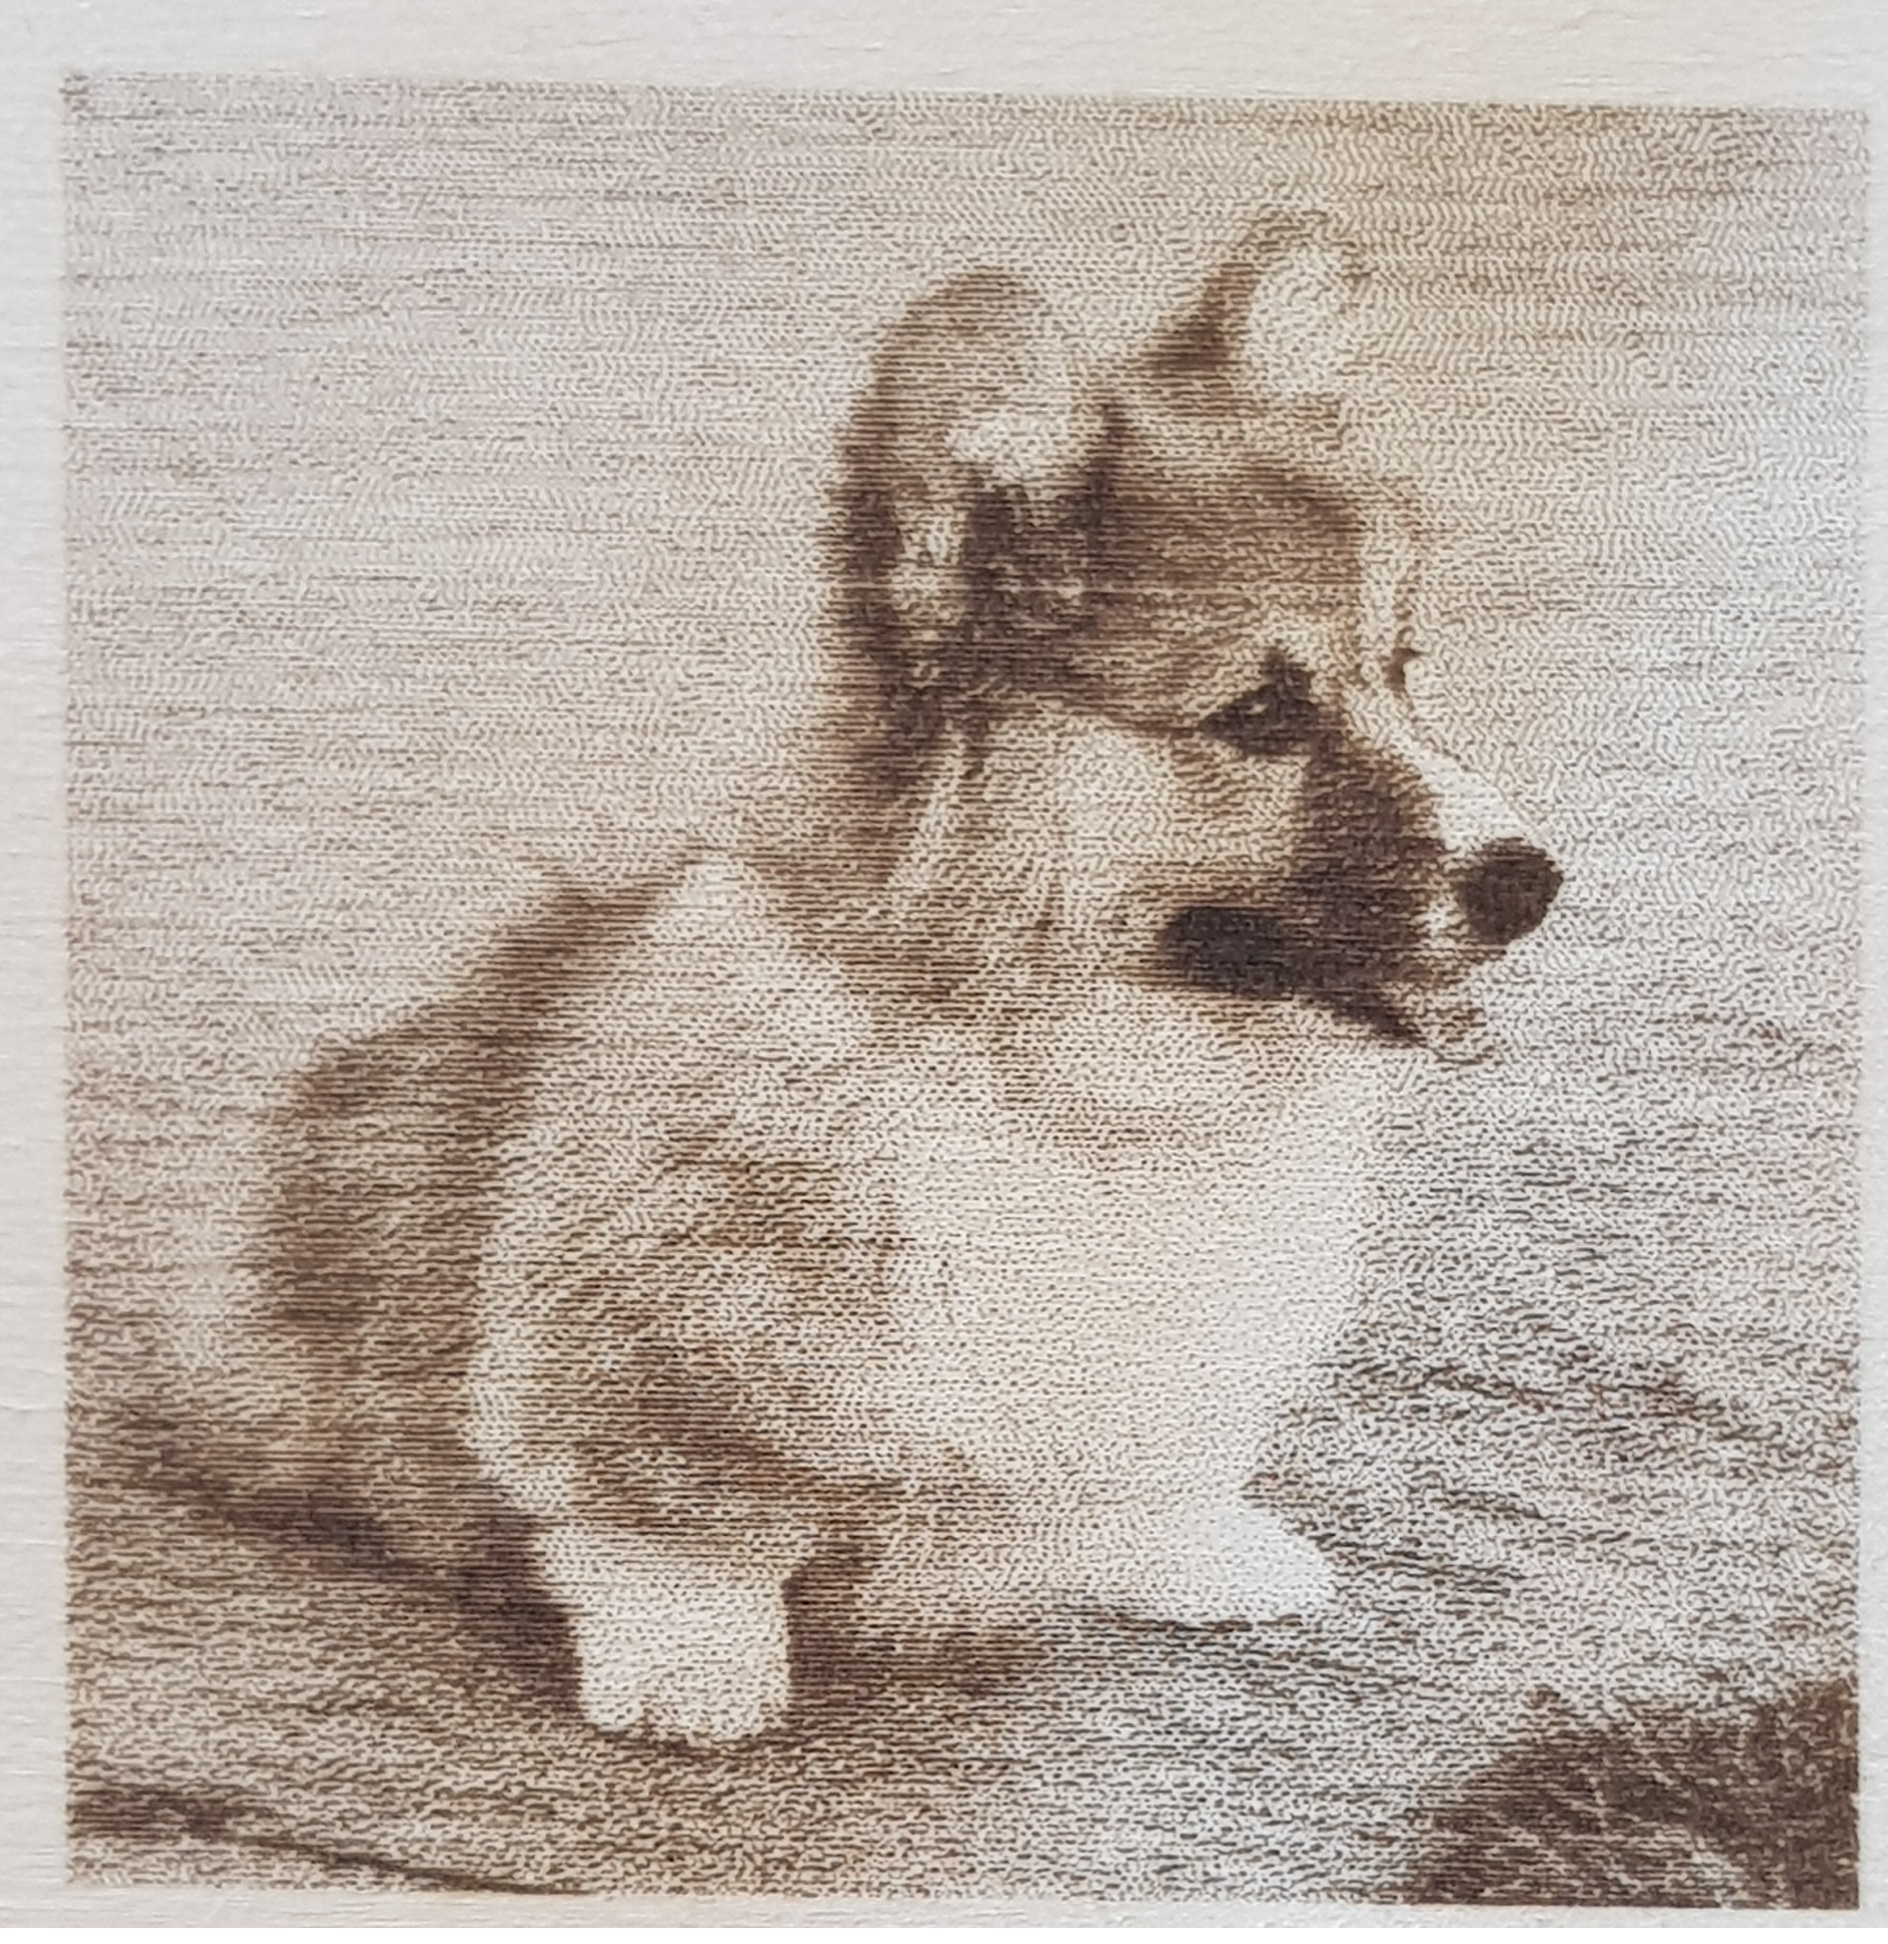
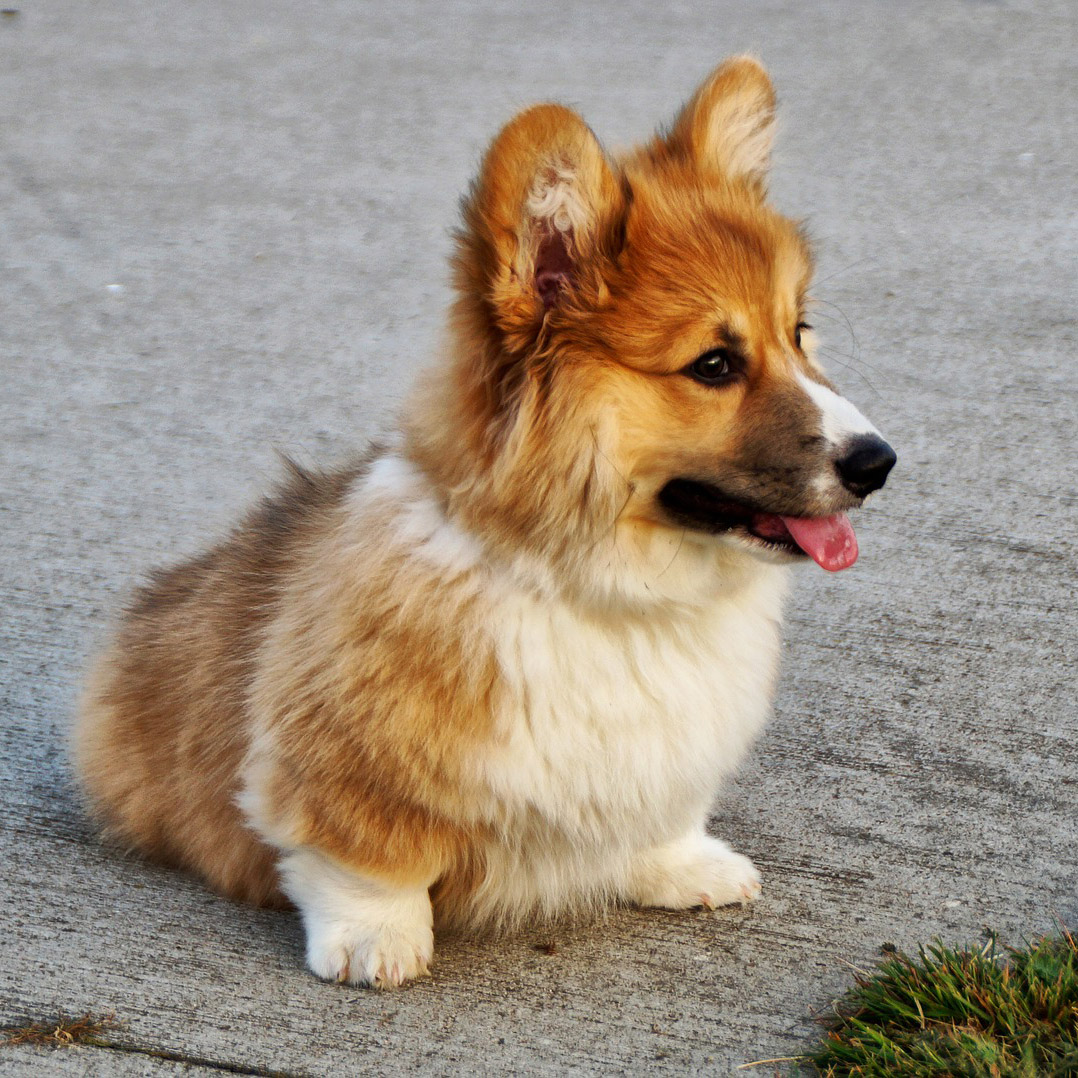
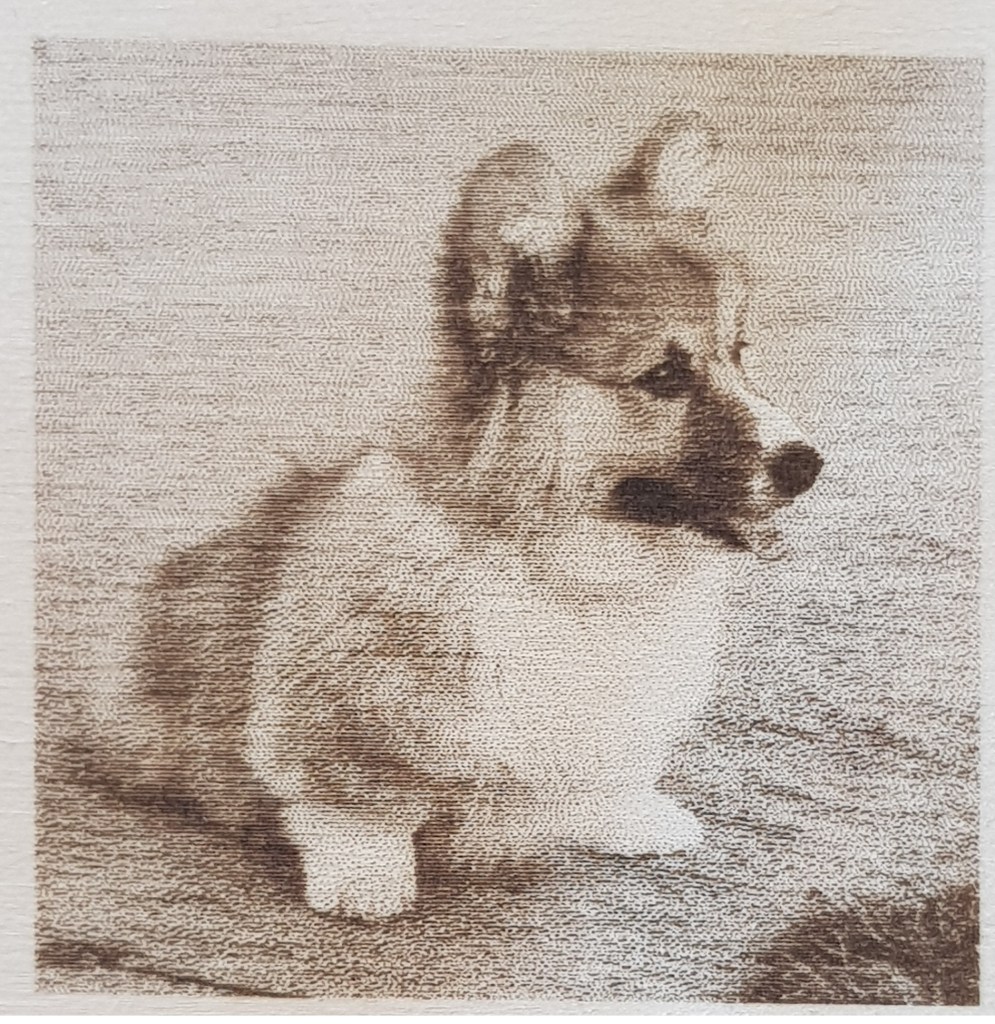
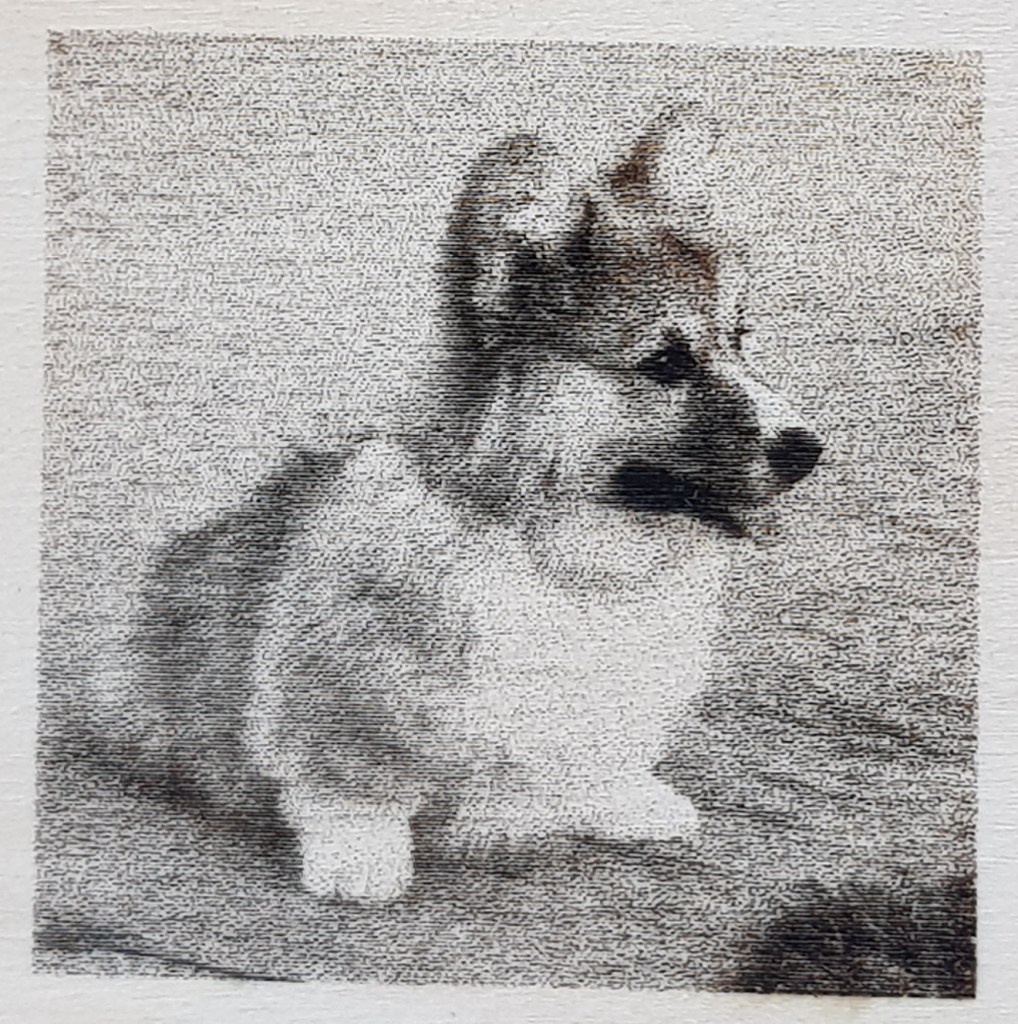
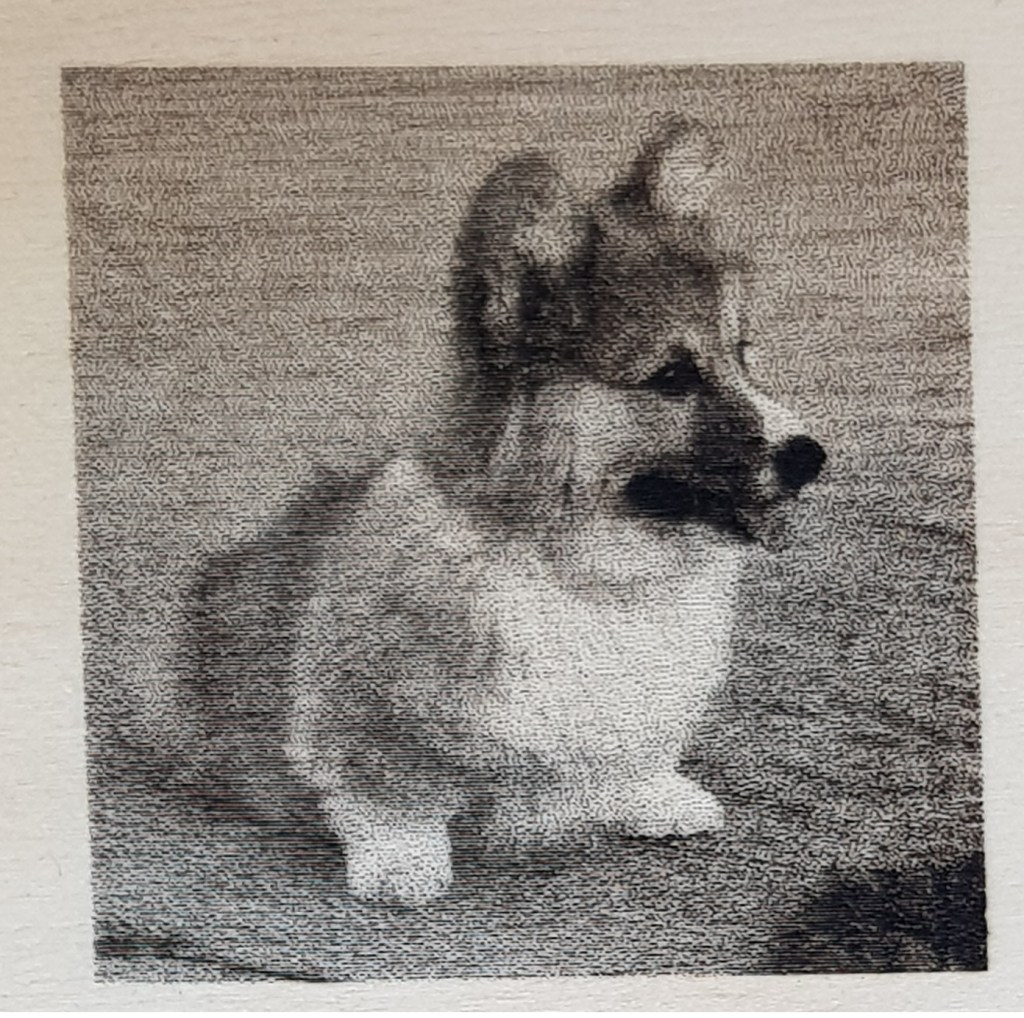
Now for my test image, a corgi lit by natural light. Other than being cute, an image like this serves to demonstrate how the engraver can deal with images that have relatively low contrast in addition to both fine details in the centre of the shot, as well as larger scale more blurry features in the foreground.
Using the free trial of LightBurn, I was able to connect to my Aufero Laser 1 just by following the prompts and selecting the right COM (the same for any laser cutter). Then I copy my image in and adjust the engraving speed/power in the cuts/layers tab.
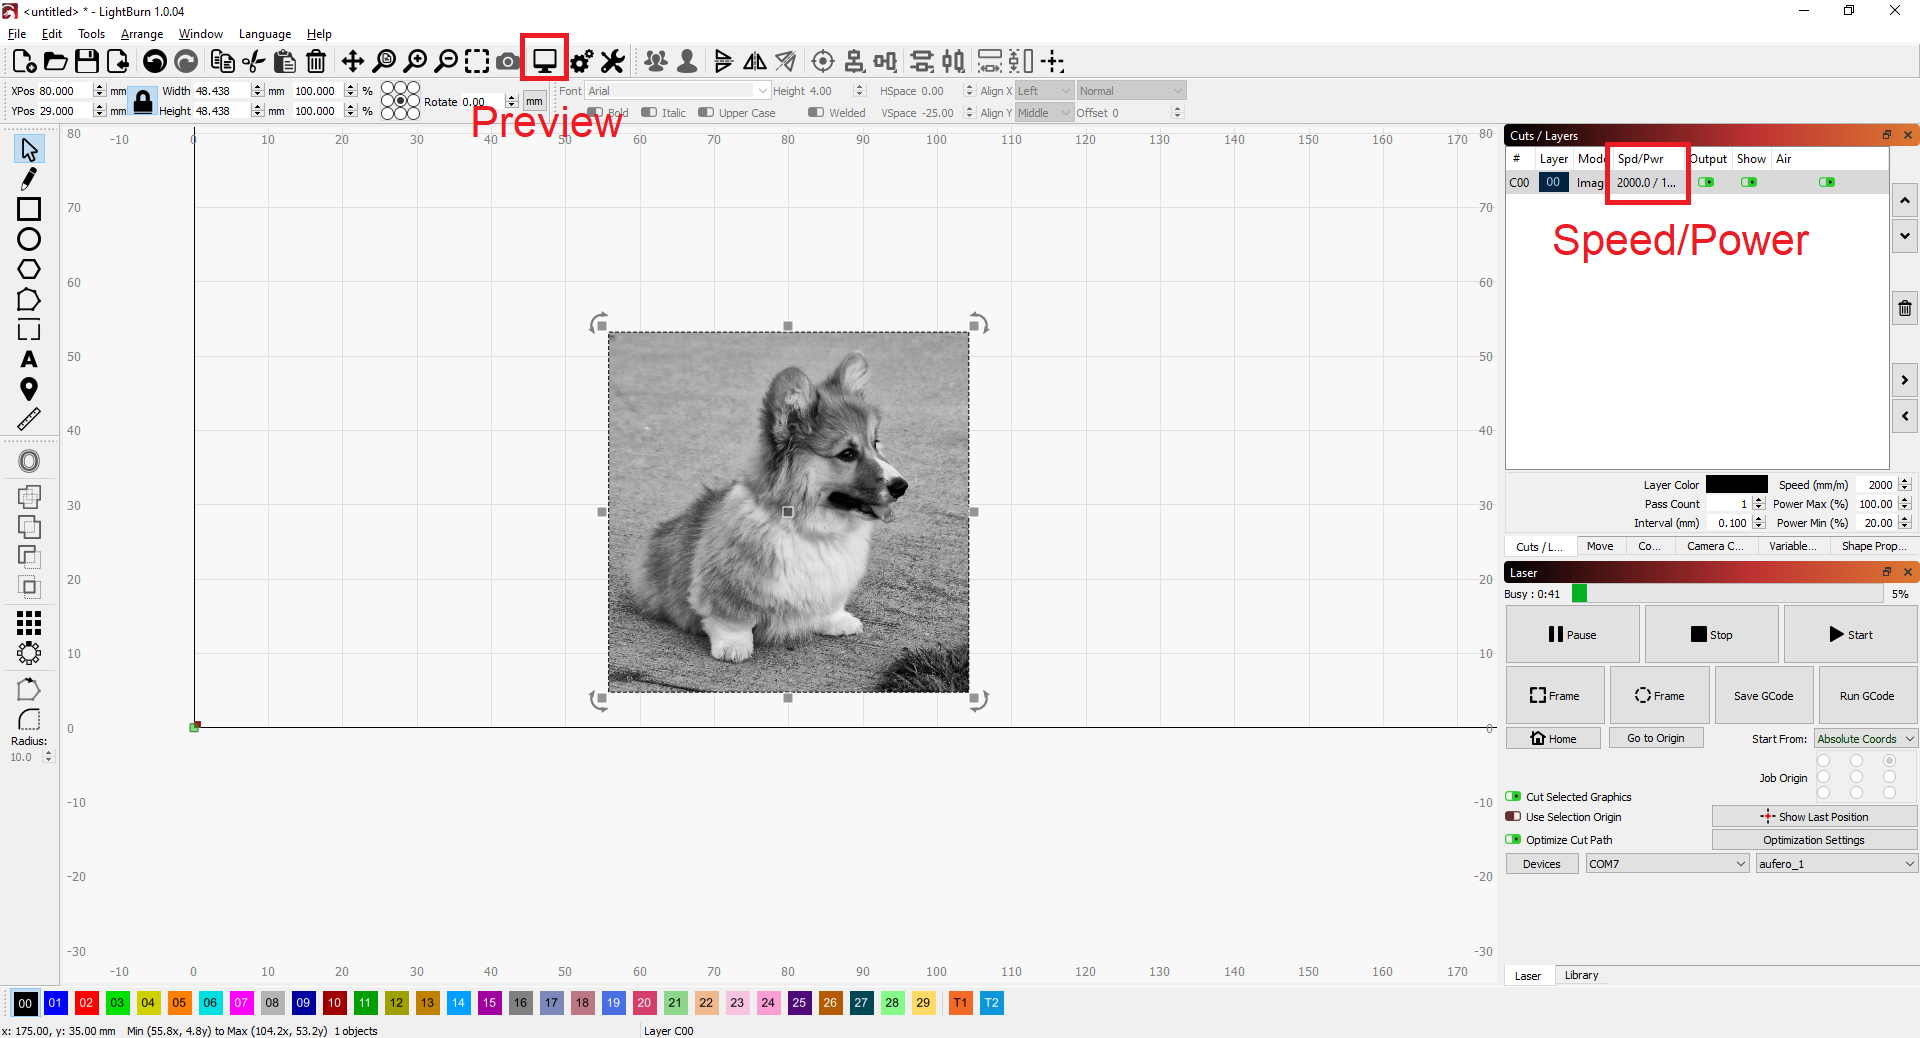
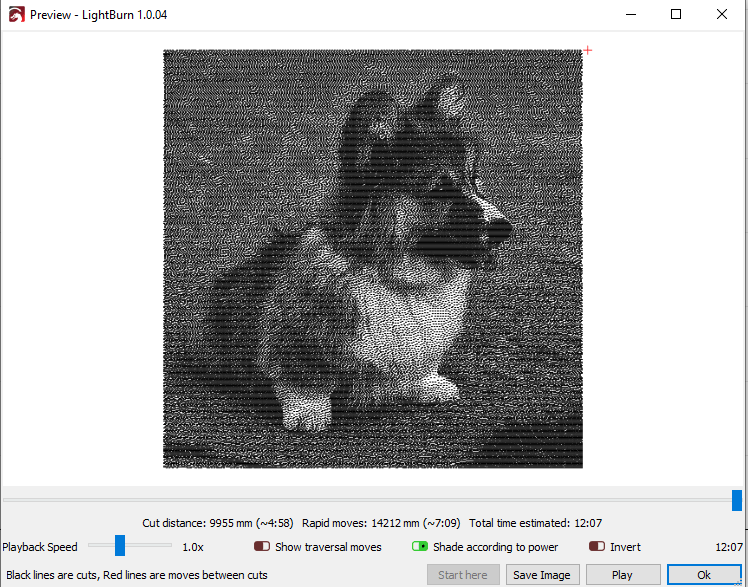
Then, pressing preview, I can get a look at what the result should be.
Normally, I would start off testing a laser engraver/cutter using a calibration pattern, where I test several combinations of power and speed, but here, since Aufero was able to provide some good guidelines, I was able to just start with their nominal values.
Using the LU2-2, the lowest power diode, I was able to get the best engraving in 12:07 minutes.
Usng the LU2-F SF 5000mm/min (max speed), 100% max power 5:18 minutes.
Using the LU2-F LF 4000mm/min (max speed), 100% max power 6:23 minutes.
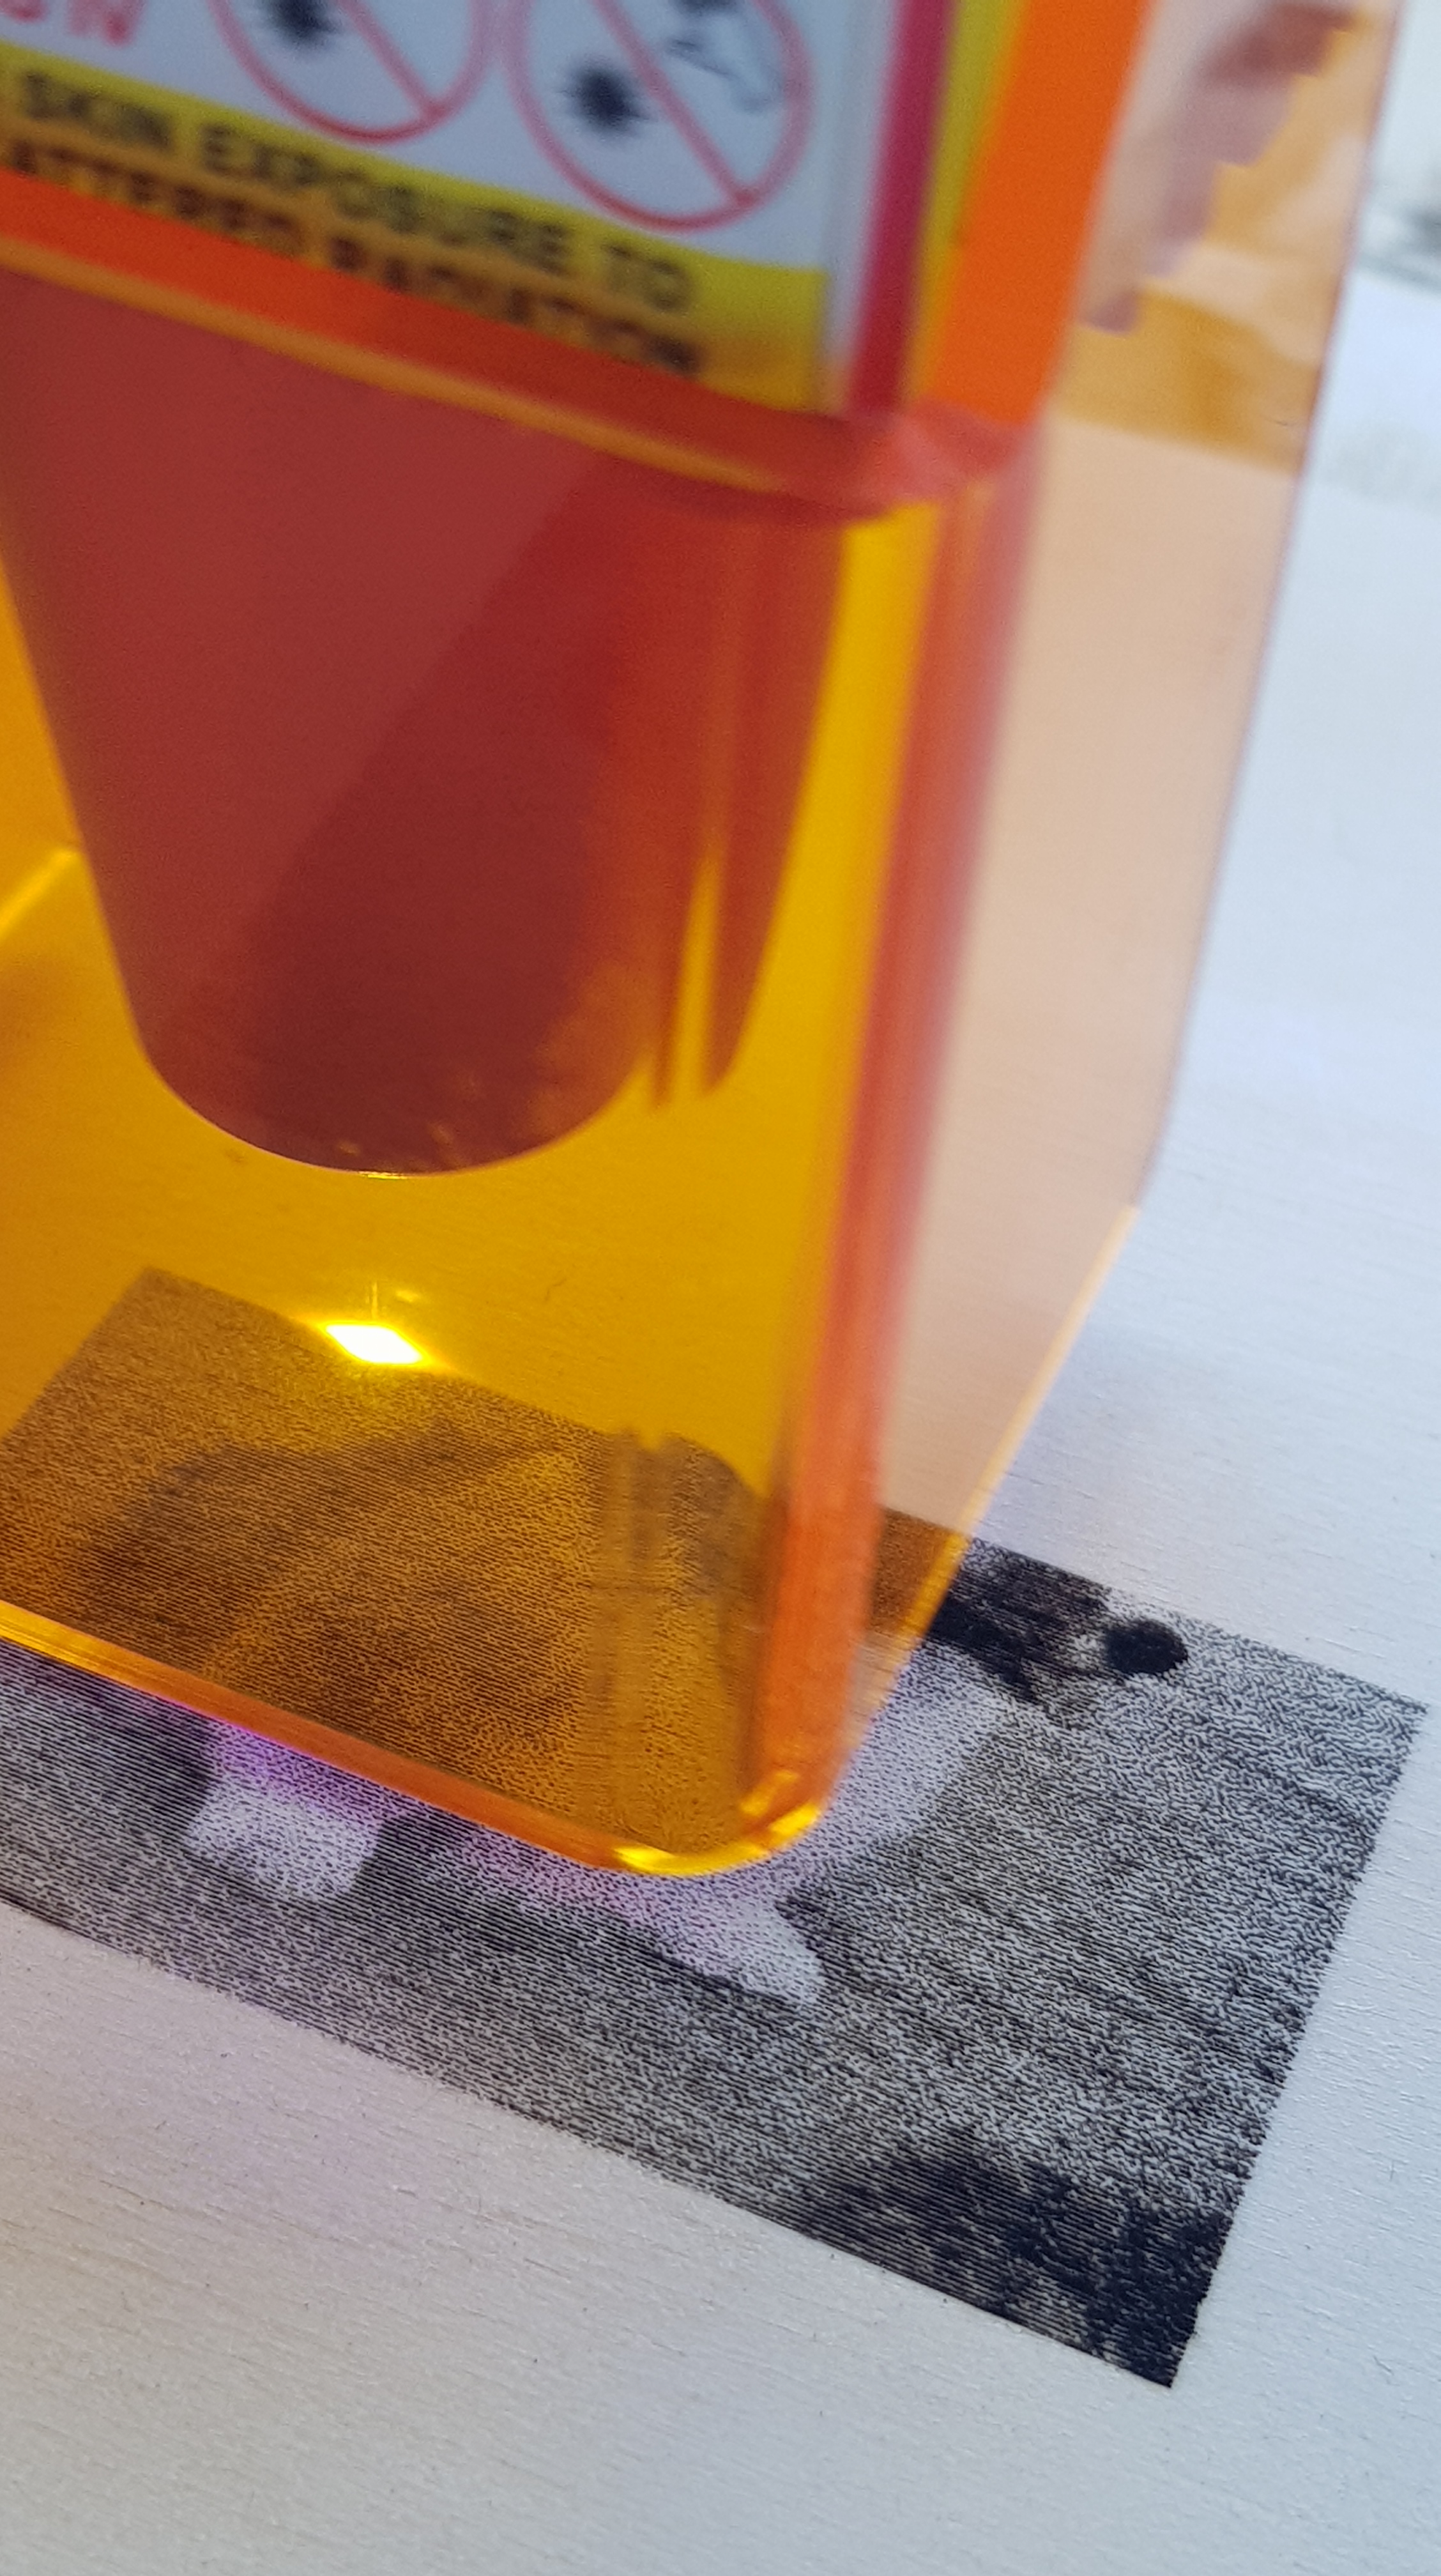
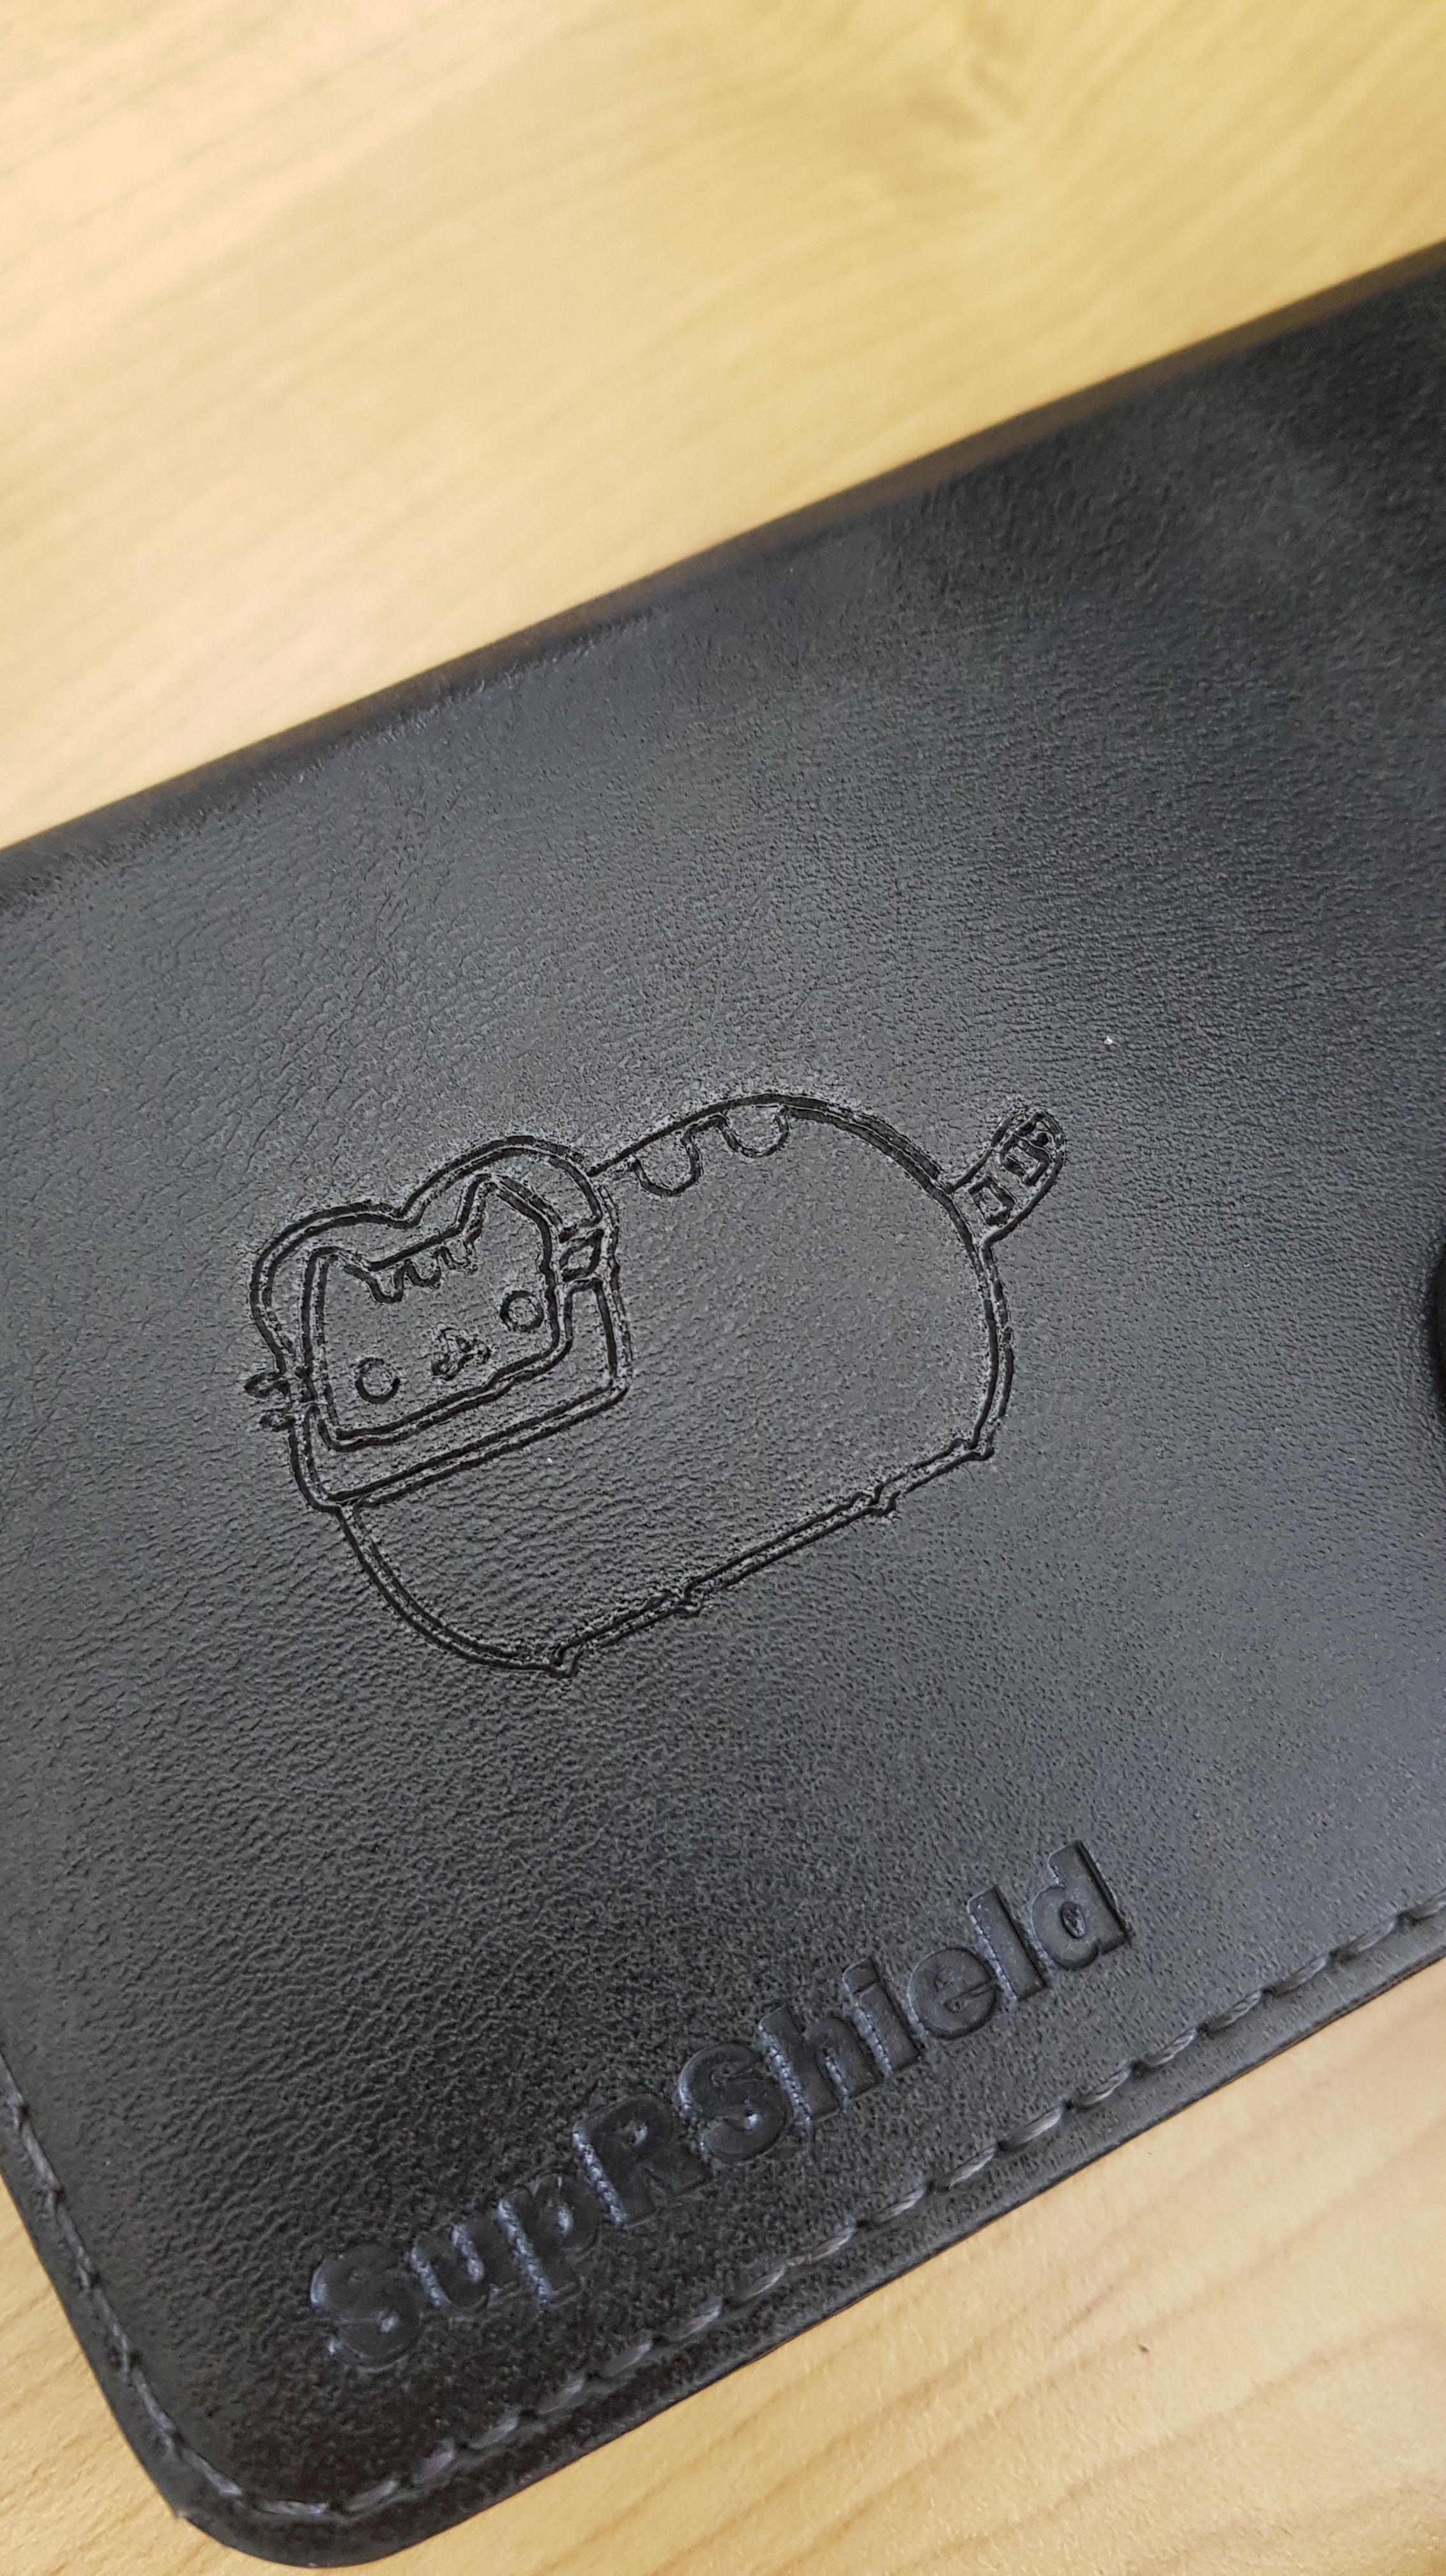
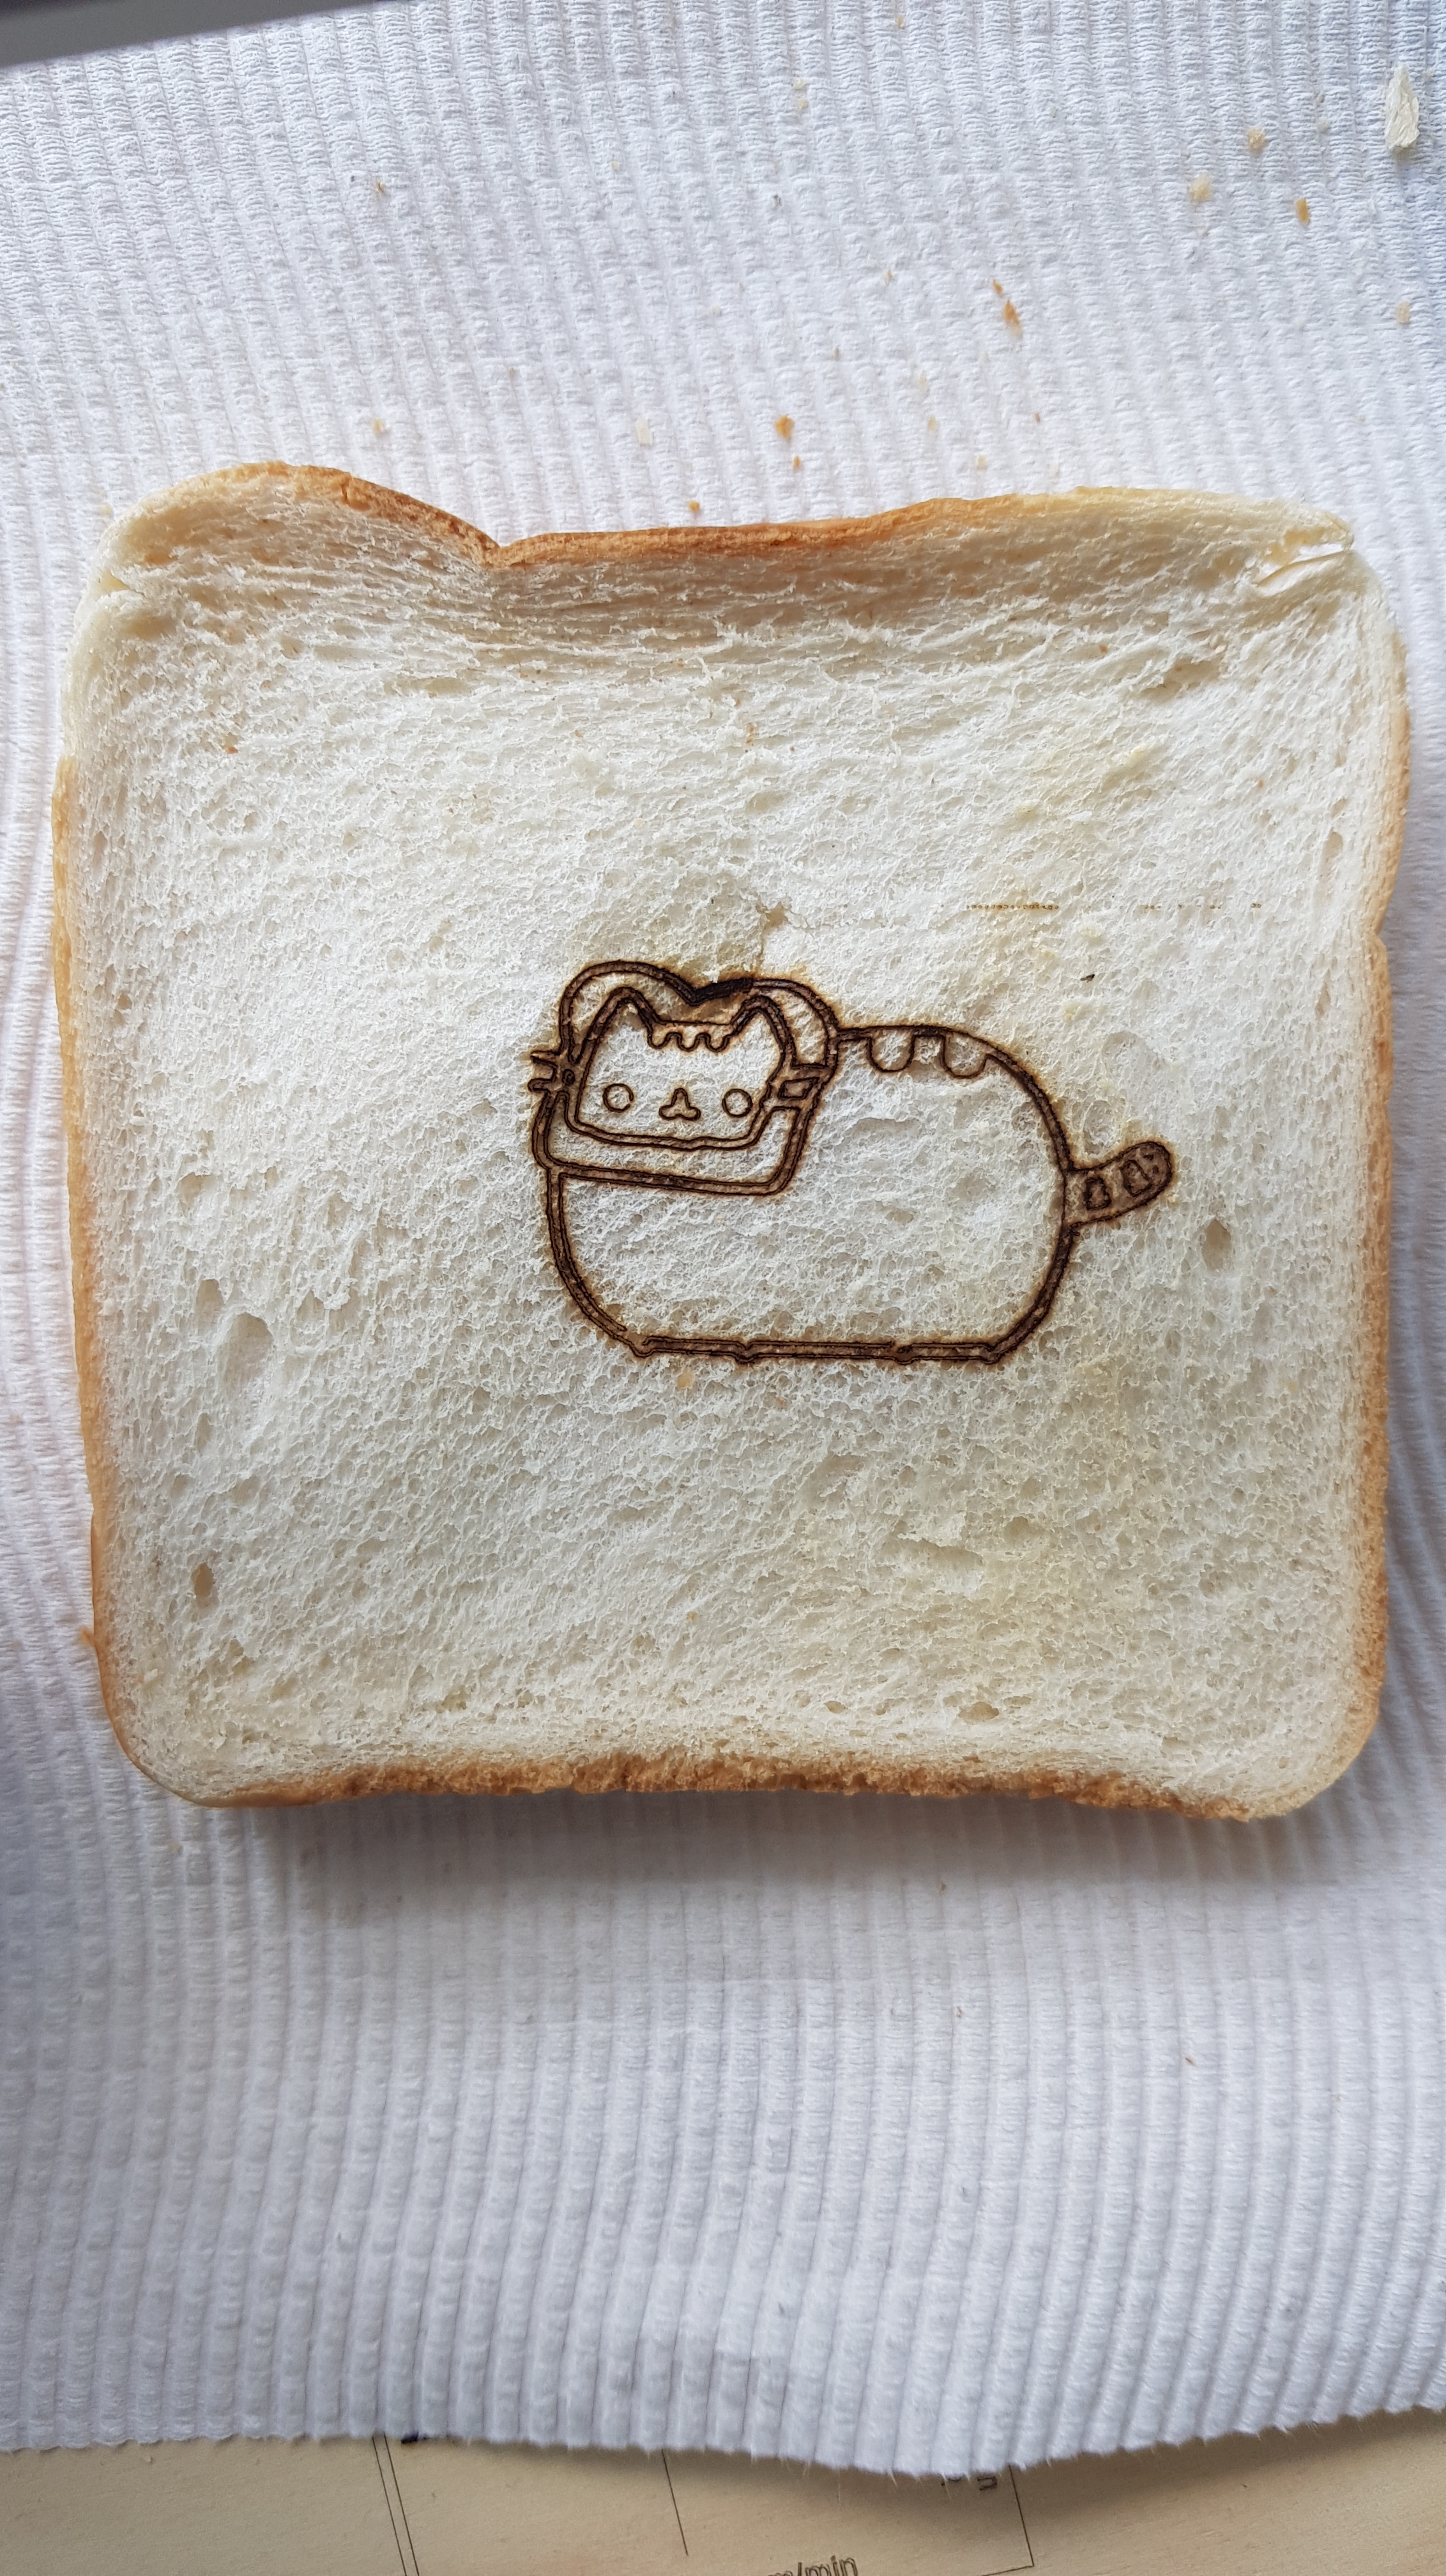
Since I found the LU2-2 the best for engraving, I did a few more tests to see if I could engrave some of the things that the Aufero was advertised to do, namely a foux leather phone case, and food! There are a few people reviewing these products, but none have done these two so far. Using Aufero’s great laser configuration guide, I managed to engrave Toast Pusheen on a black phone case and on some toast.

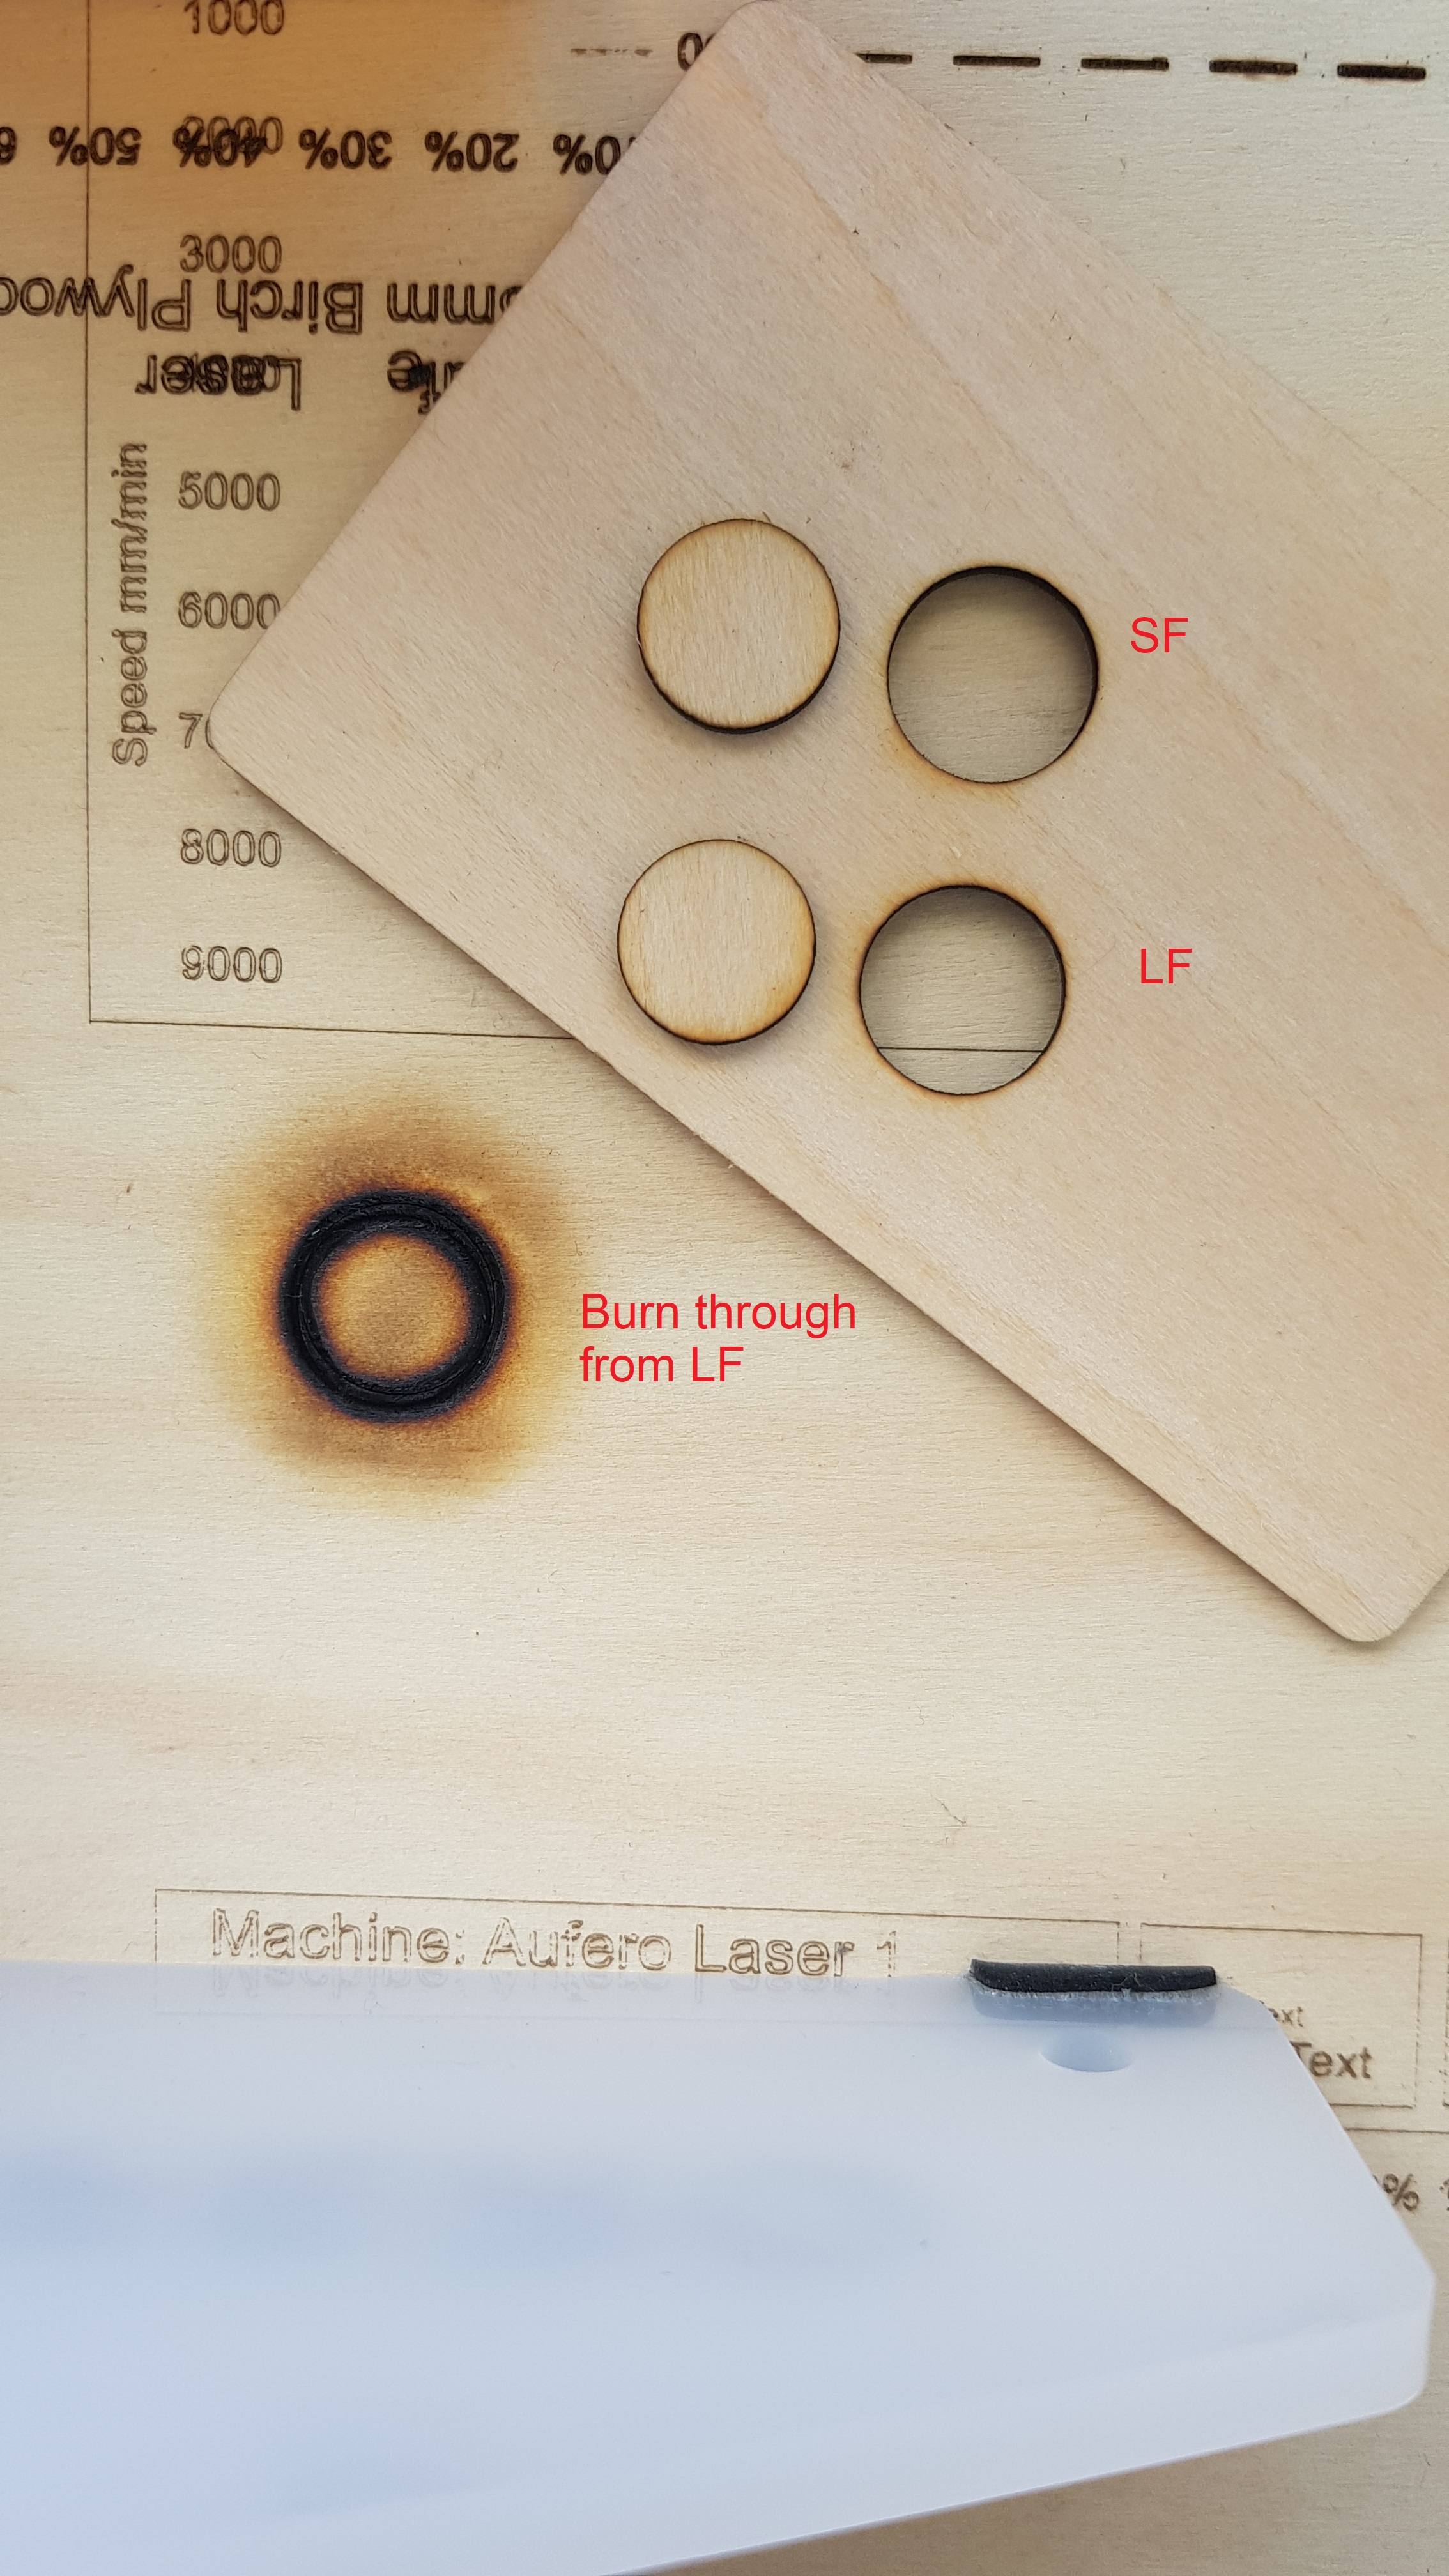
Onto cutting, following Orturs exact setting guide, I used the LU2-F SF and LF to cut the provided 2.8mm pineboard with great success. There is no apparent differences in the two cuts, although the SF has to run slower at 150mm/min instead of the LF at 100mm/min, the SF hardly penetrated the material (owed to the beam diverging faster past the focal point), than the LF, which is of course designed for laser penetration. As the Aufero Laser 1 is foremost an engraver, I decided to focus less on the cutting and more on the engraving.
I was surprised to find that the Aufero as a laser engraver also has a decent cutting capability. Future iterations of this device I am sure will include Z-axis control to gradually lower the laser toward the workspace for a more consistent focal point at the actual cutting position. For example, if a 3mm acrylic sheet is being cut, the first 1.5mm will be removed from the first pass of the laser, but now the second pass to complete the cut will still have the focal point still set to the surface of the material and will be out of focus for the remainder of the cut and reducing the cut quality. The inclusion of Z axis control or an active focus would mitigate this effect for higher quality and more reliable cutting.
The Verdict
- Plug and play, streamlined workflow and easy to use
- Clean design with high quality parts
- Excellent support with Ortur’s own laser engraving settings and remarks for different materials
- Clear design focus on safety, modularity and convenience, although, some of the safety features need some refinement.
- Air assist nozzle support
- Low cost starting at $250 USD ($200 on sale) with the LU2-2, and with each laser diode available for $100 USD
- Multiple laser diode options with 1.5W to 5.5W power configurations with long and short focus
- Overall, an easy low cost solution with impressive capabilities
It is very exciting to see technology like laser cutting and engraving becoming more accessible with easy to use and out of the box low cost products like the Aufero Laser 1. I was pleasently surprised with the travel accuracy, repeatability and effective laser resolution for a device this small and for such a low cost. I would recommend this clean engraving and cutting solution to anyone looking for a start in small scale and experimental prototyping, basic fine detail fabrication and decoration. I am looking forward to seeing what Ortur’s other machines can do!
Take a look at the Aufero Laser 1 on Ortur’s: https://auferolaser.net/products/aufero-laser-1-best-portable-diode-laser-engraver and check out my other reviews: https://nicralph.com/generative_art_plotting/
Happy plotting
