During Sydney’s latest COVID lockdown, I found myself with the time to delve deeper into my generative art and plotting as a means to translate this art to paper. The last time I went down this rabbit hole, I found the field to be quite niche, with limited products and no middle ground. With price points for cheap plotters around $200 with convoluted work flows, or the expensive plotters around $900 with all the bells and whistles. To my surprise, a few years later and looking back down the same rabbit hole, I instead found a growing community and a growing variety of impressive XY plotters.
This lead me to the Uunatek IDraw, a plotter and laser engraving combo with a price point fitting of a beginner, but with an impressive performance and workflow fitting an expert. Translating generative art to paper has always been difficult, but the IDraw might be one of the easiest ways to get it right. And now here we are, a user guide and review of the Uunatek IDraw A4 XY plotter and laser engraver combo available from https://uunatek.com/.
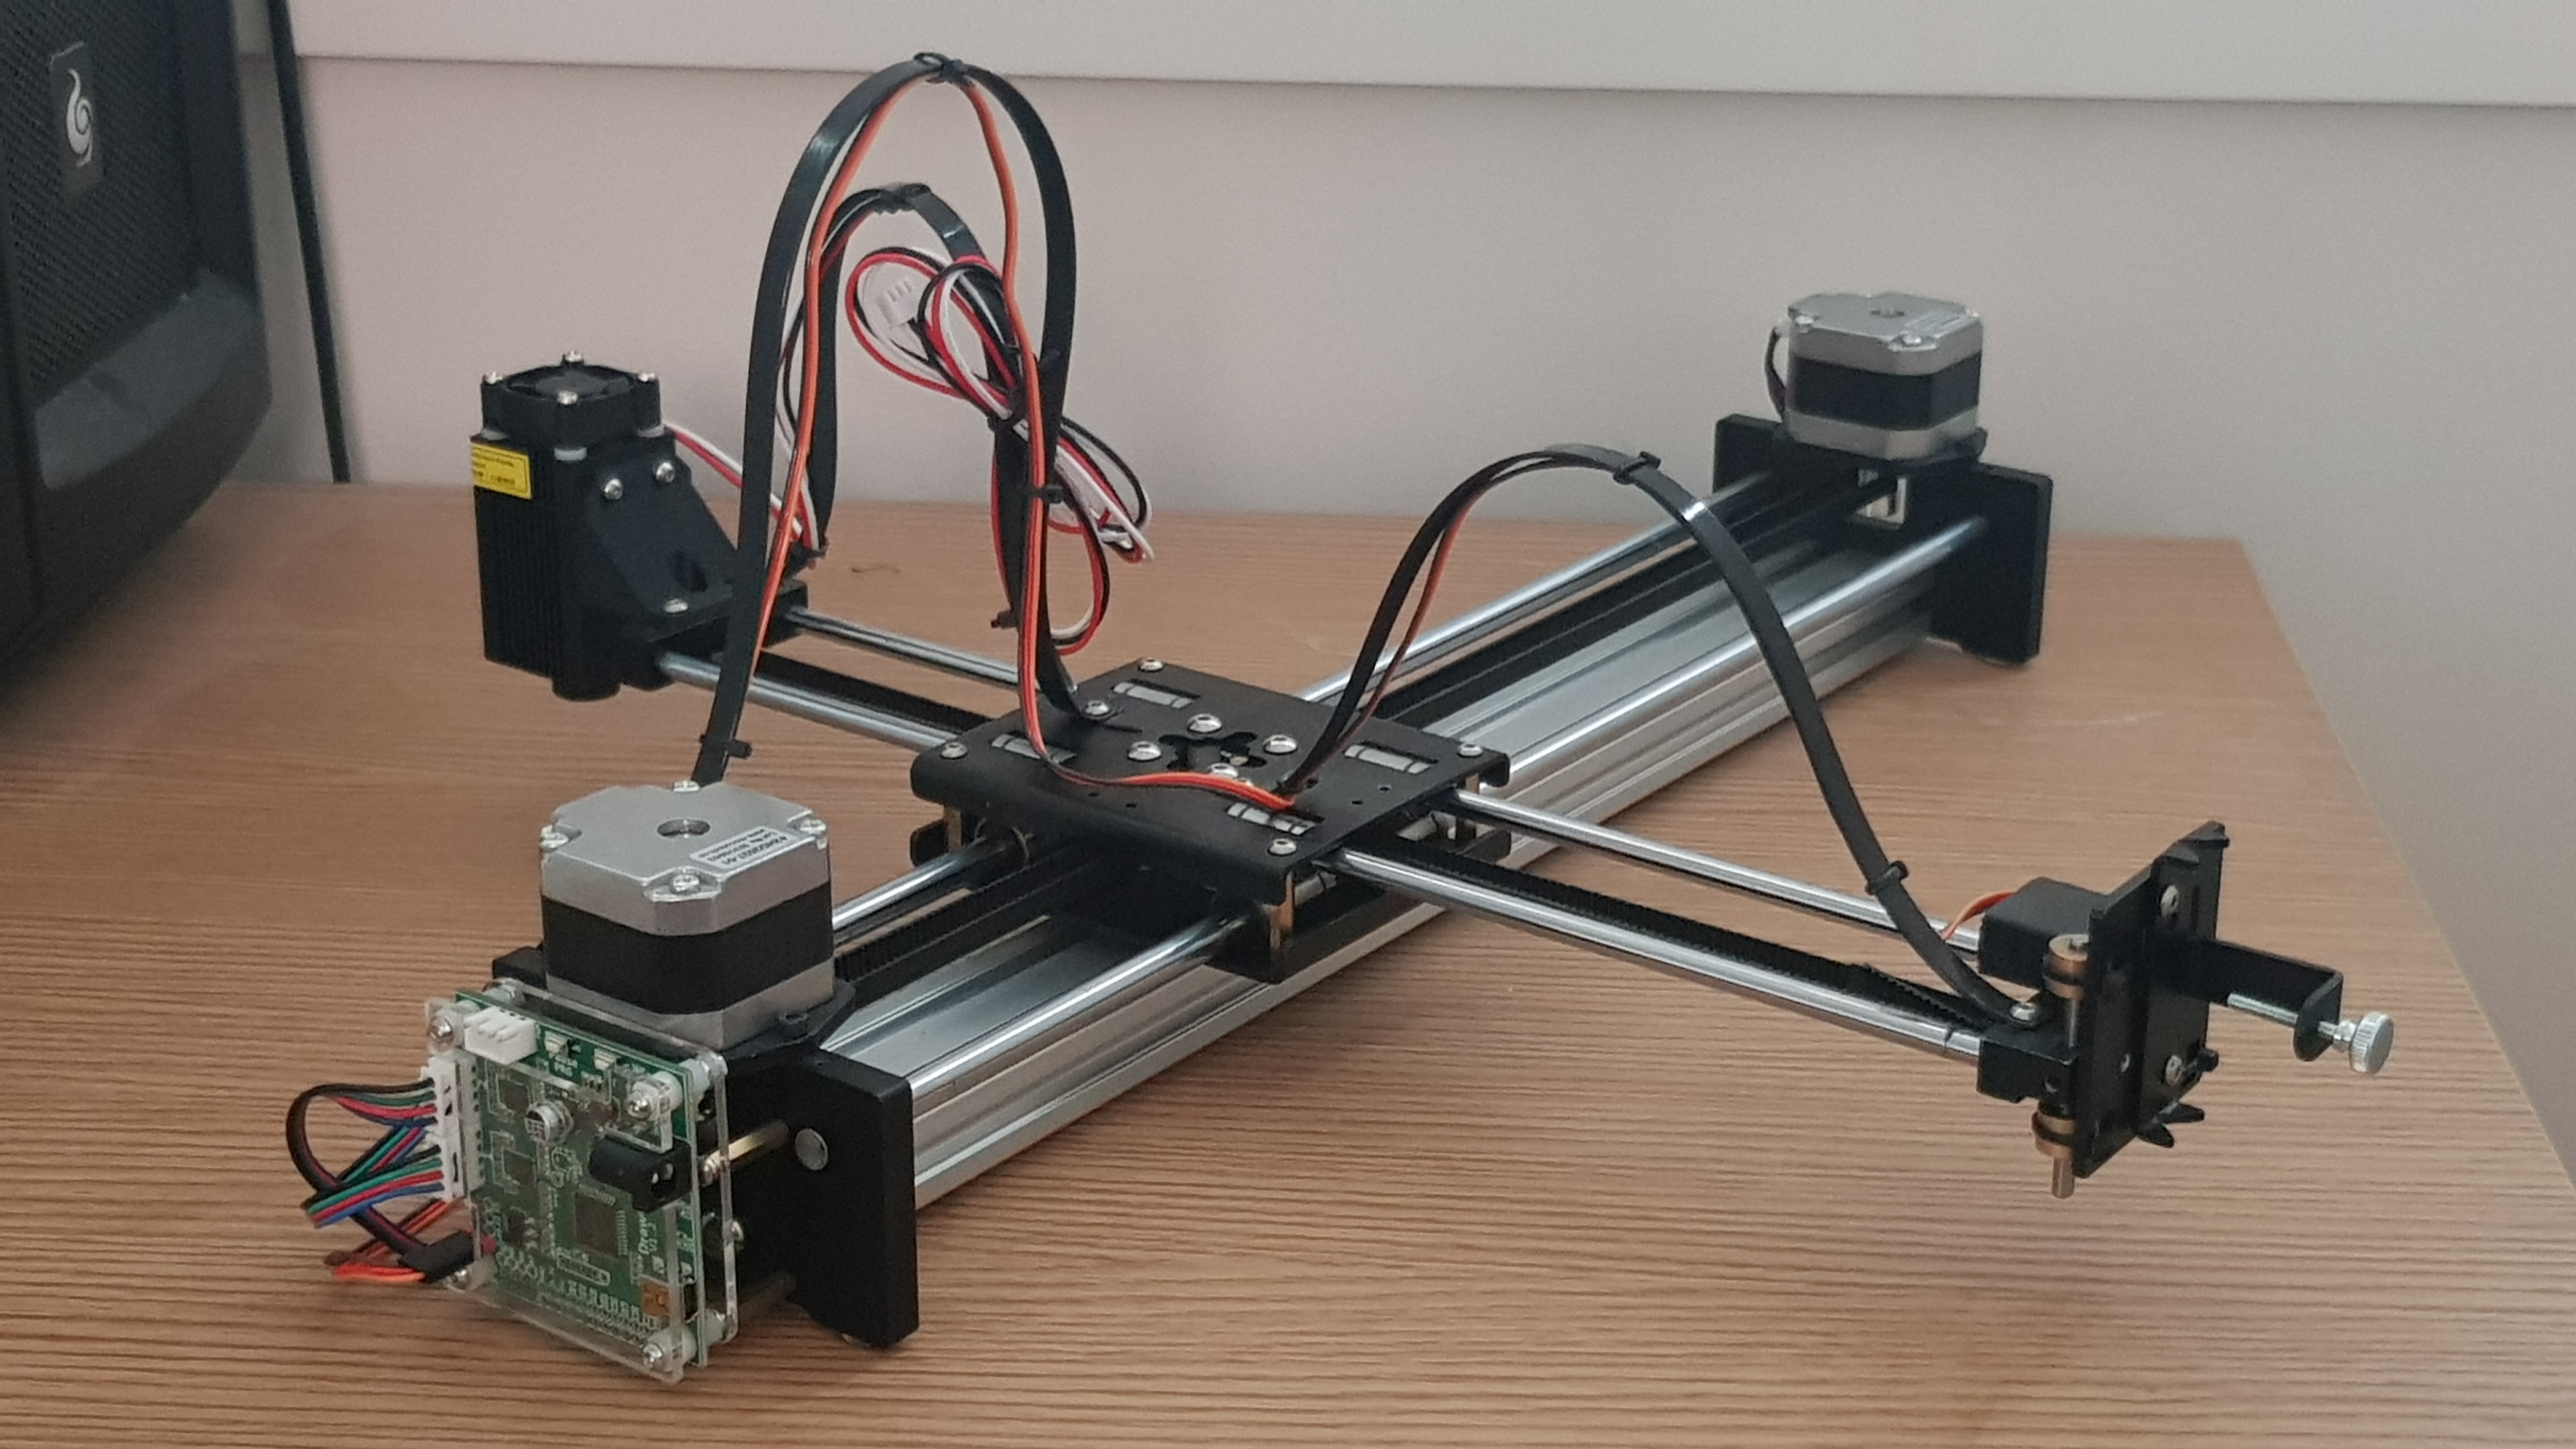
IDraw is an open source XY plotter, with a servo controlled pen mount, with each axis belt driven by two stepper motors. IDraw has a several features:
- Very precise and repeatable, well into the sub-millimetre range
- A straight forward and easy use workflow
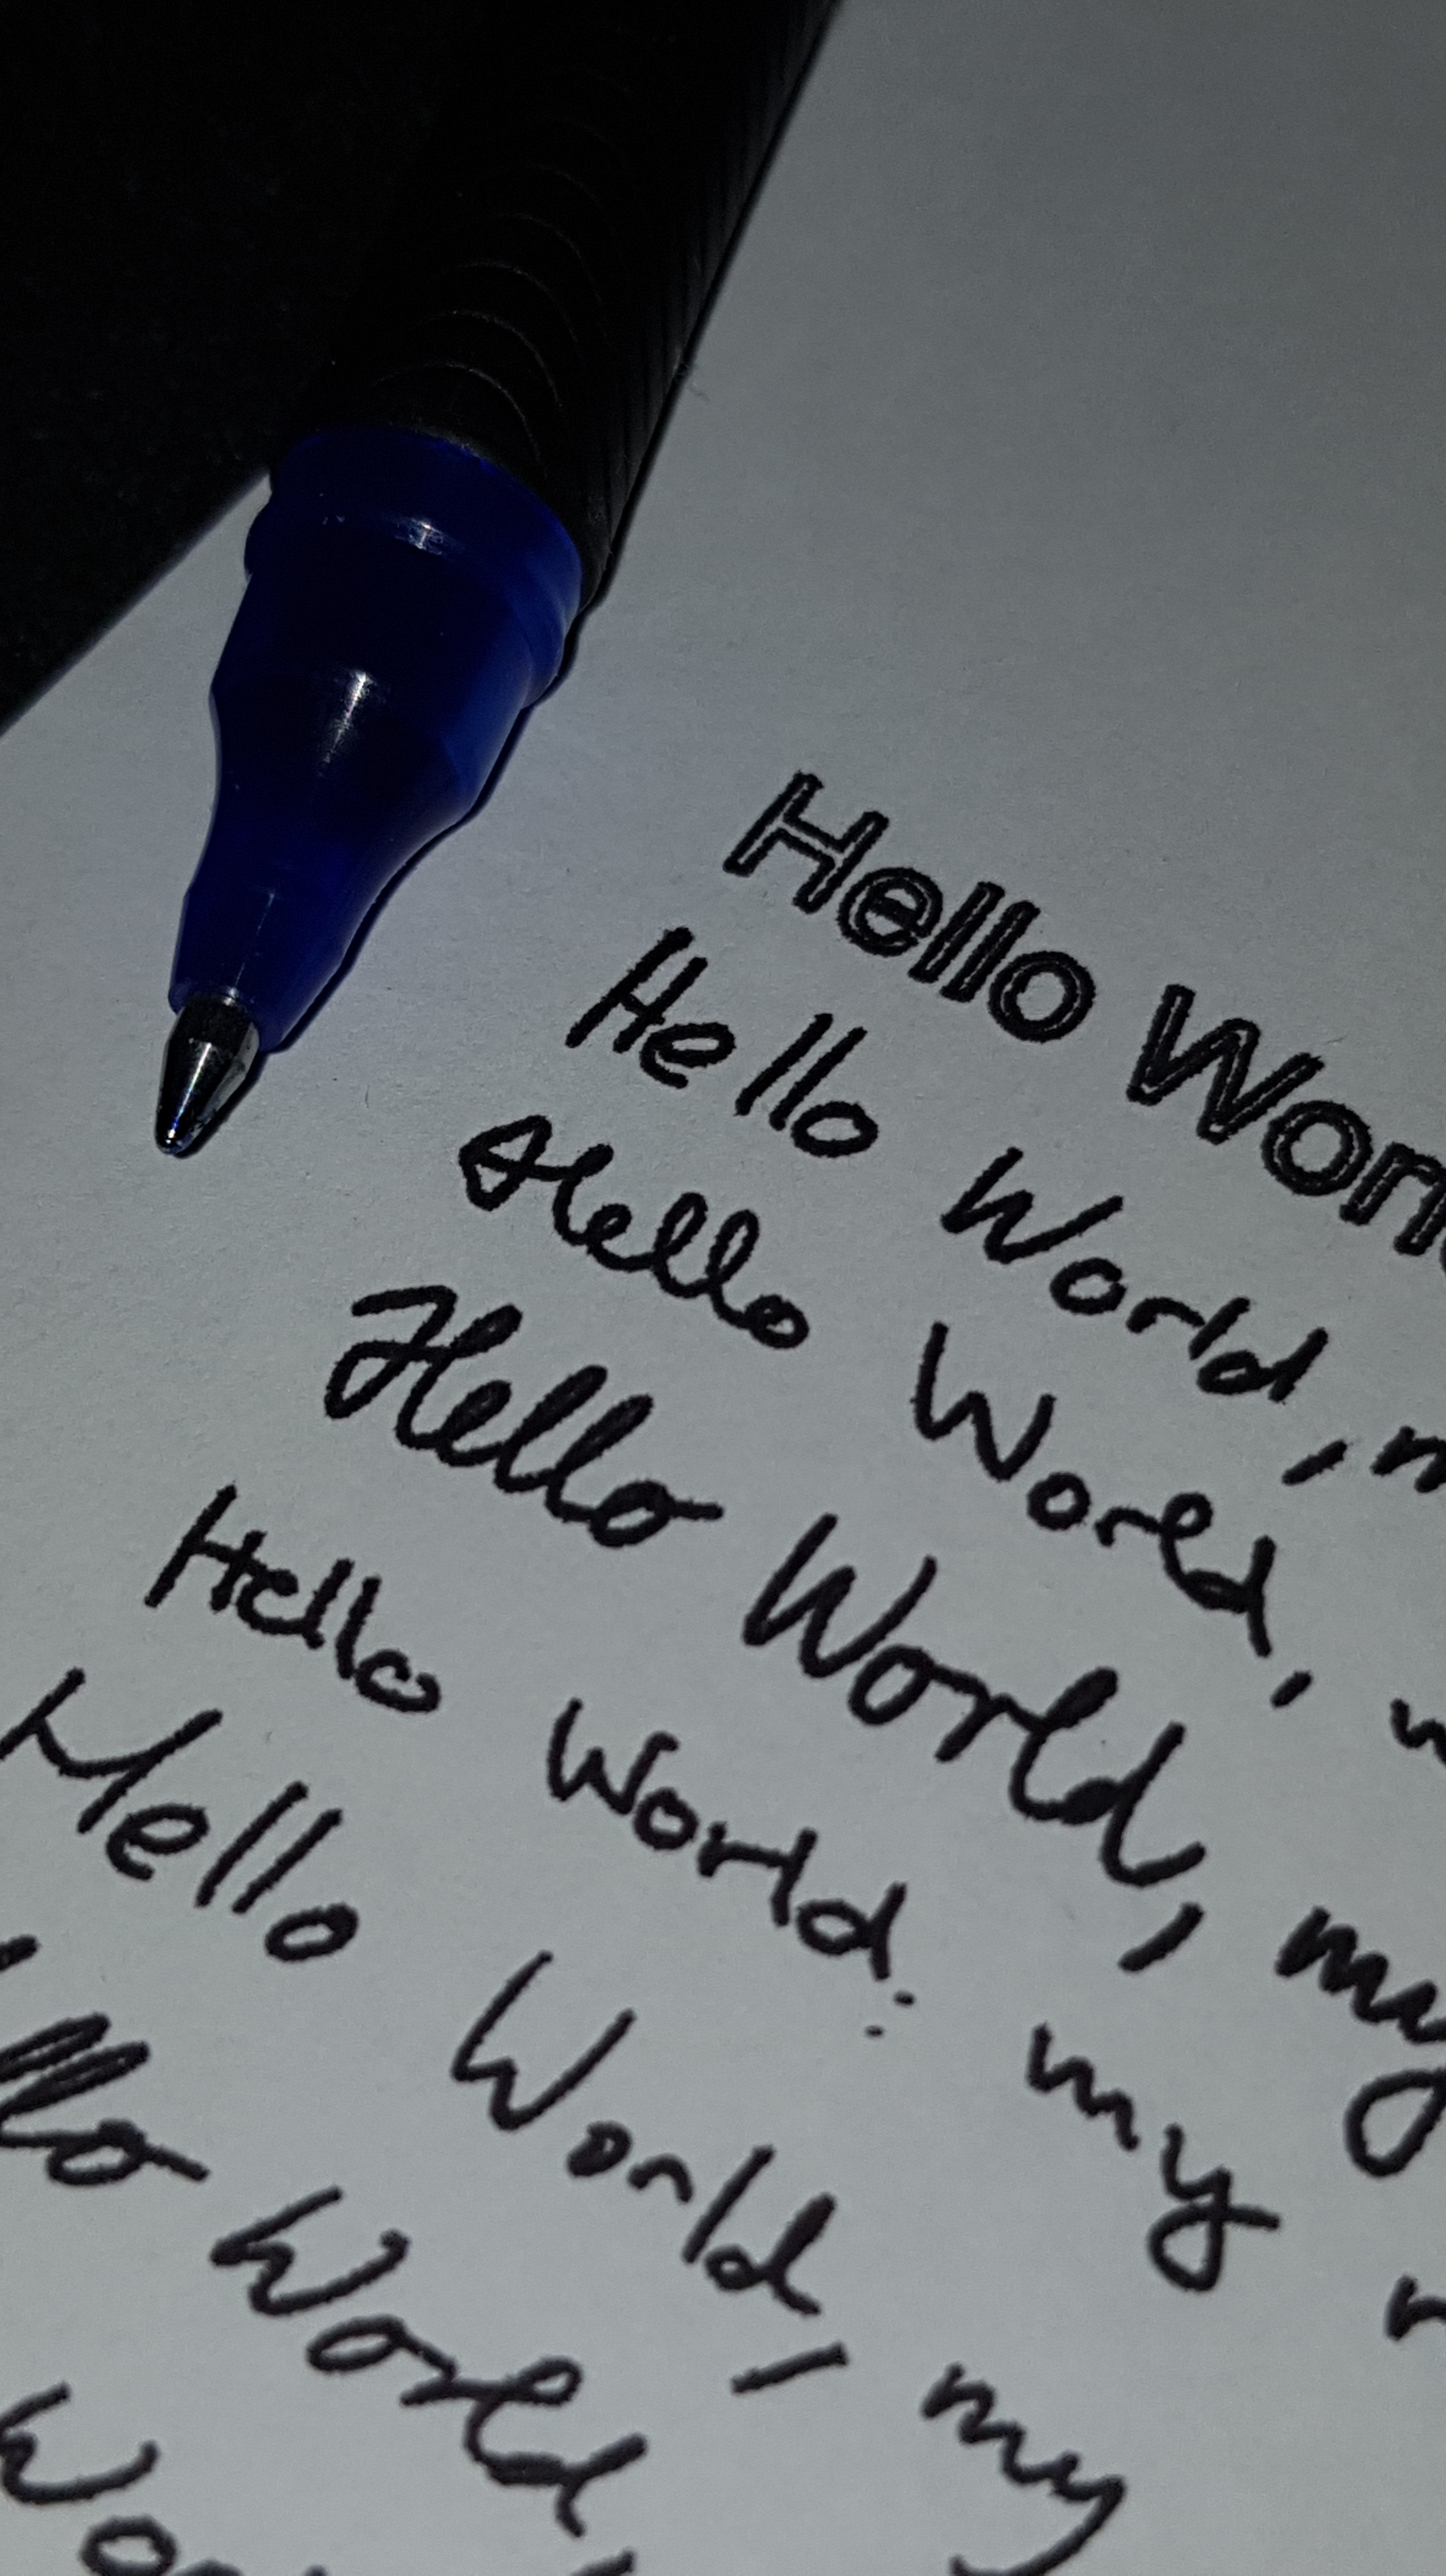
- Capable of replicating handwriting
- Operates via Inkscape V1.0 using the open source Axidraw extension
- Can be fitted with a laser engraver
- High quality components
- Easy to assemble with plenty of resources
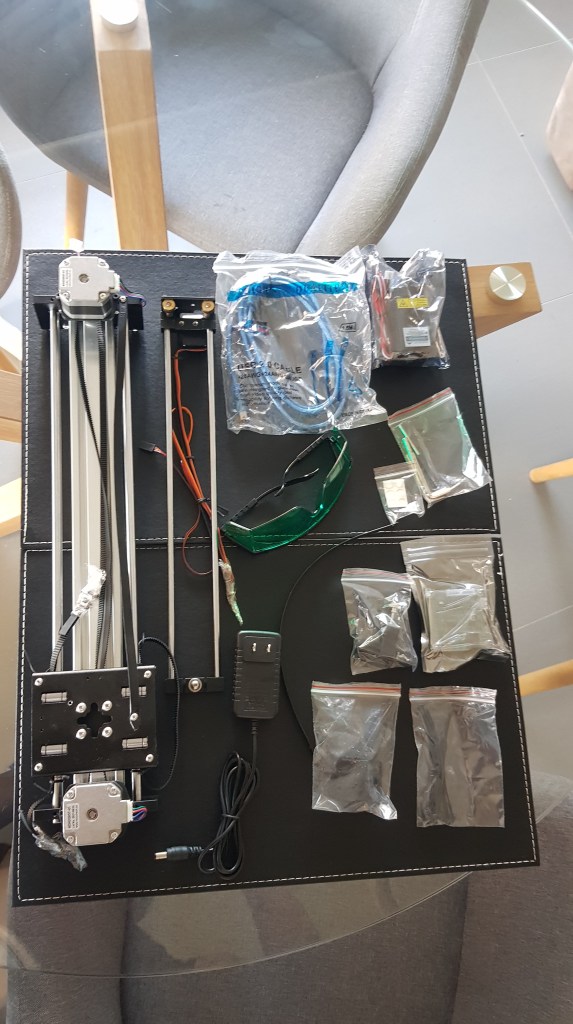
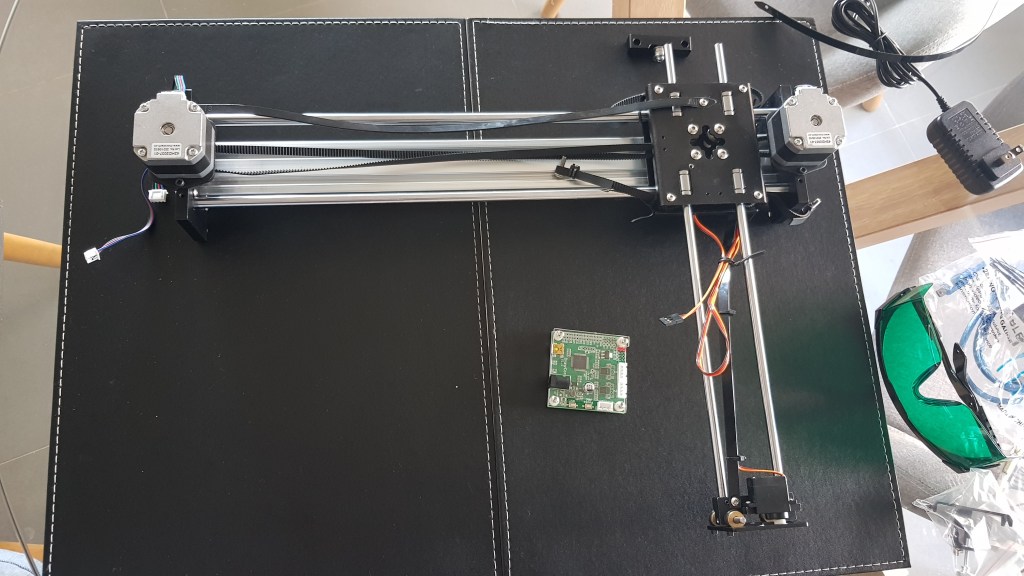
Ordering from the Uunatek website, the IDraw comes two varieties of working envelopes, A4 and A3, ranging from $150 – $329 (at time of review). The cheapest plotter, the acrylic A4 (shown above), also has a metallic component model for an extra $100. This is the plotter I received from Uunatek, along with the a 500mW laser engraving head, available for $49.90. An excellent price point for a plotter with this quality of construction. Una from Uunatek was very approachable and easy to contact, she sent me my tracking number and in a few weeks, I had my IDraw A4 in metal:
The IDraw A4 in metal comes partially assembled, which is a relief from previous XY plotters I have recieved. With plenty of online resources and straight assembly, away I went.

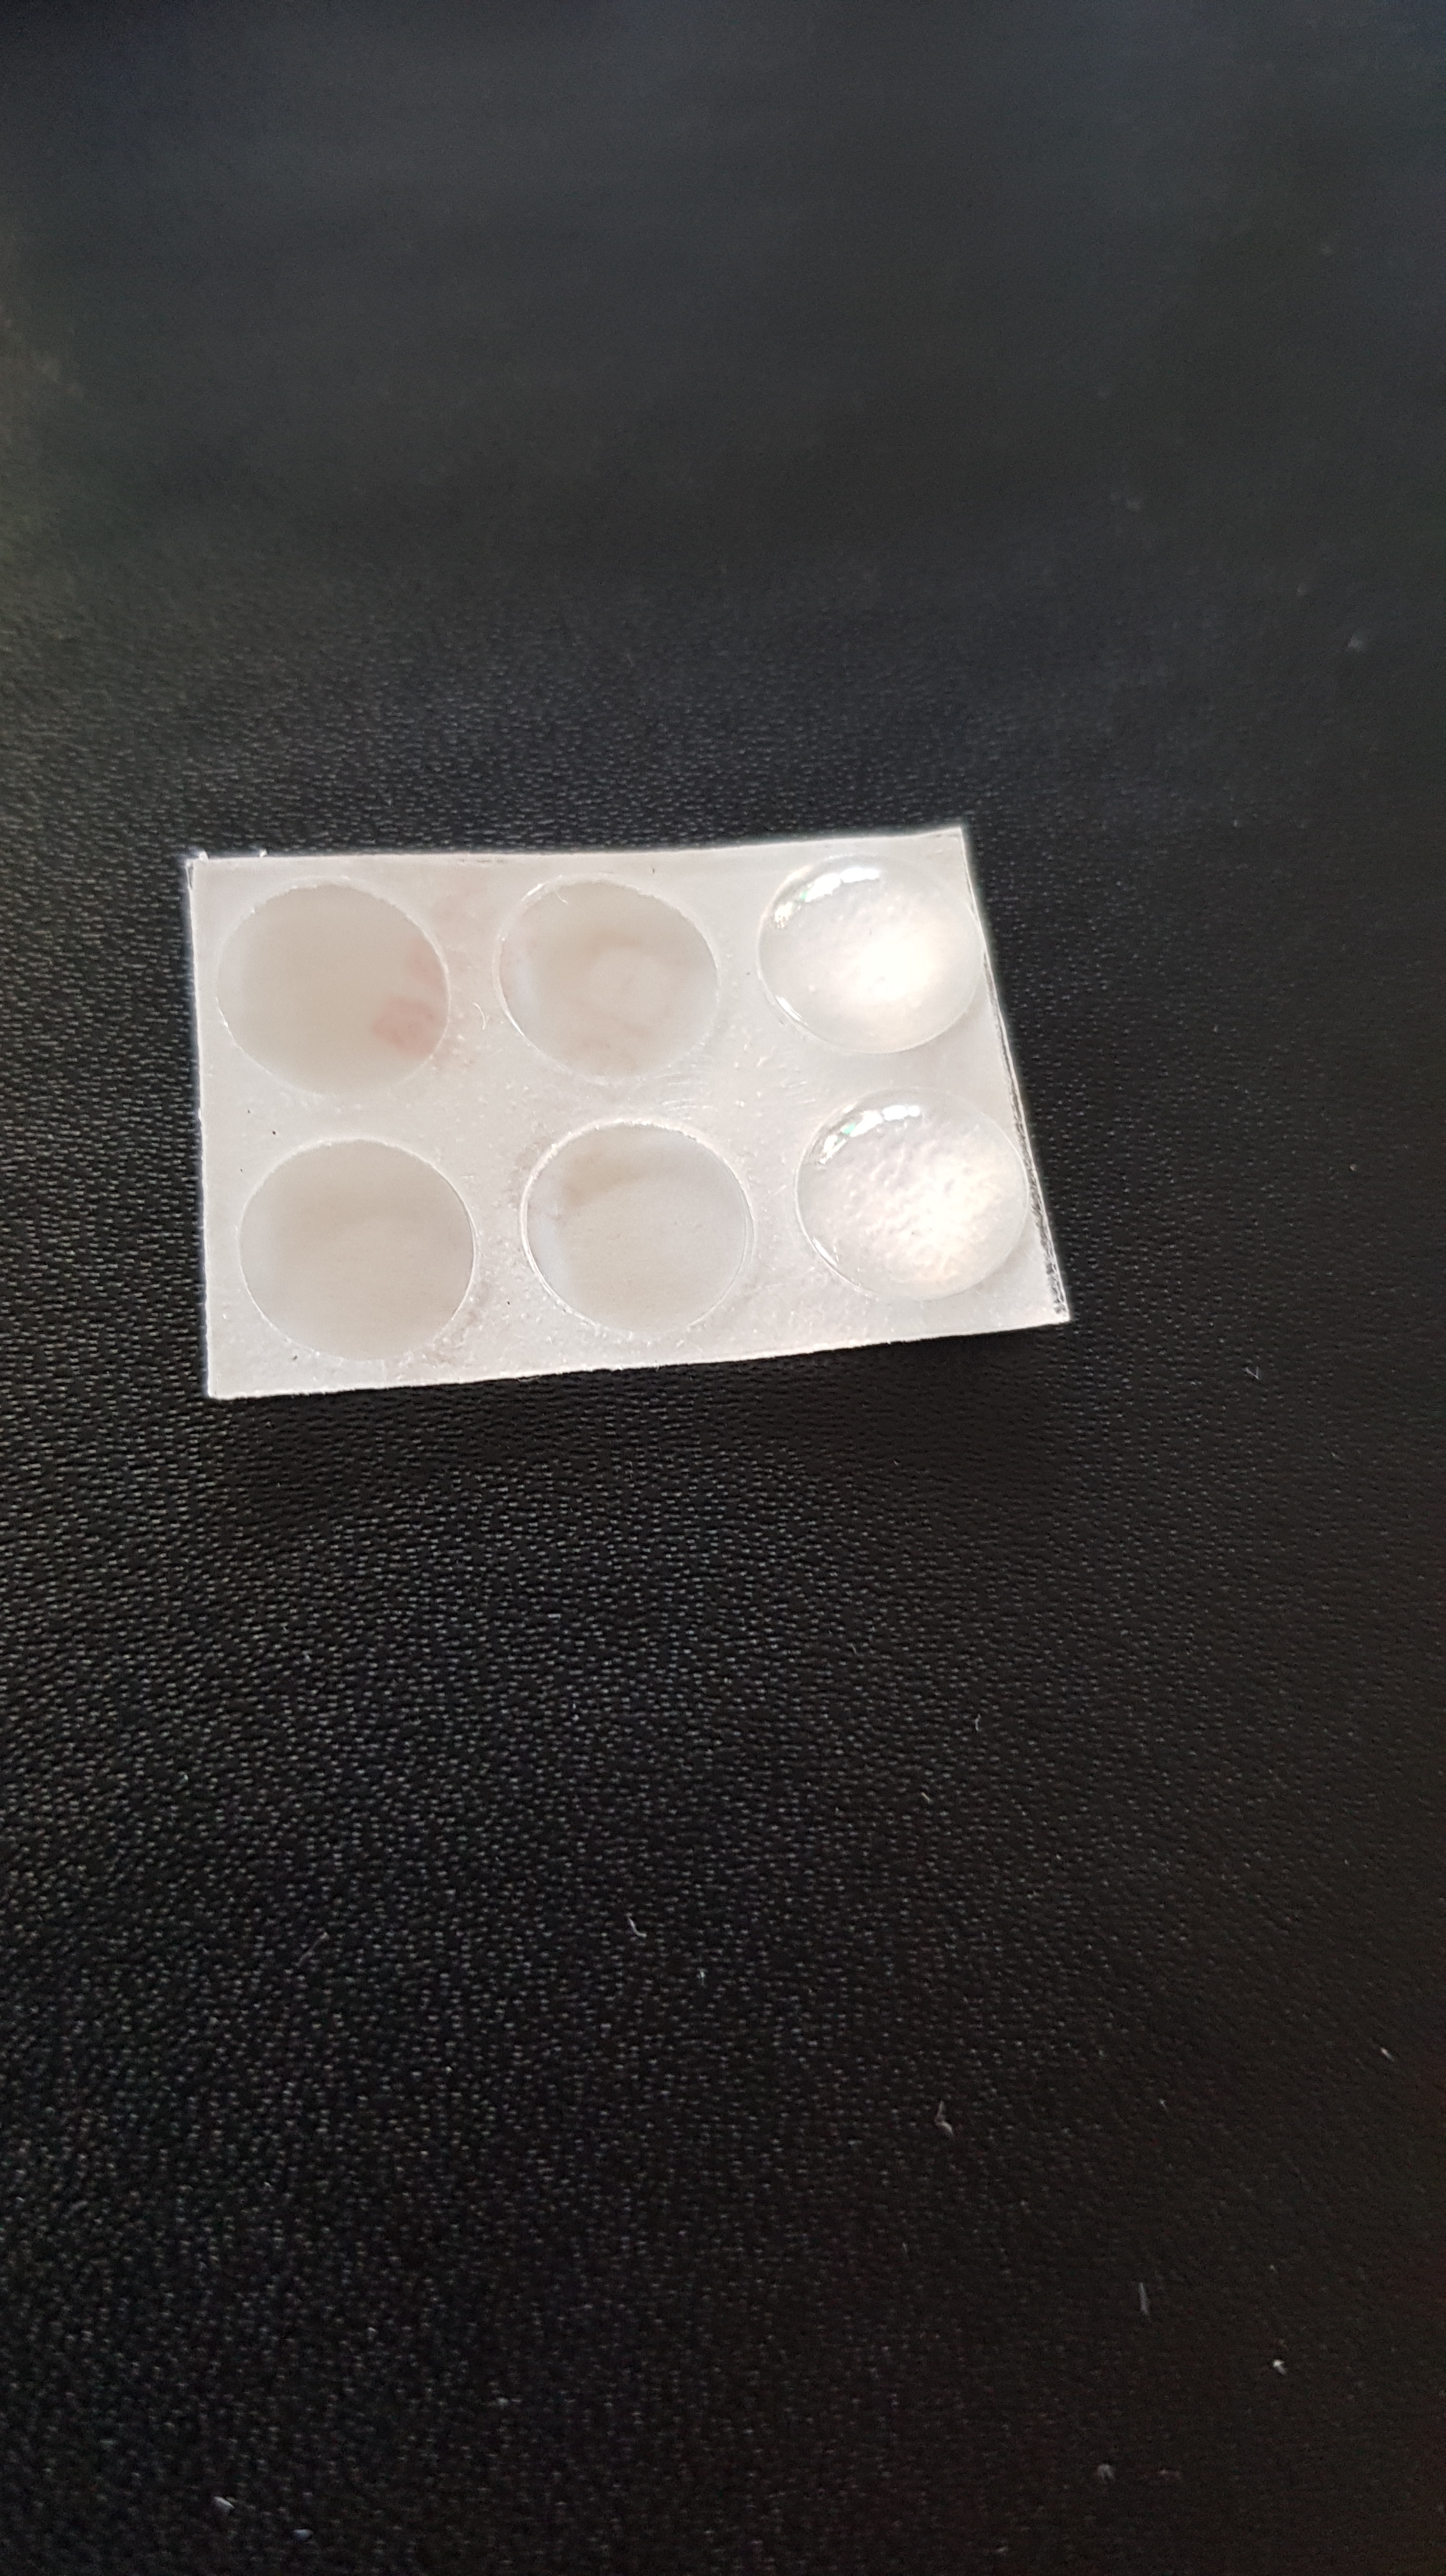
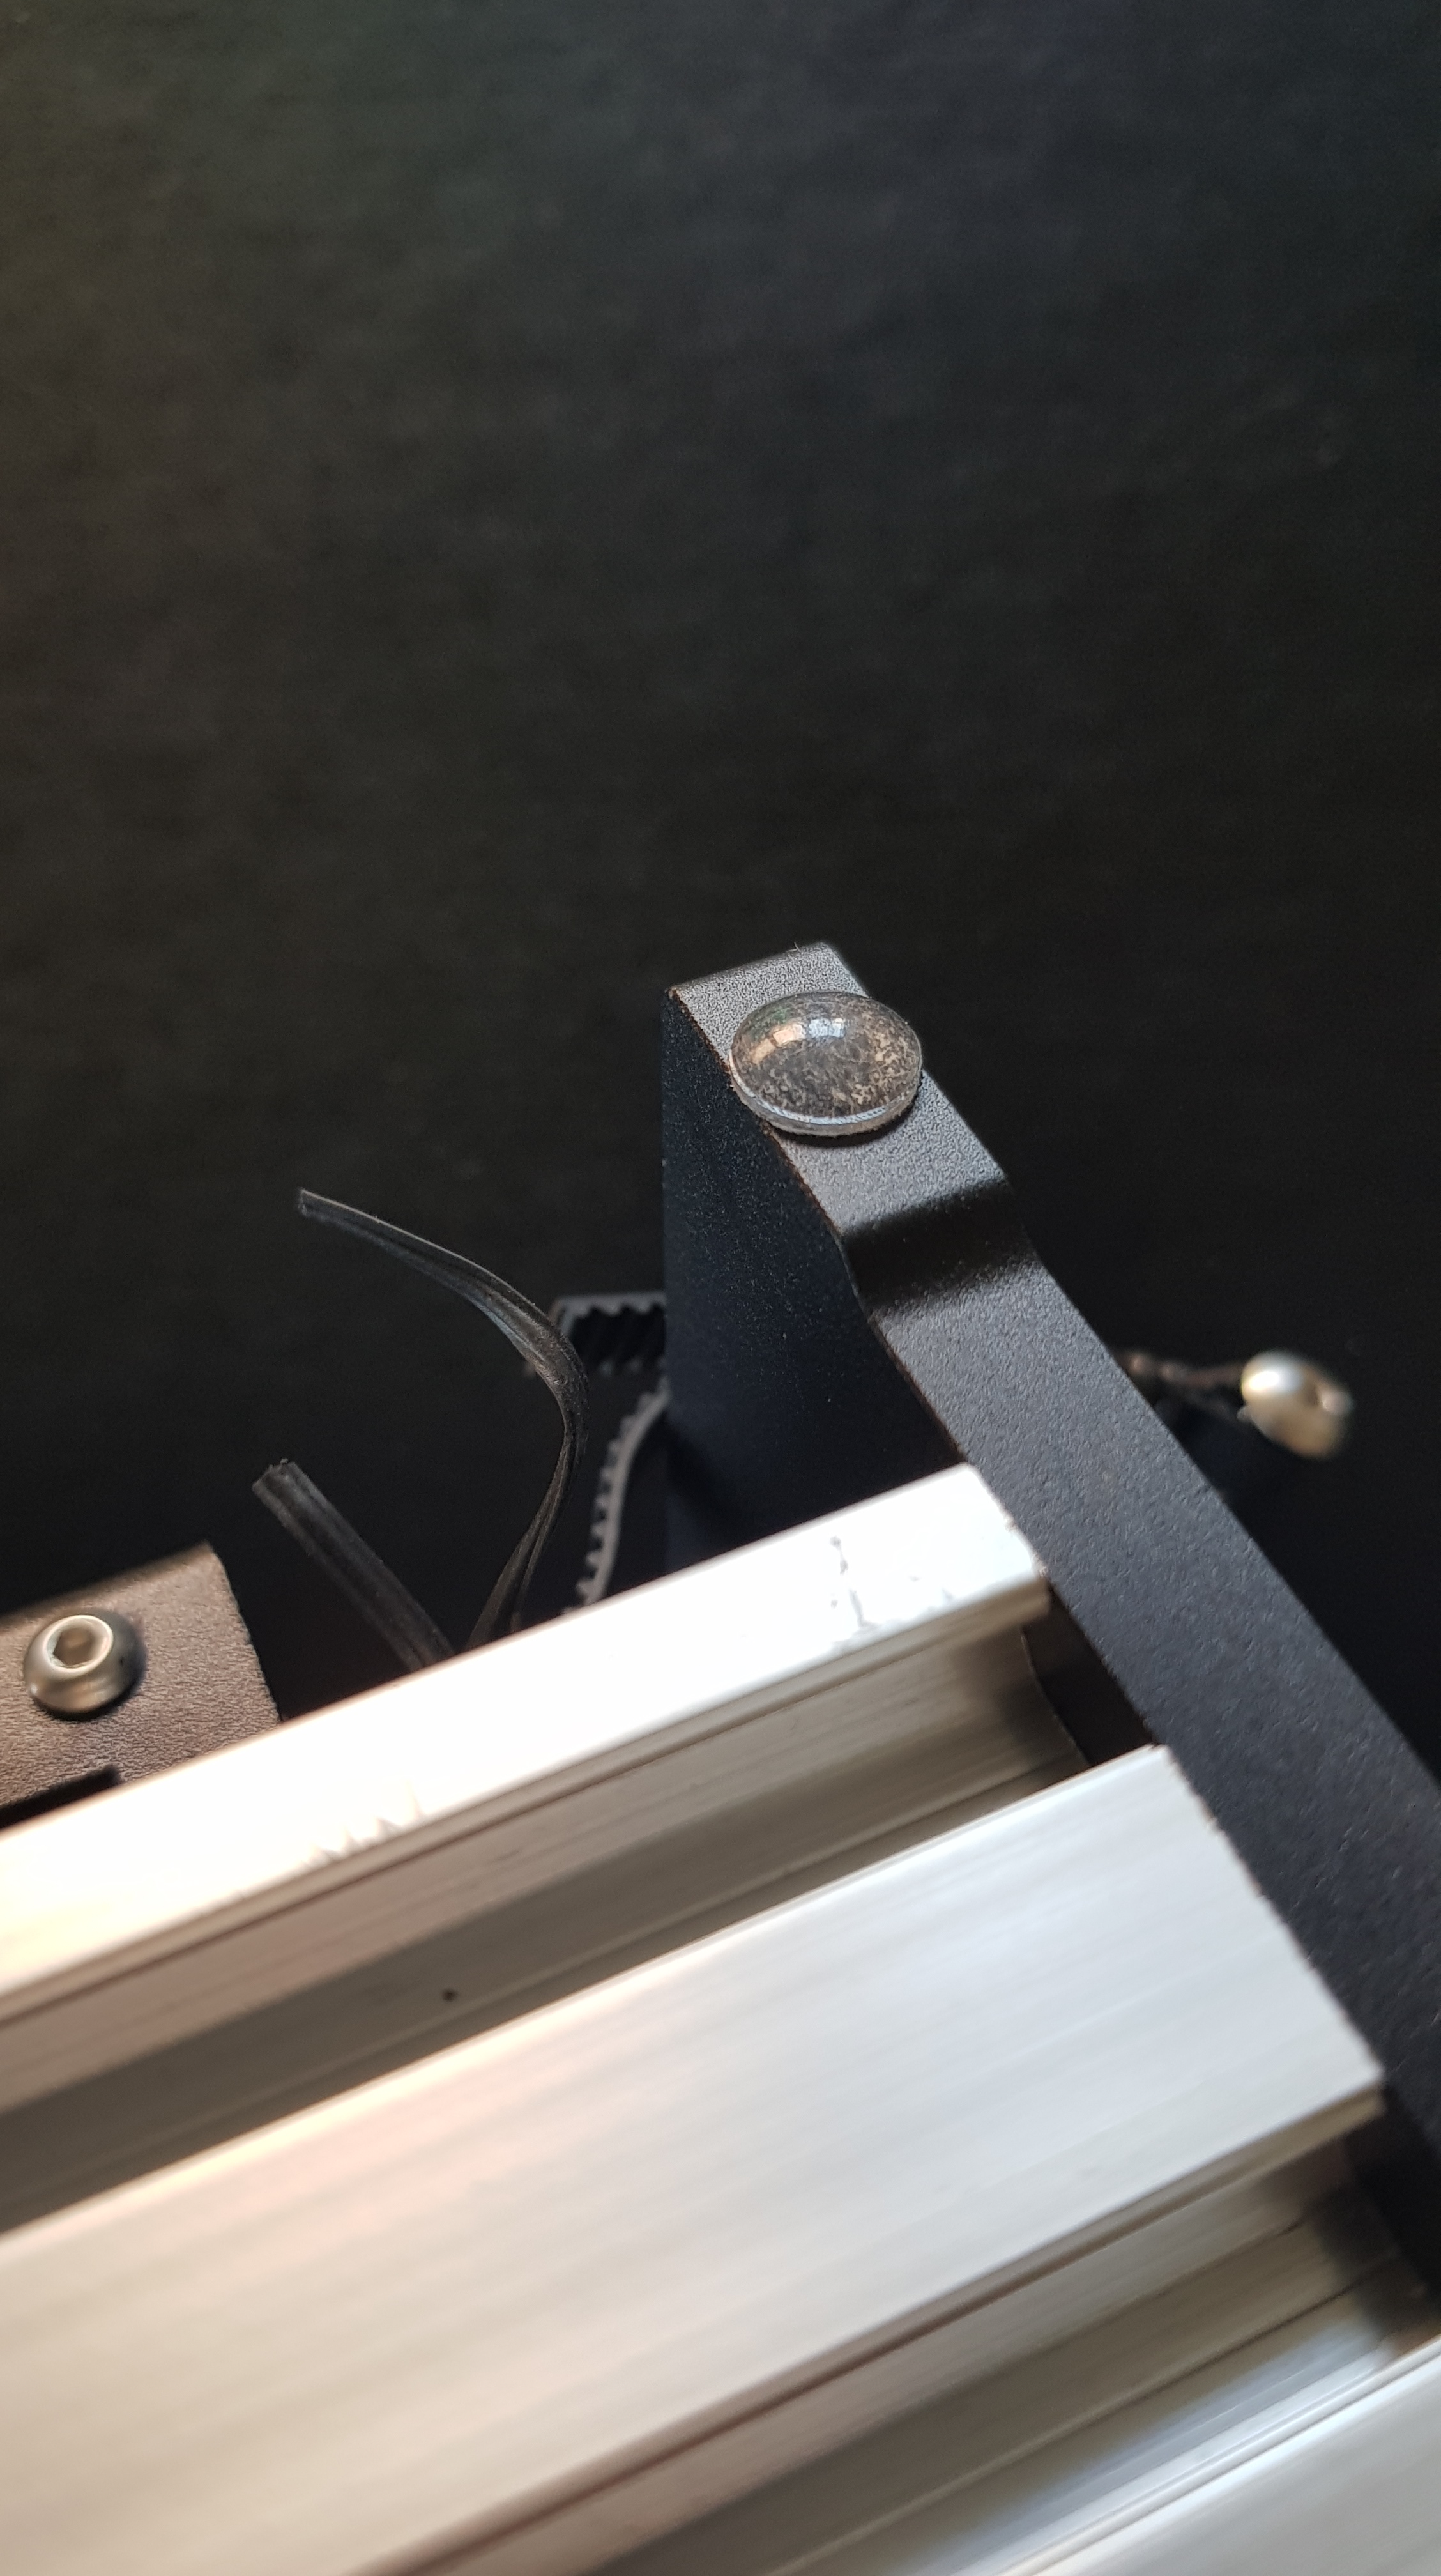
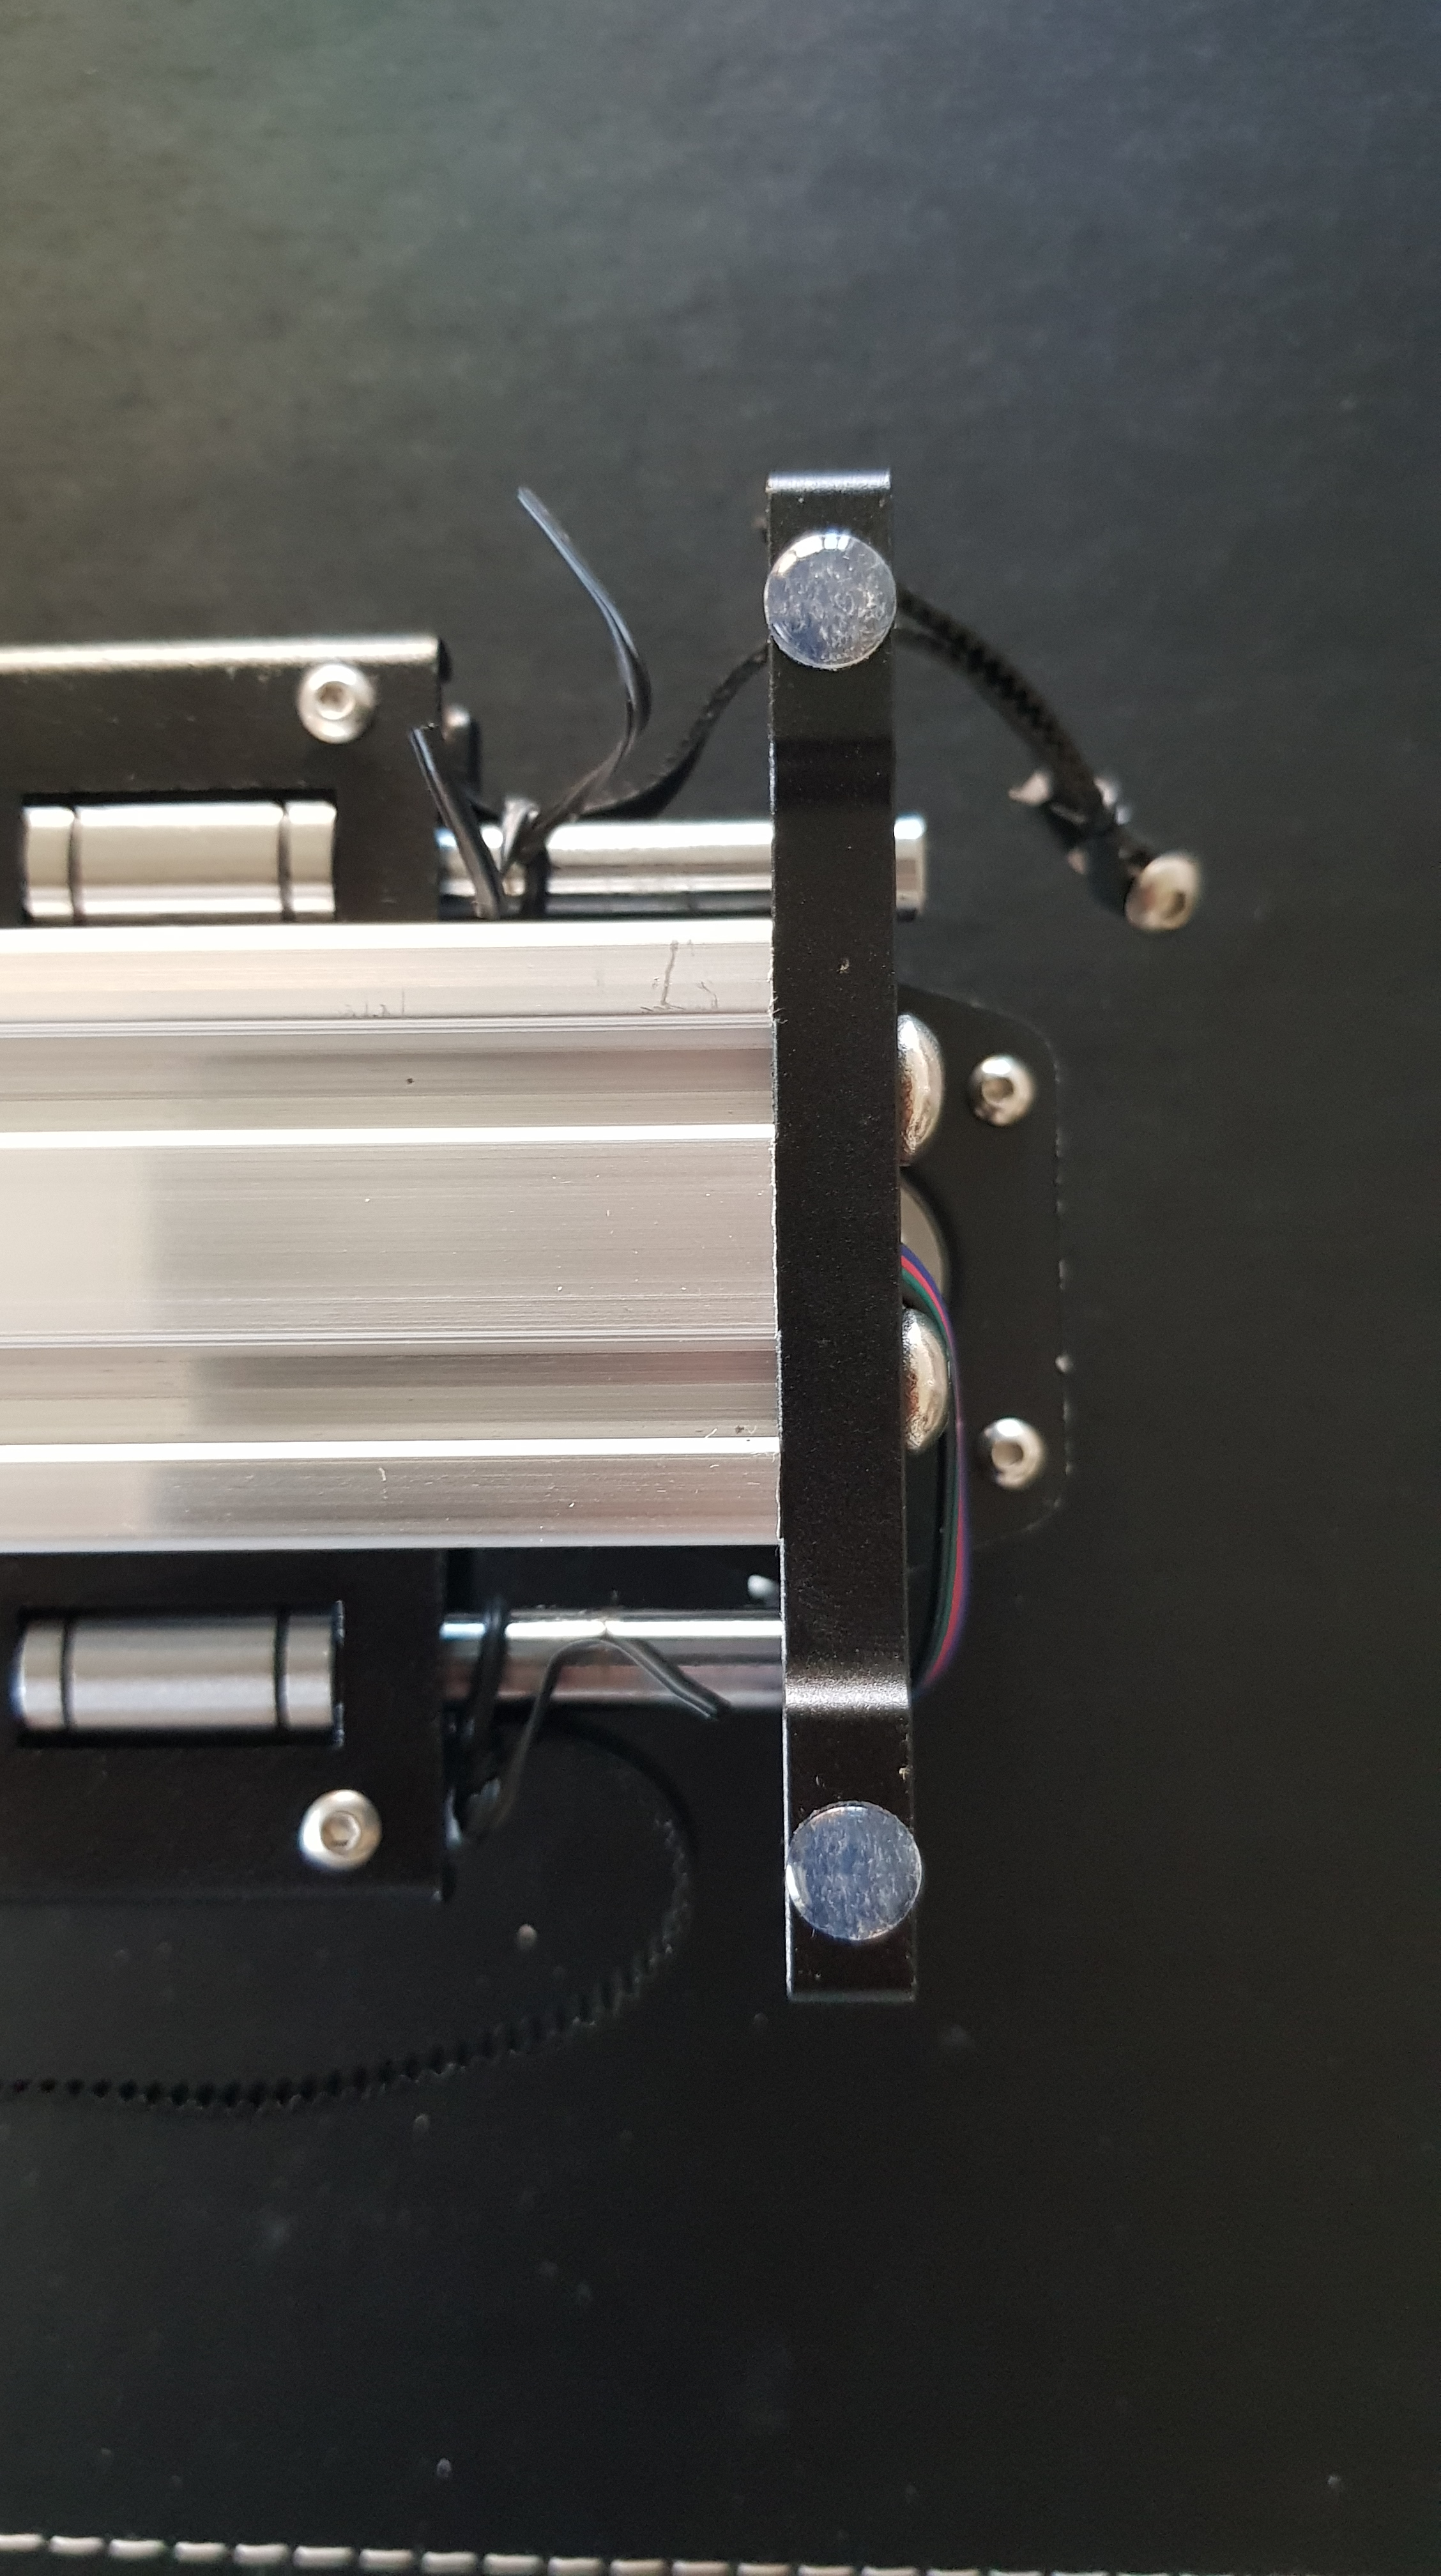
I started by adding the adhesive rubber feet to the base. These reduce slip and vibration in the IDraw, in addition to reducing friction wear on your workspace. Most importantly, I won’t scratch my table during assembly!
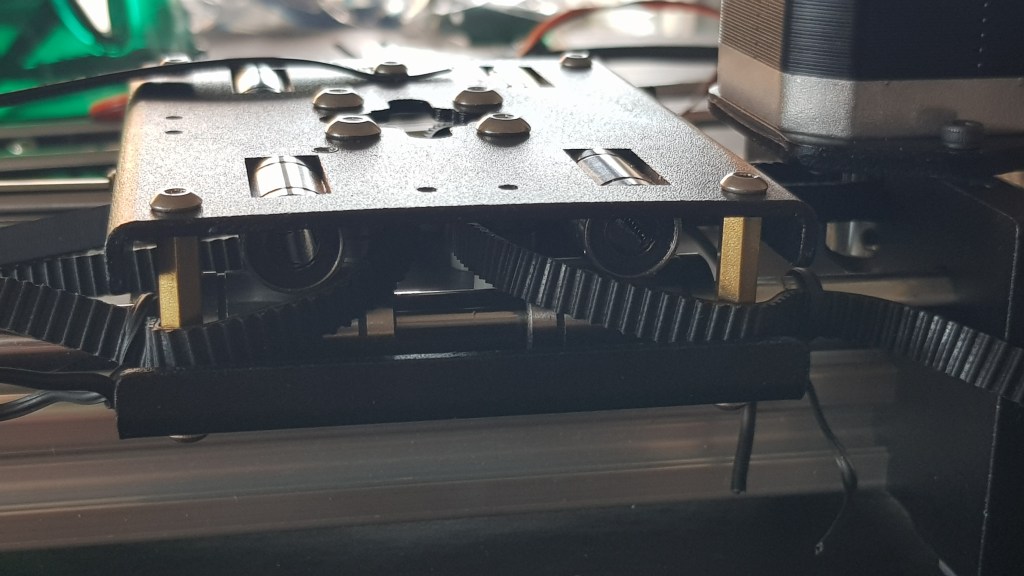
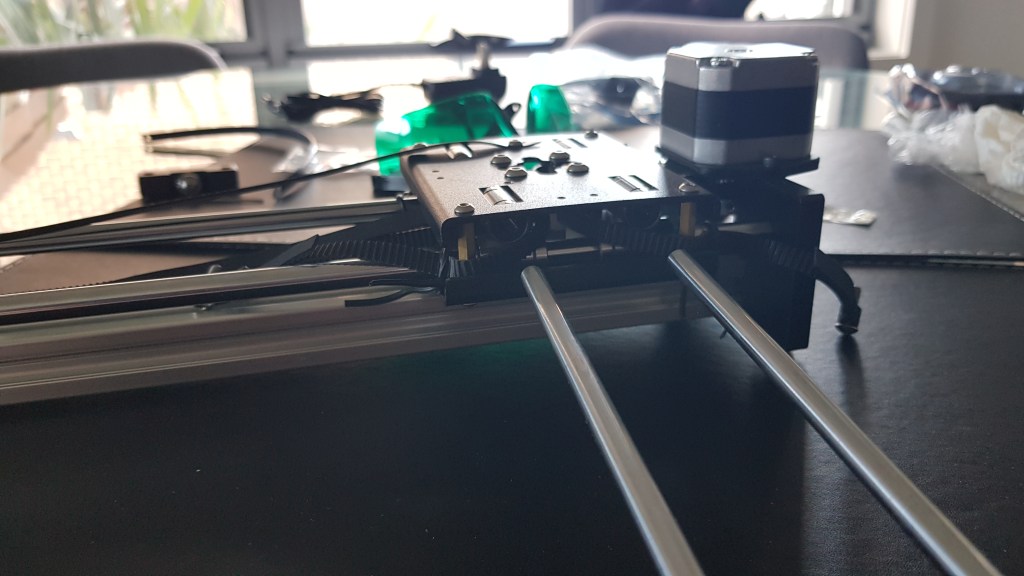
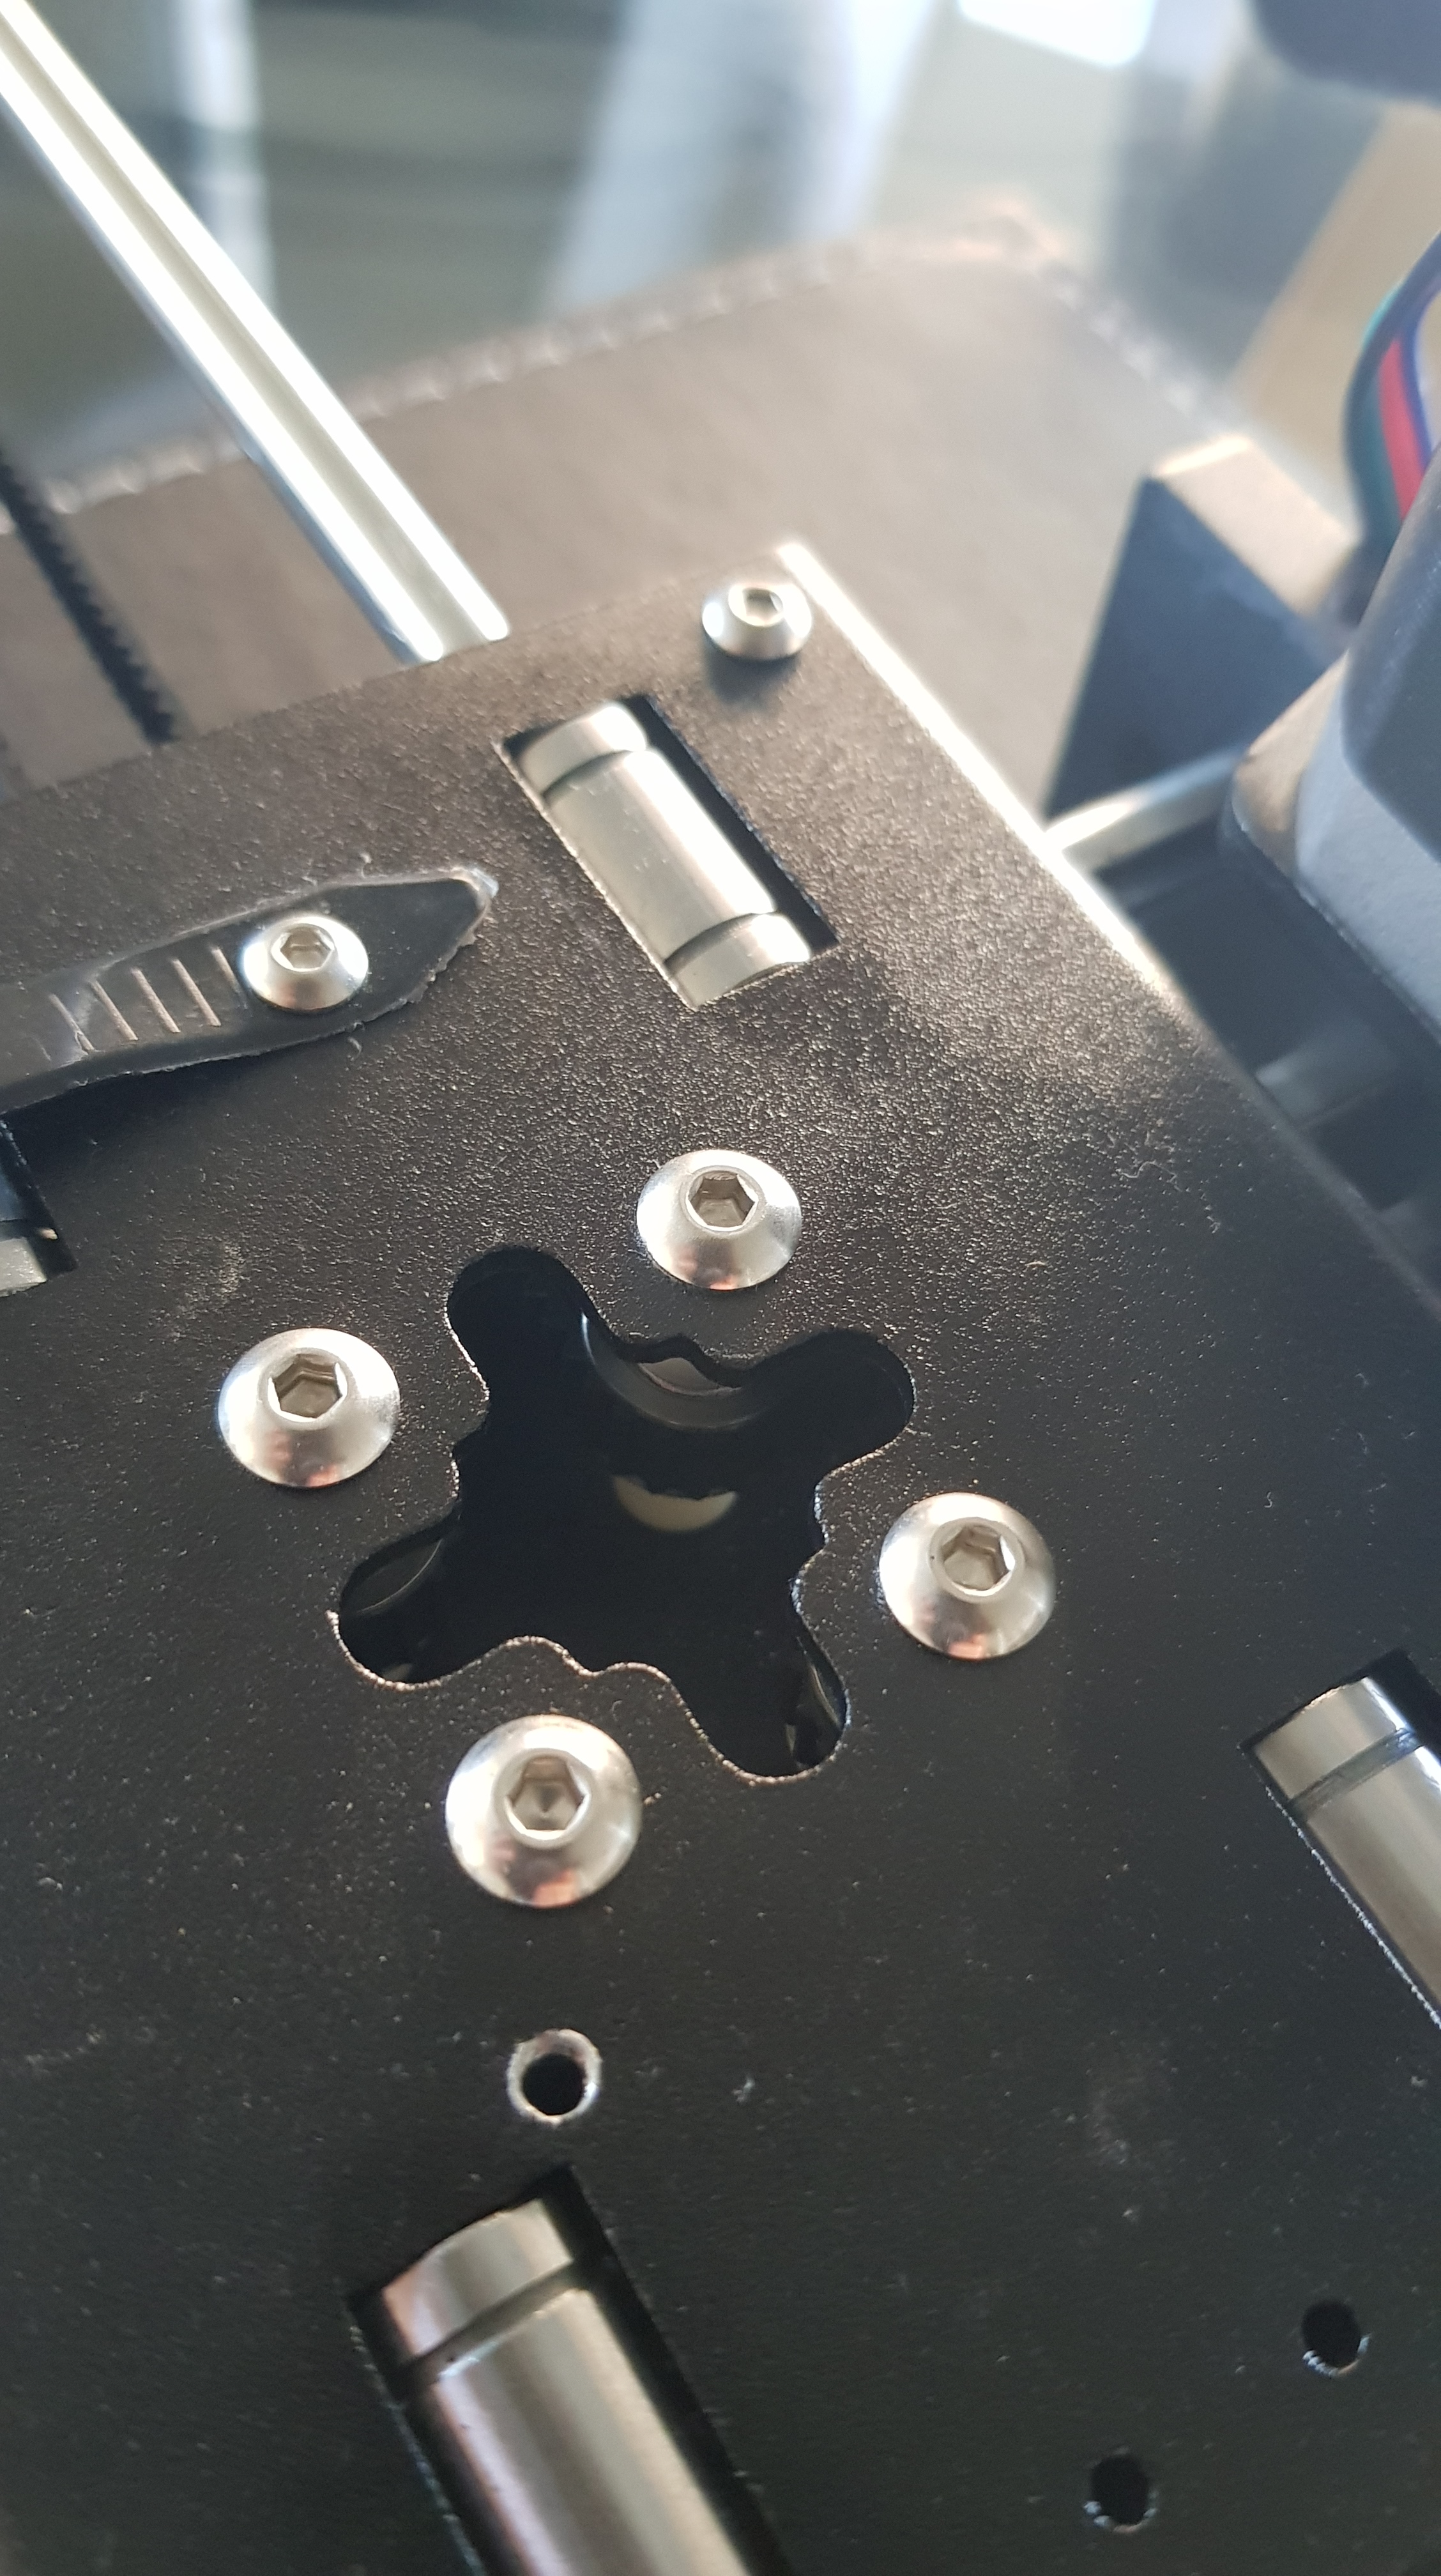
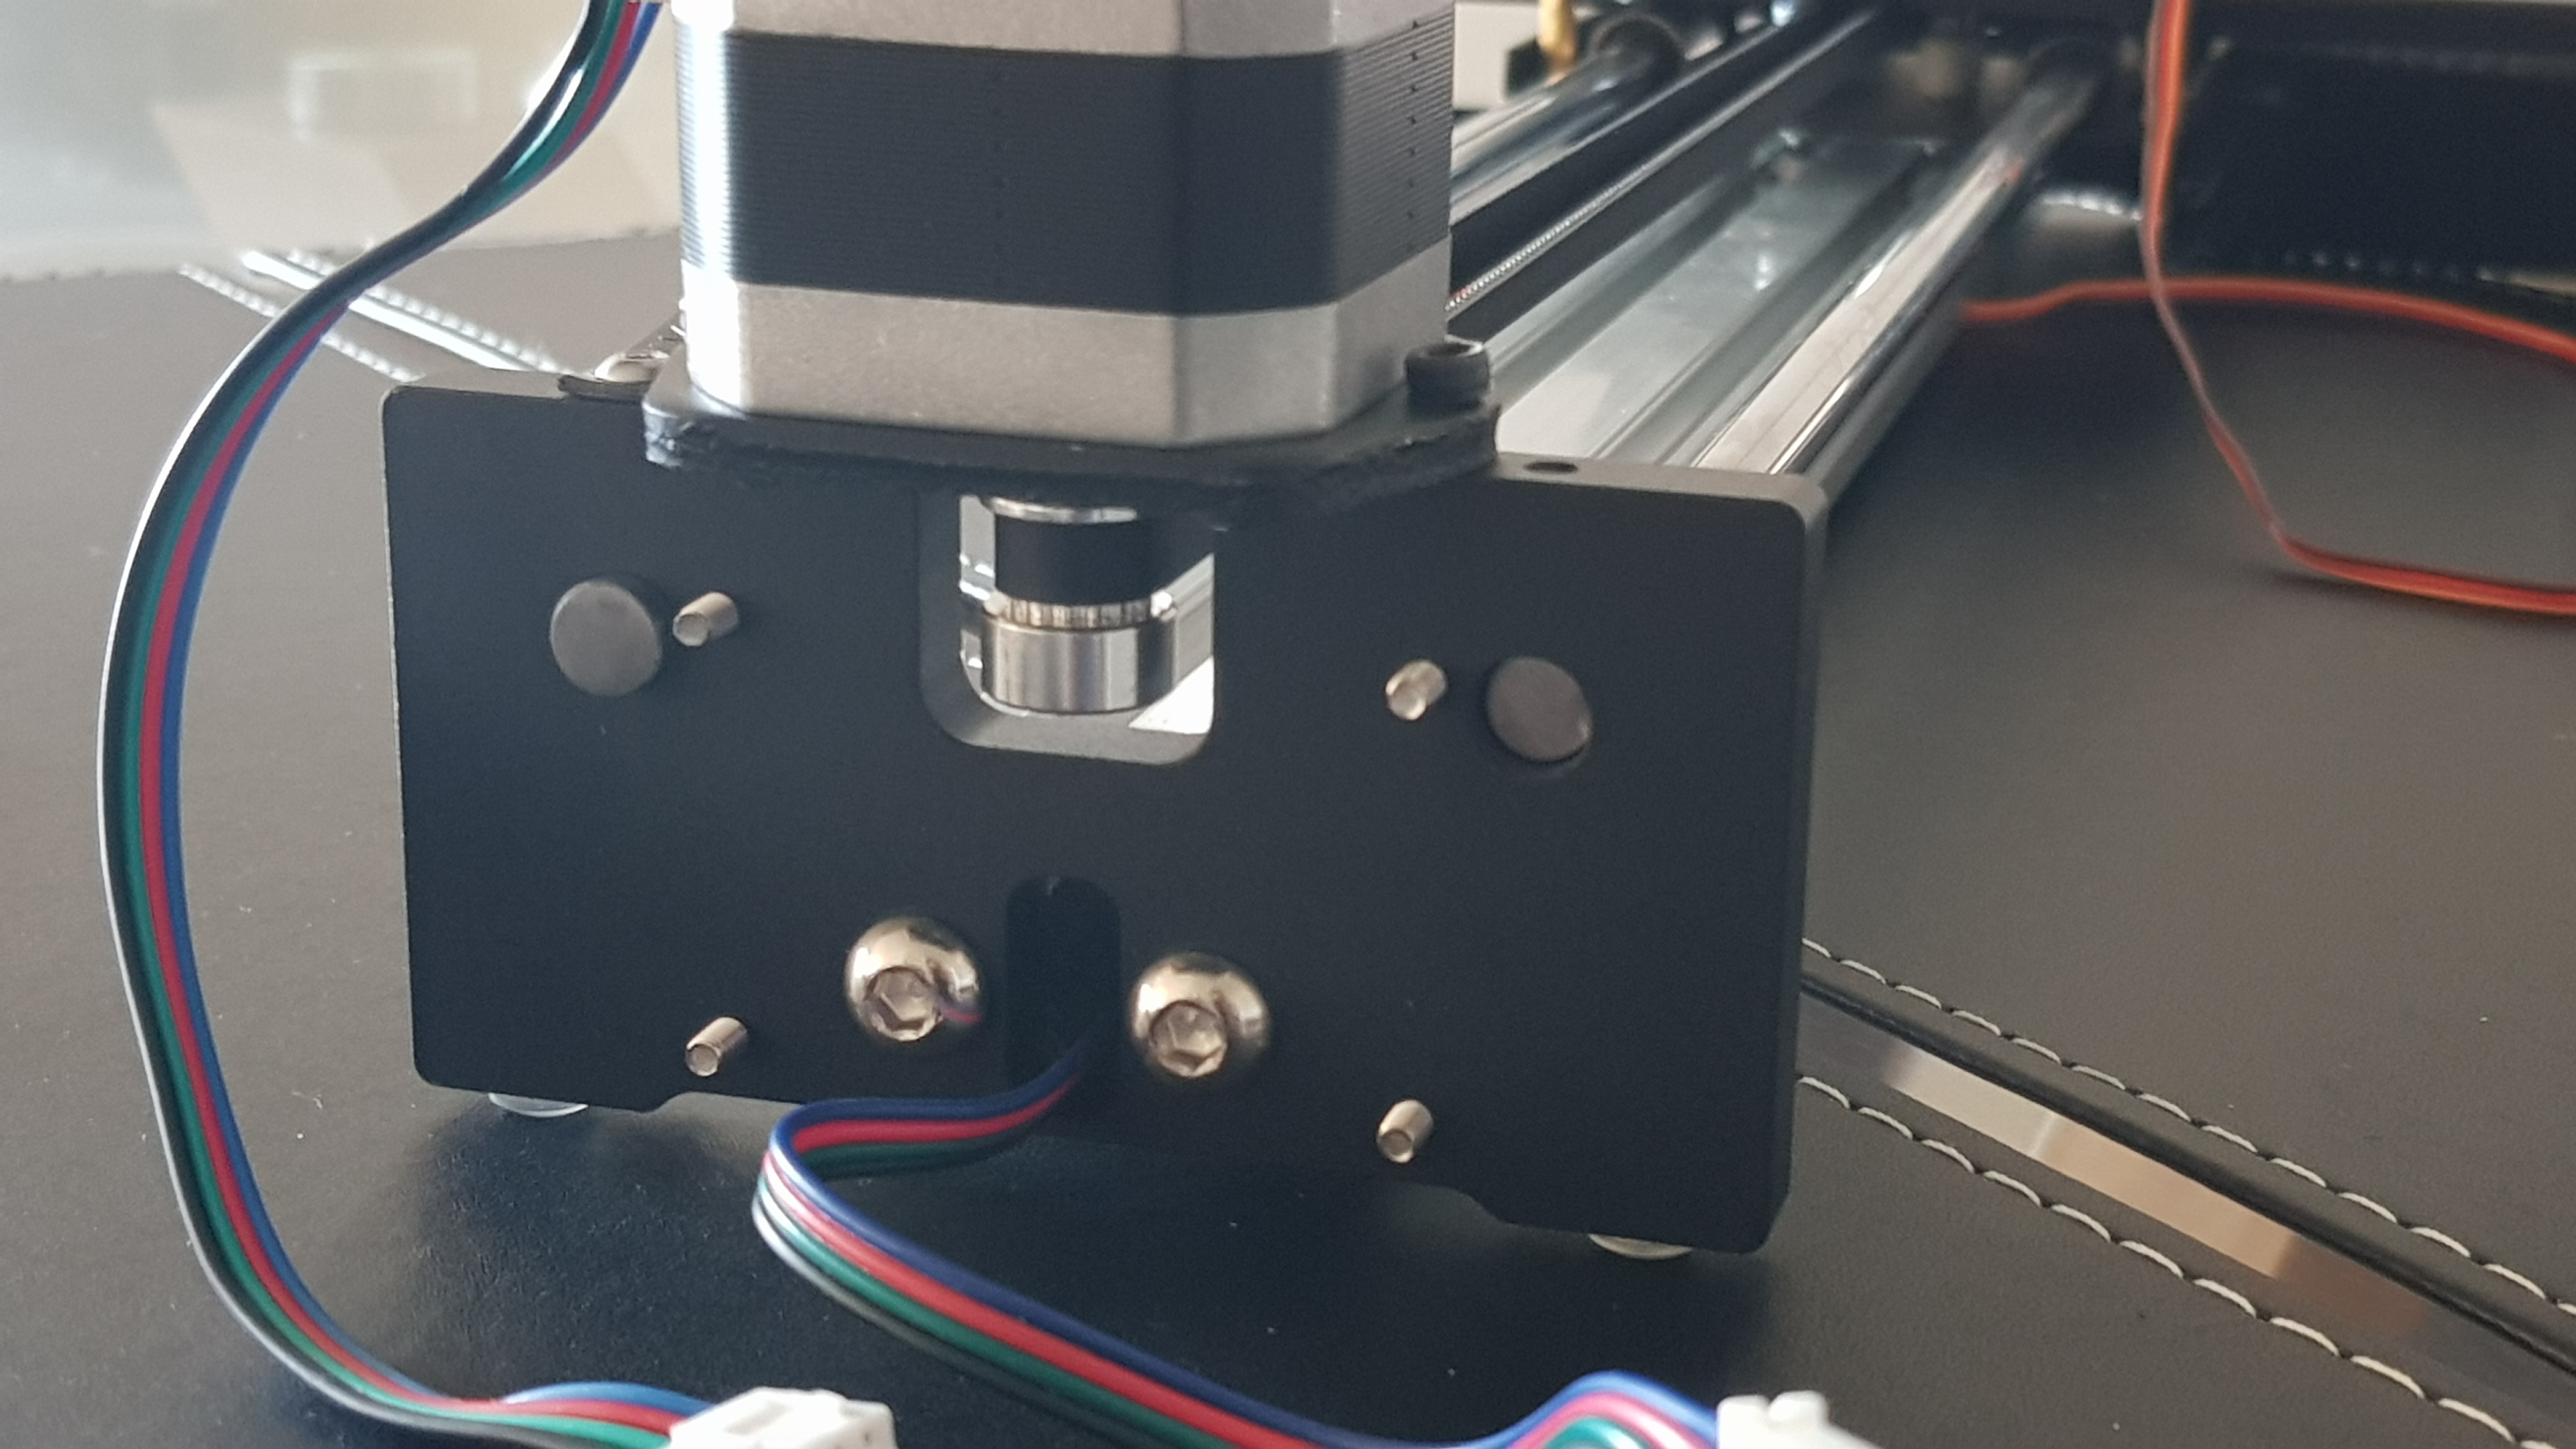
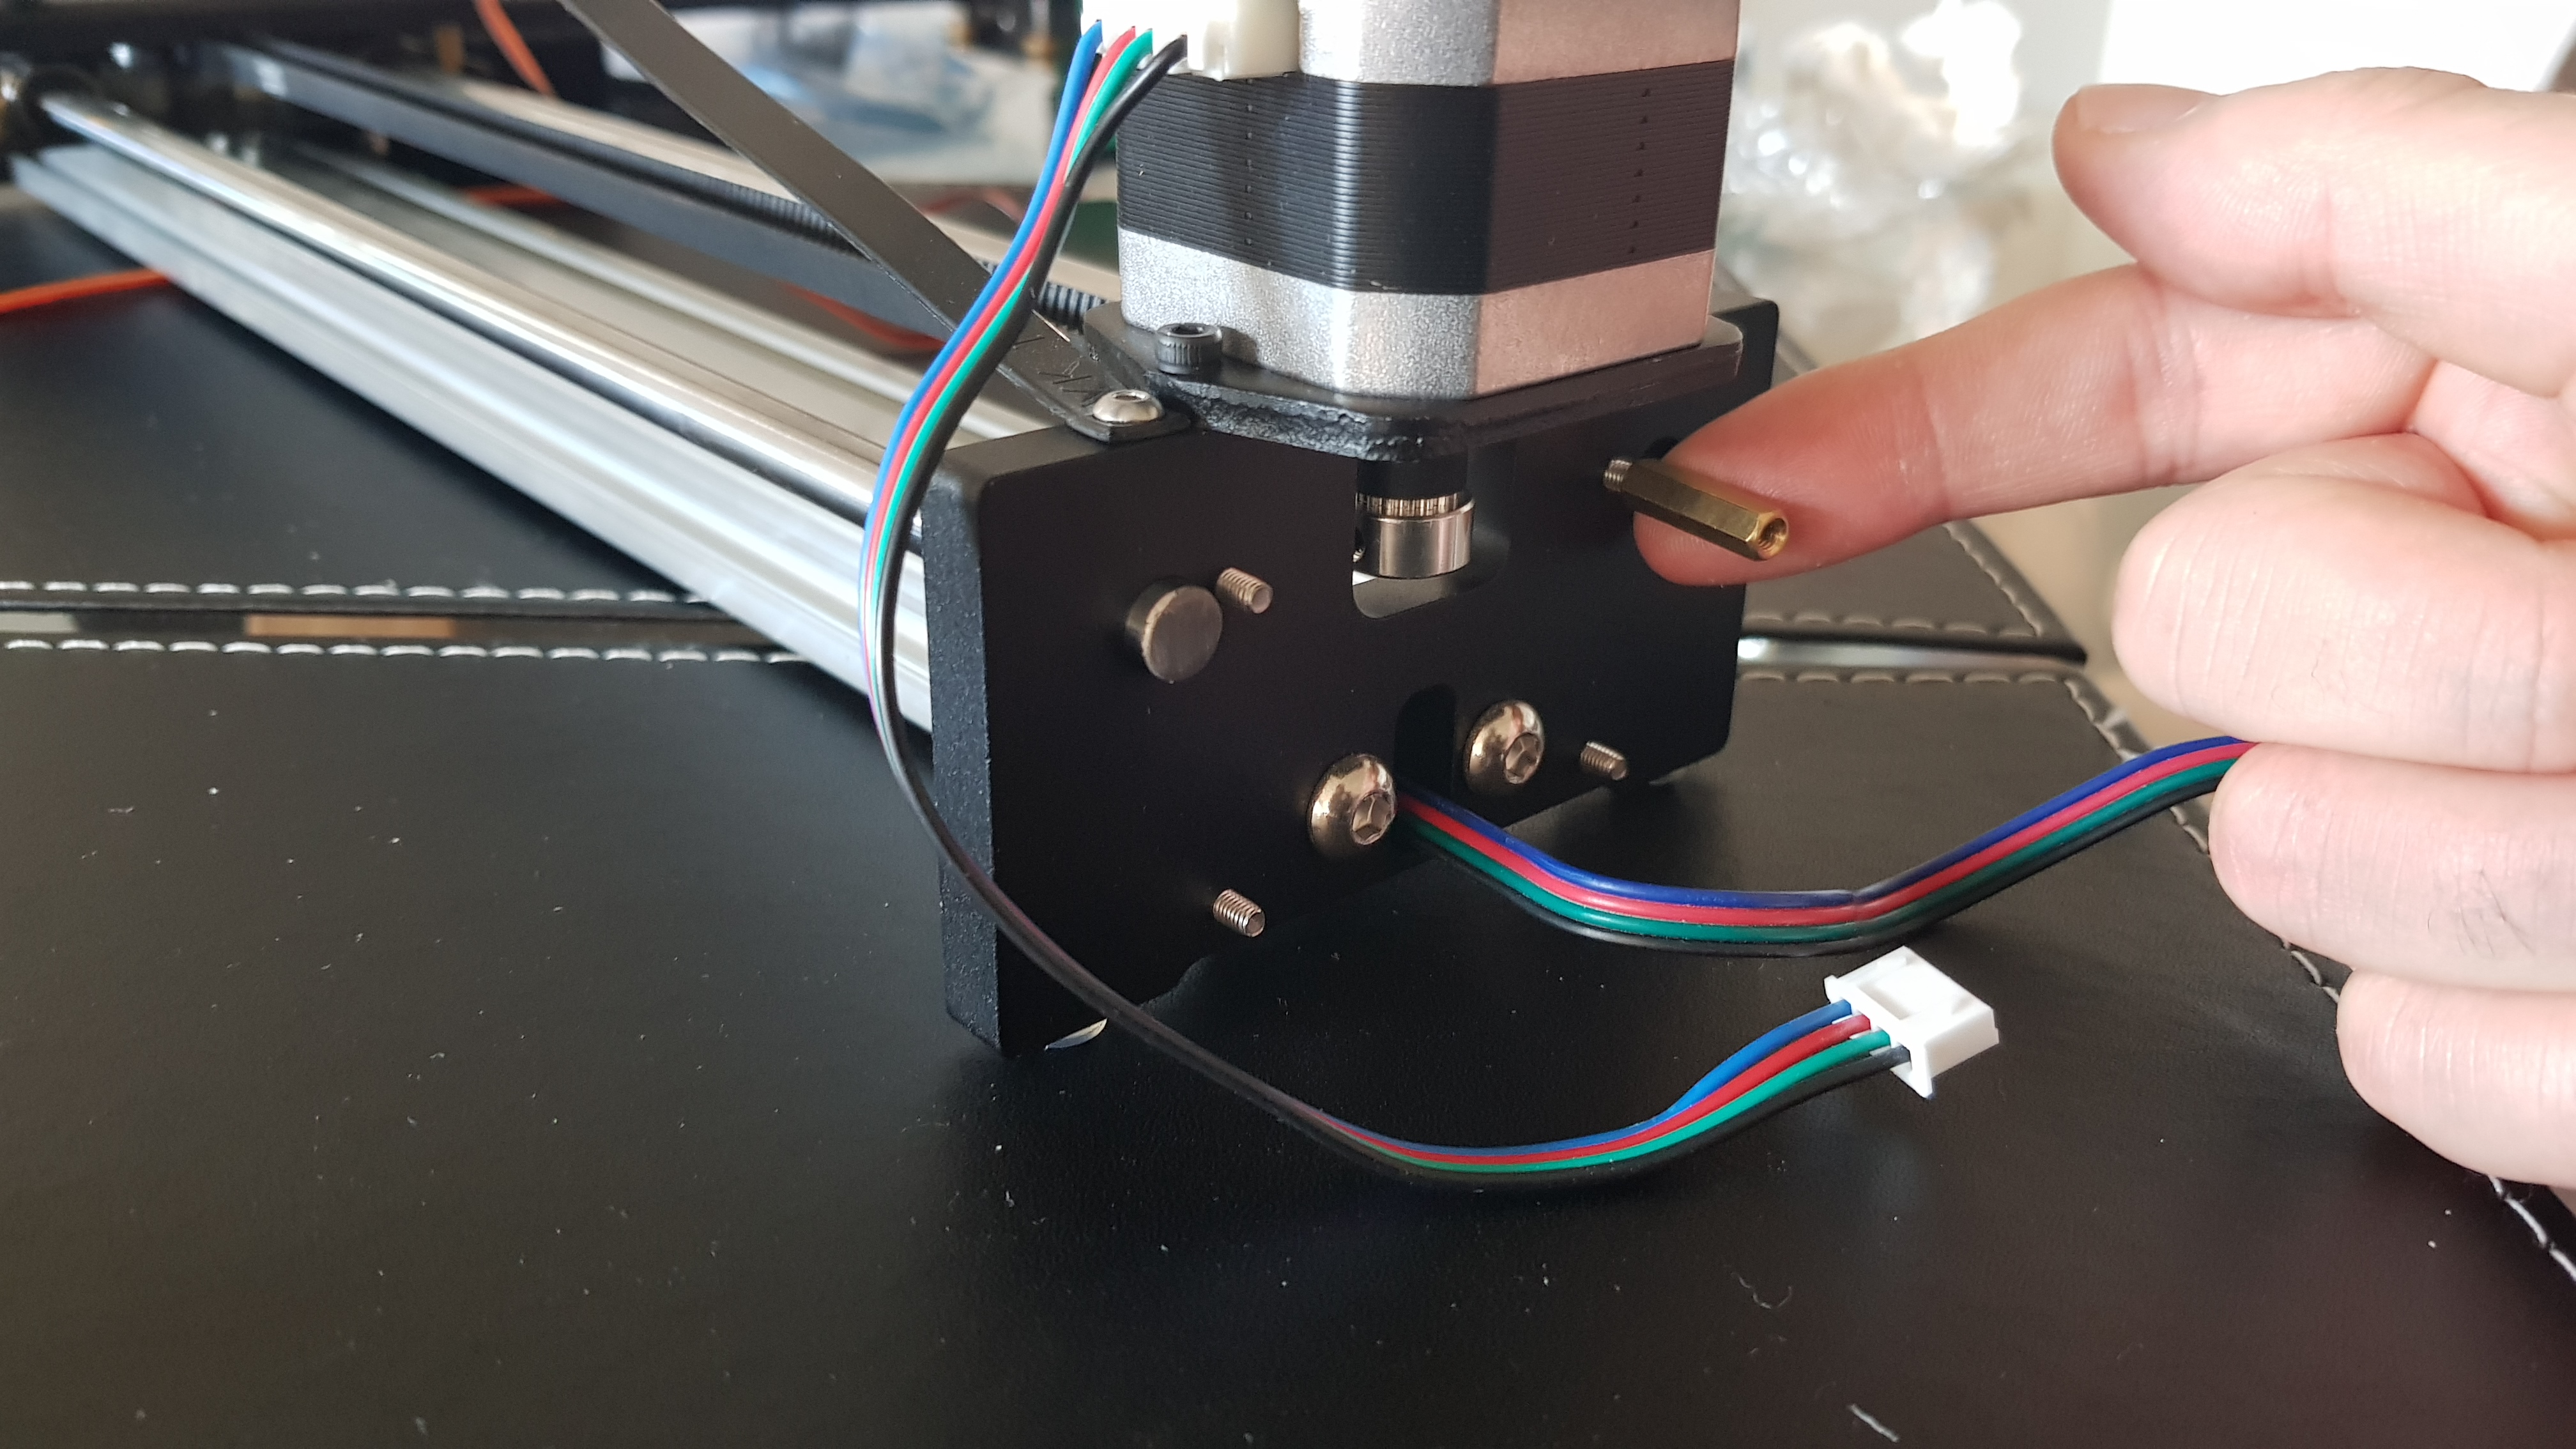
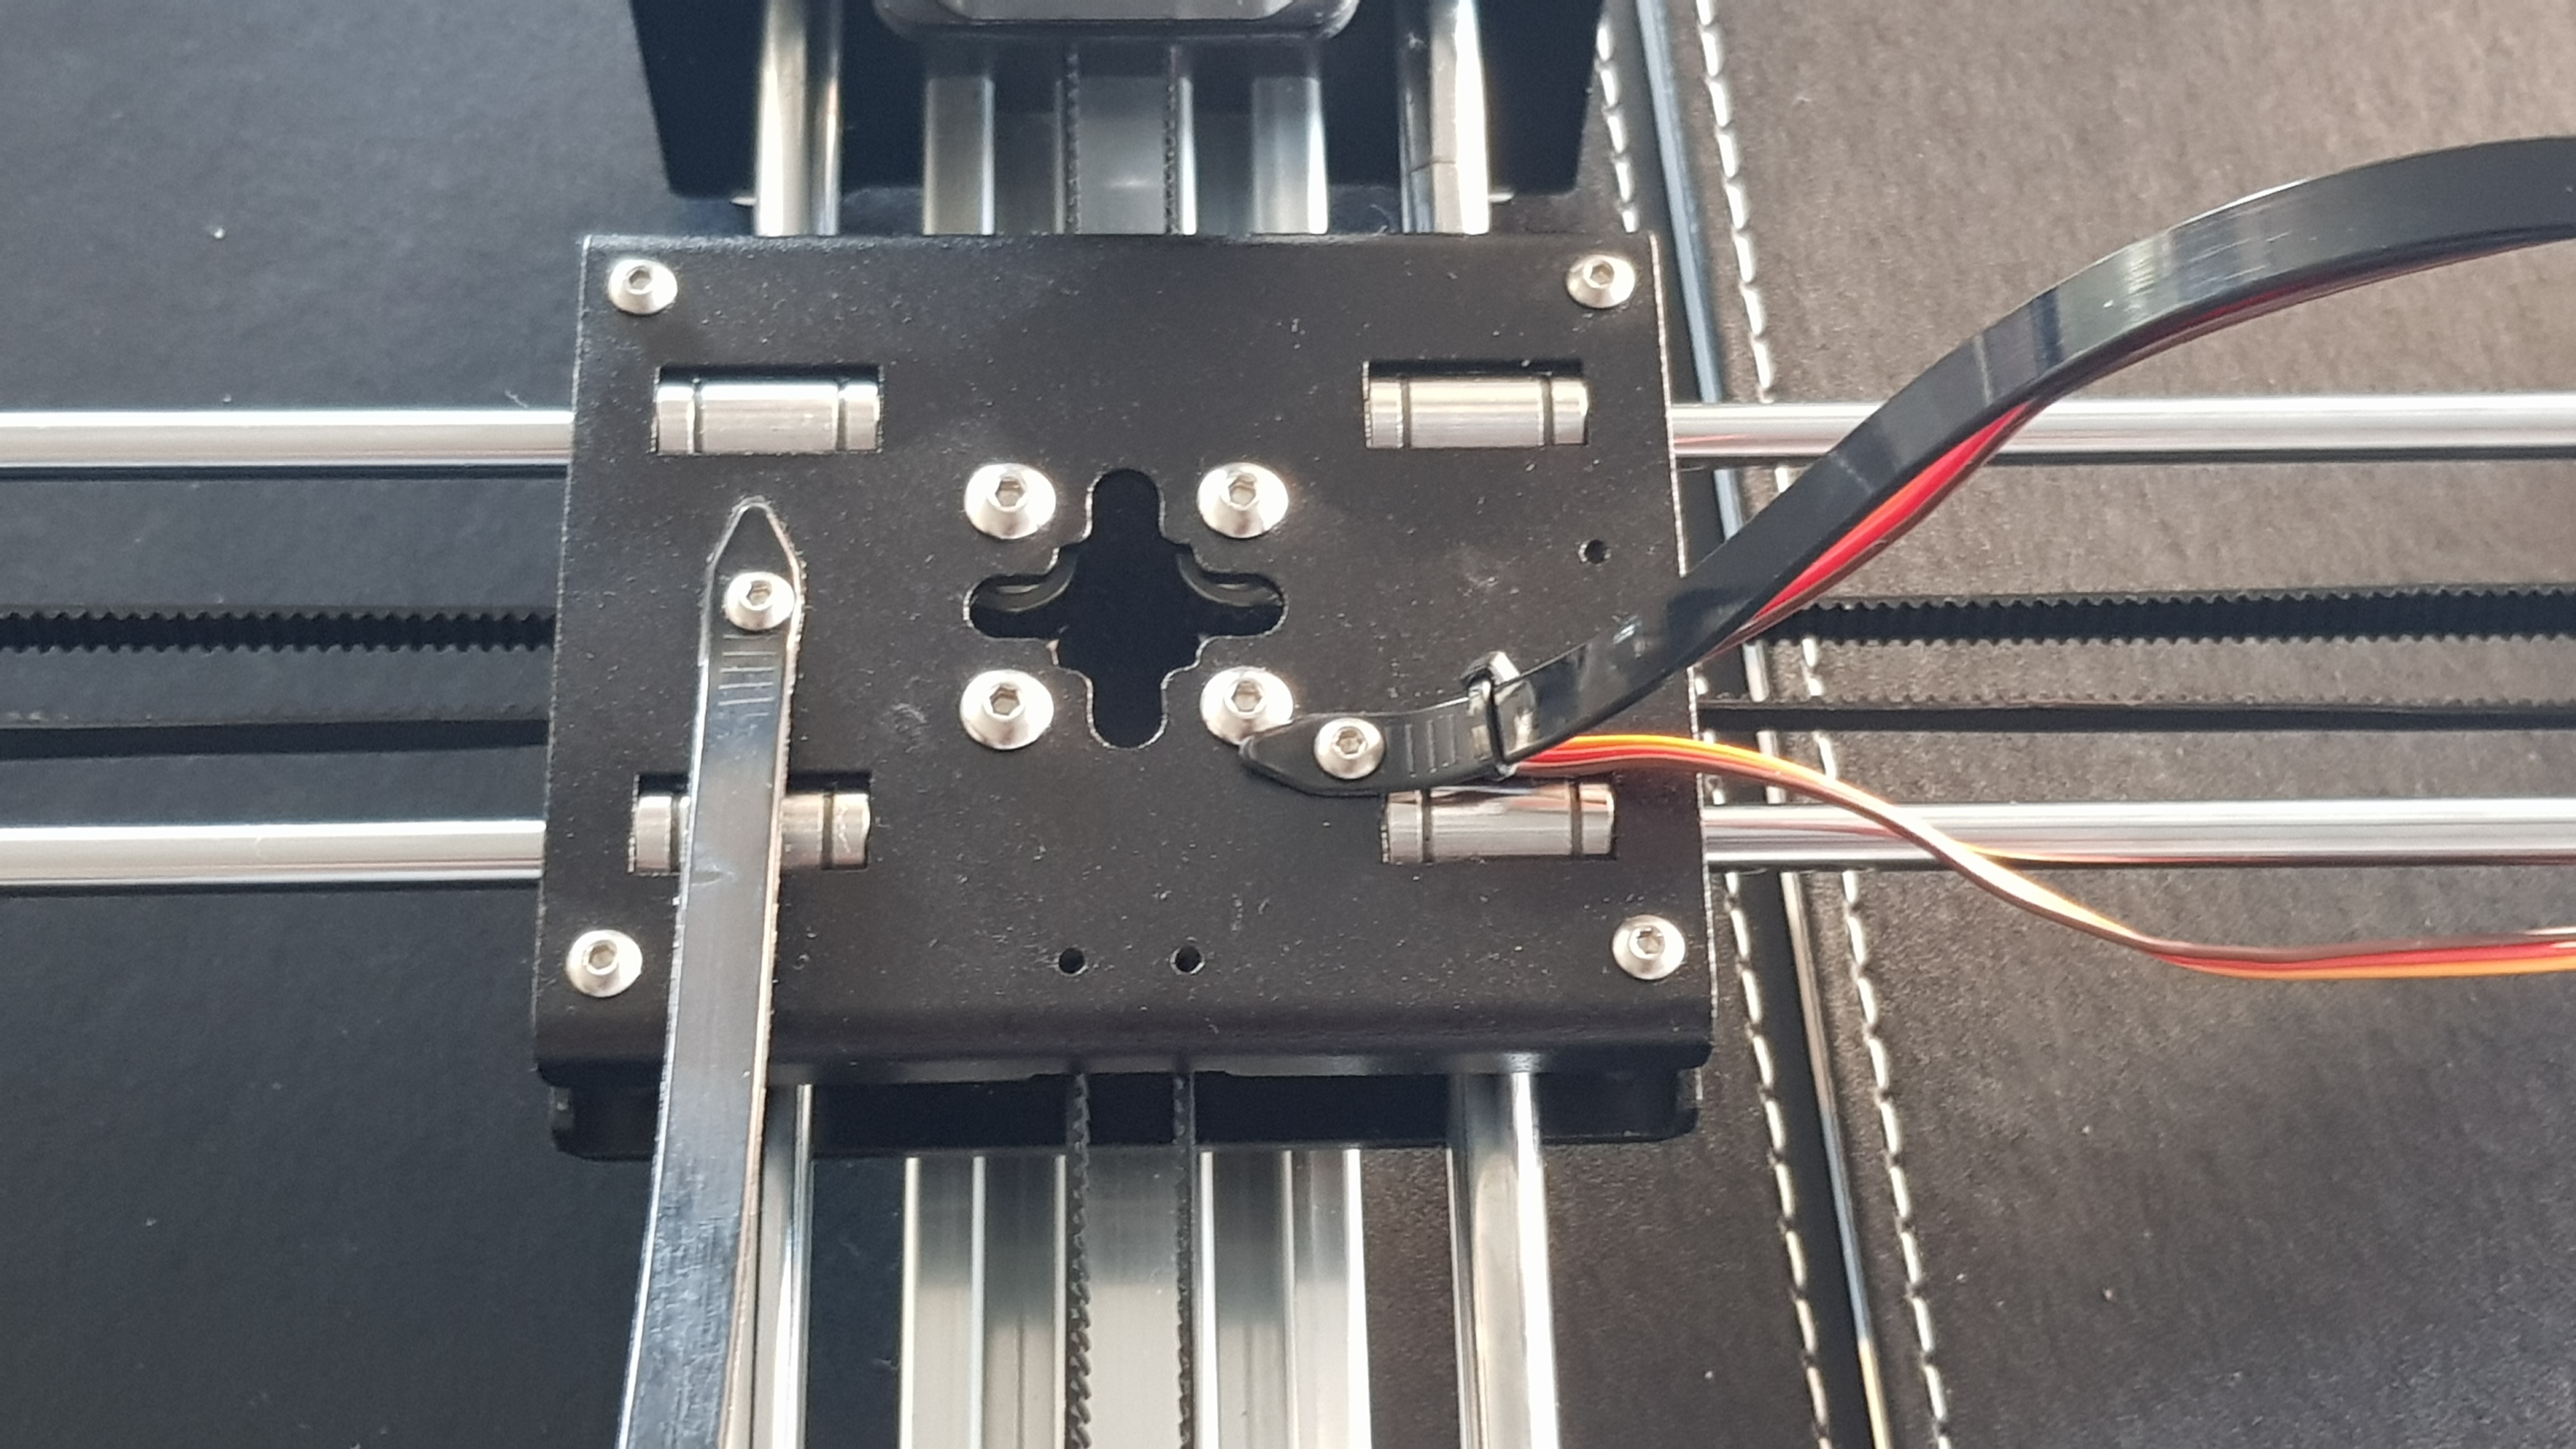
Next, we slide the carrier that holds the pen/workpiece in the X axis, into the linear bearings into the large centre carrier block. Direction matters! Make sure it is the right way up, with the servo higher than the centre carrier and the cable guide on top, as shown below.
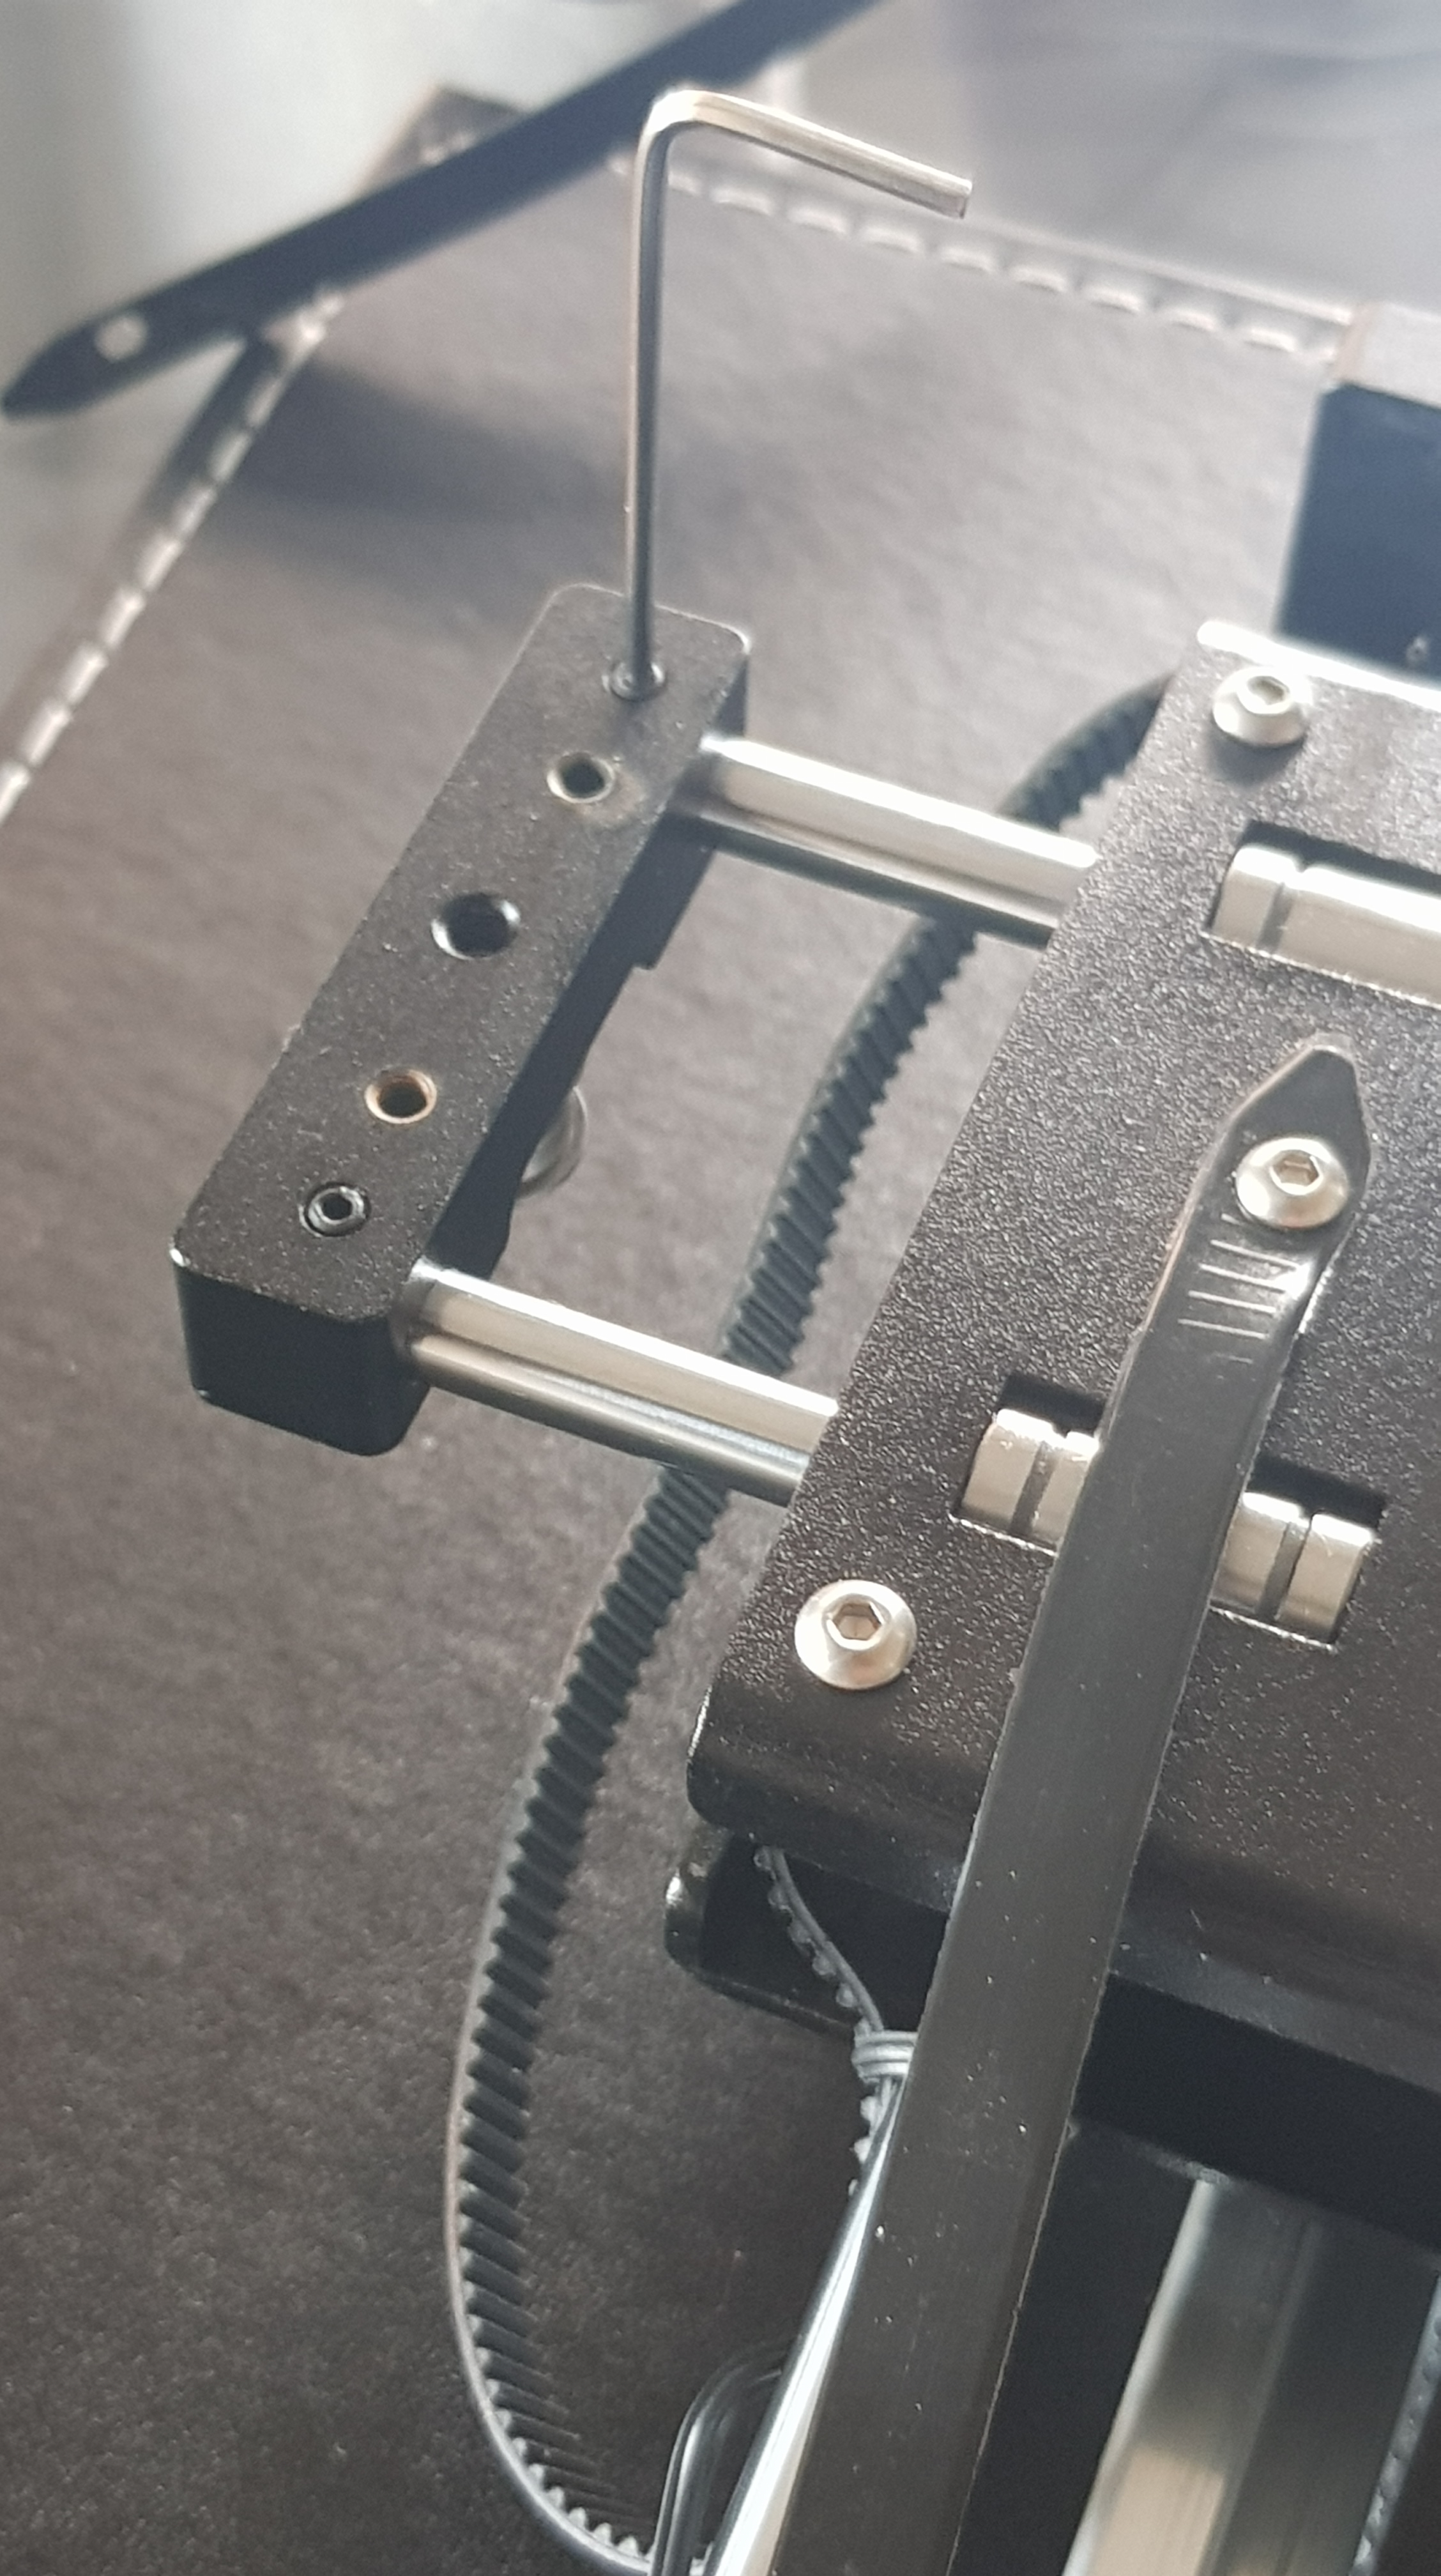
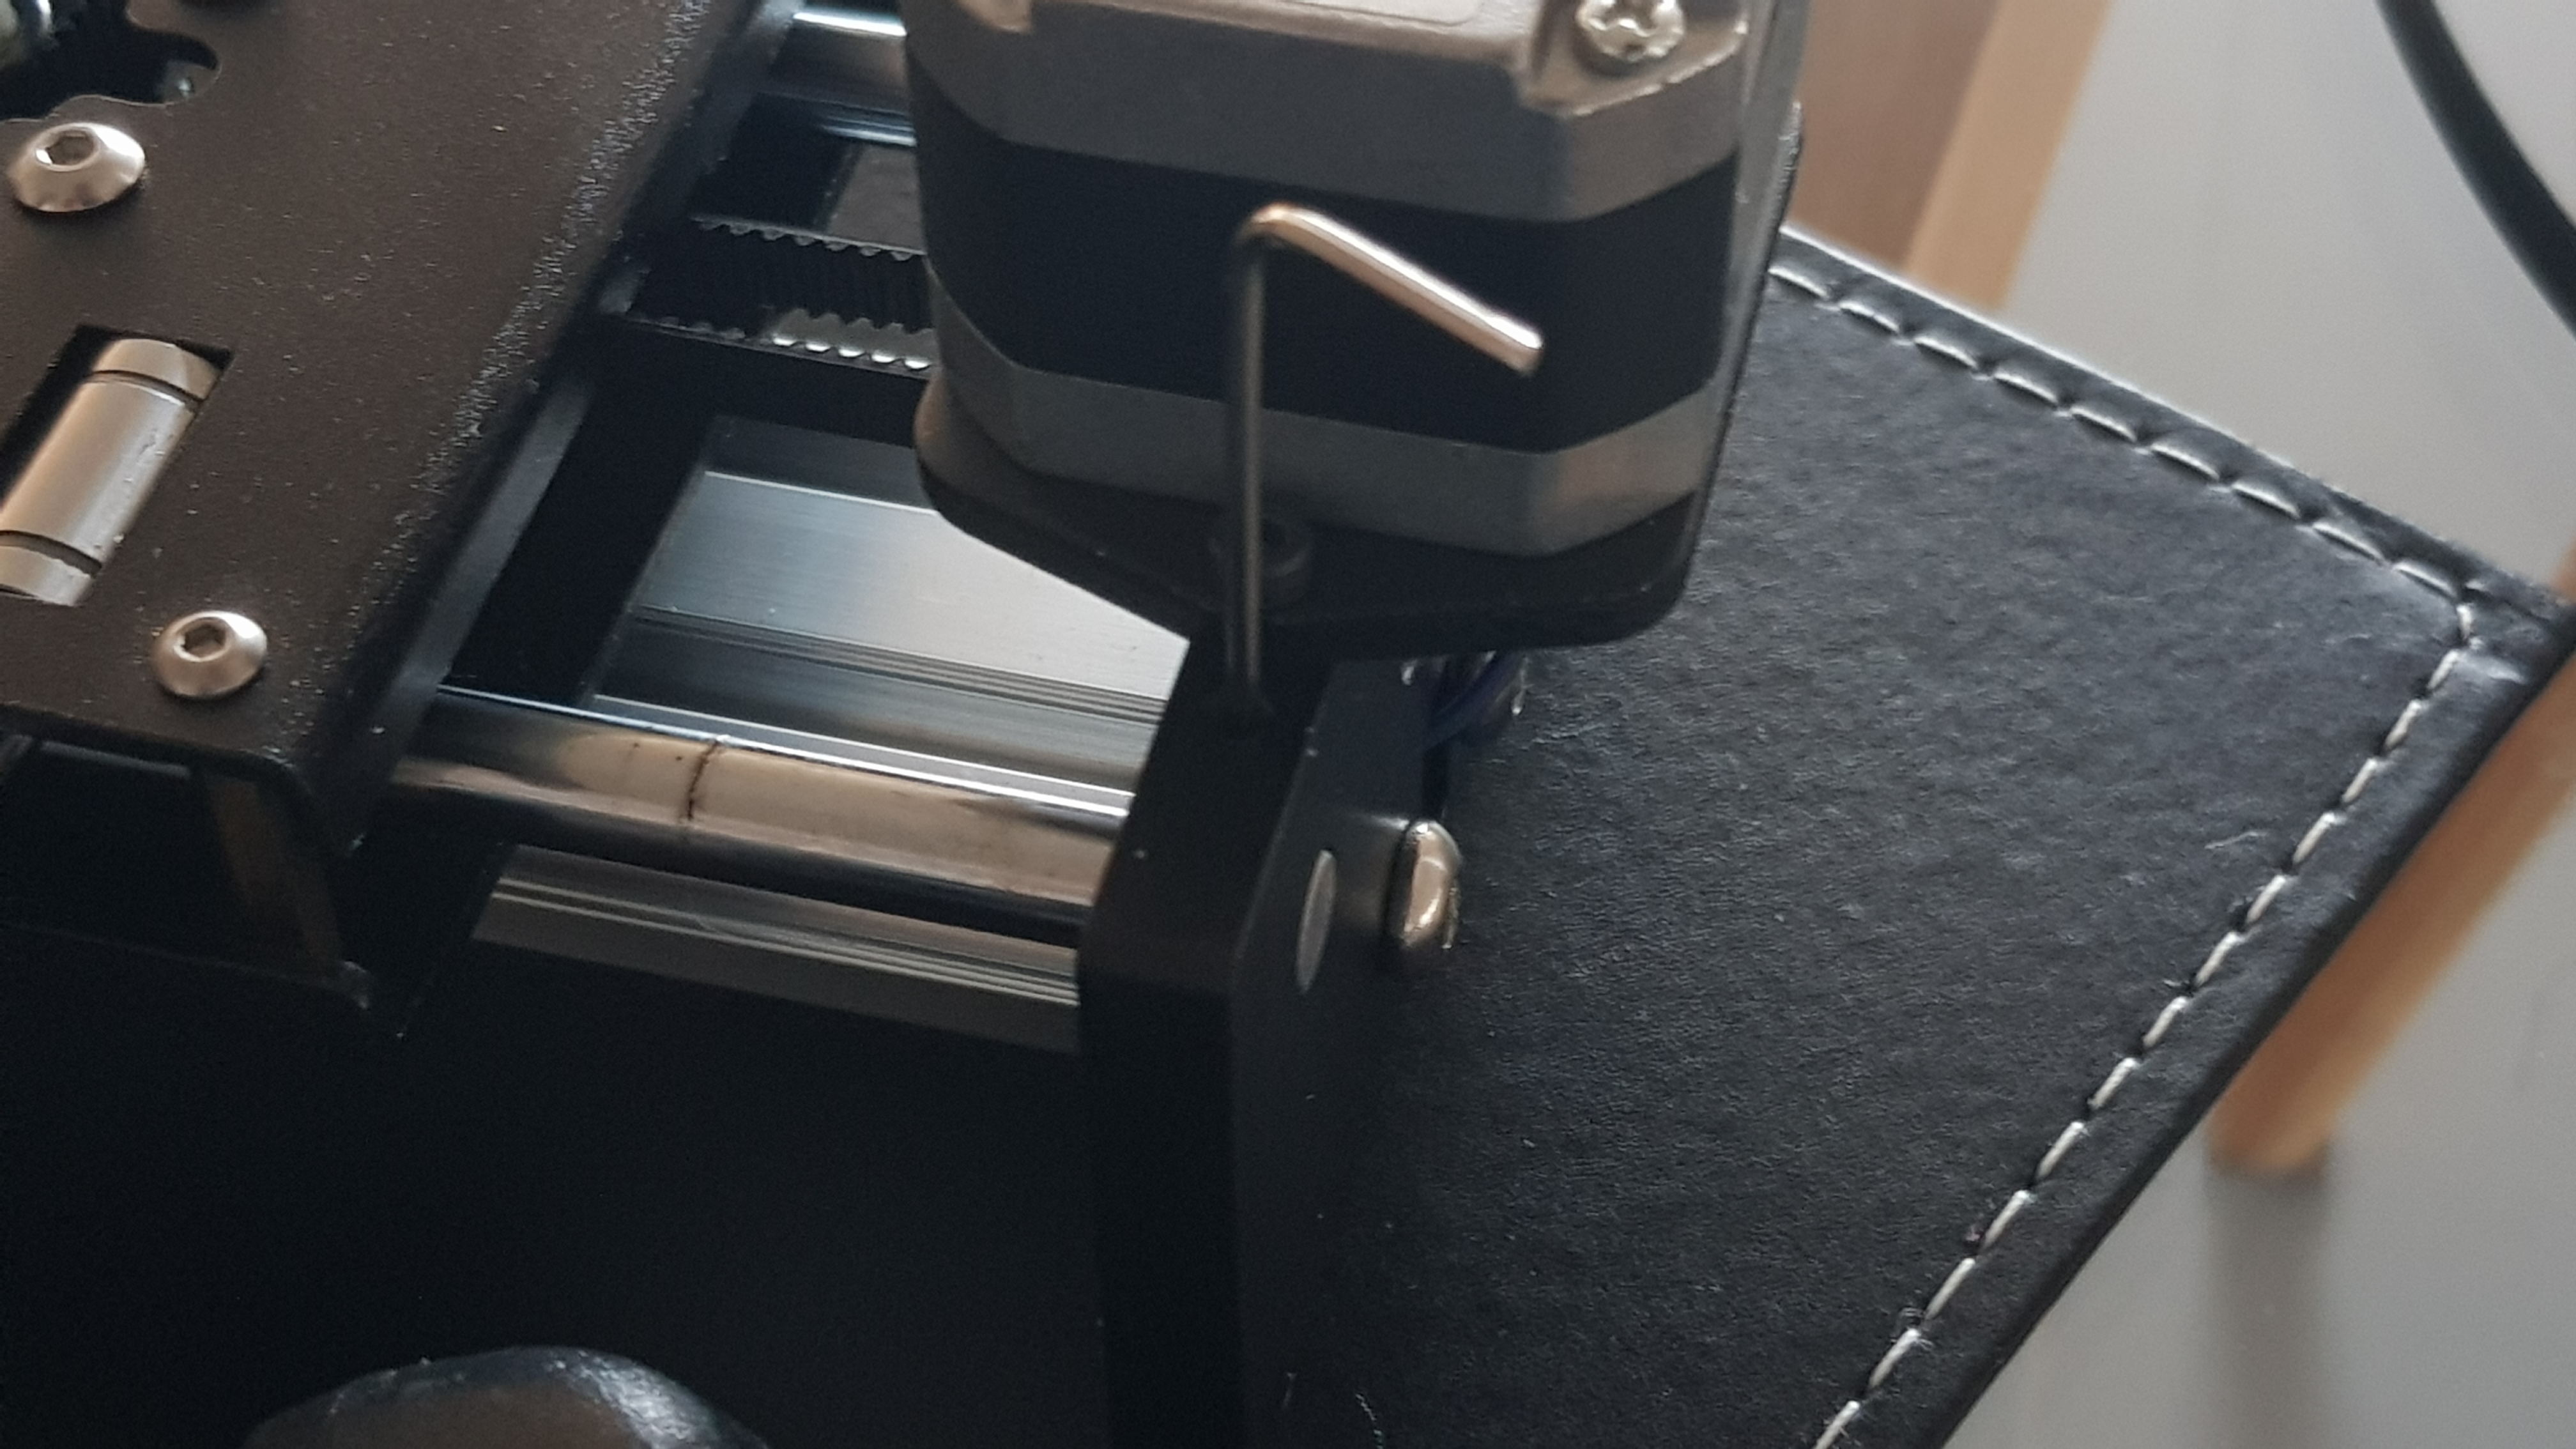
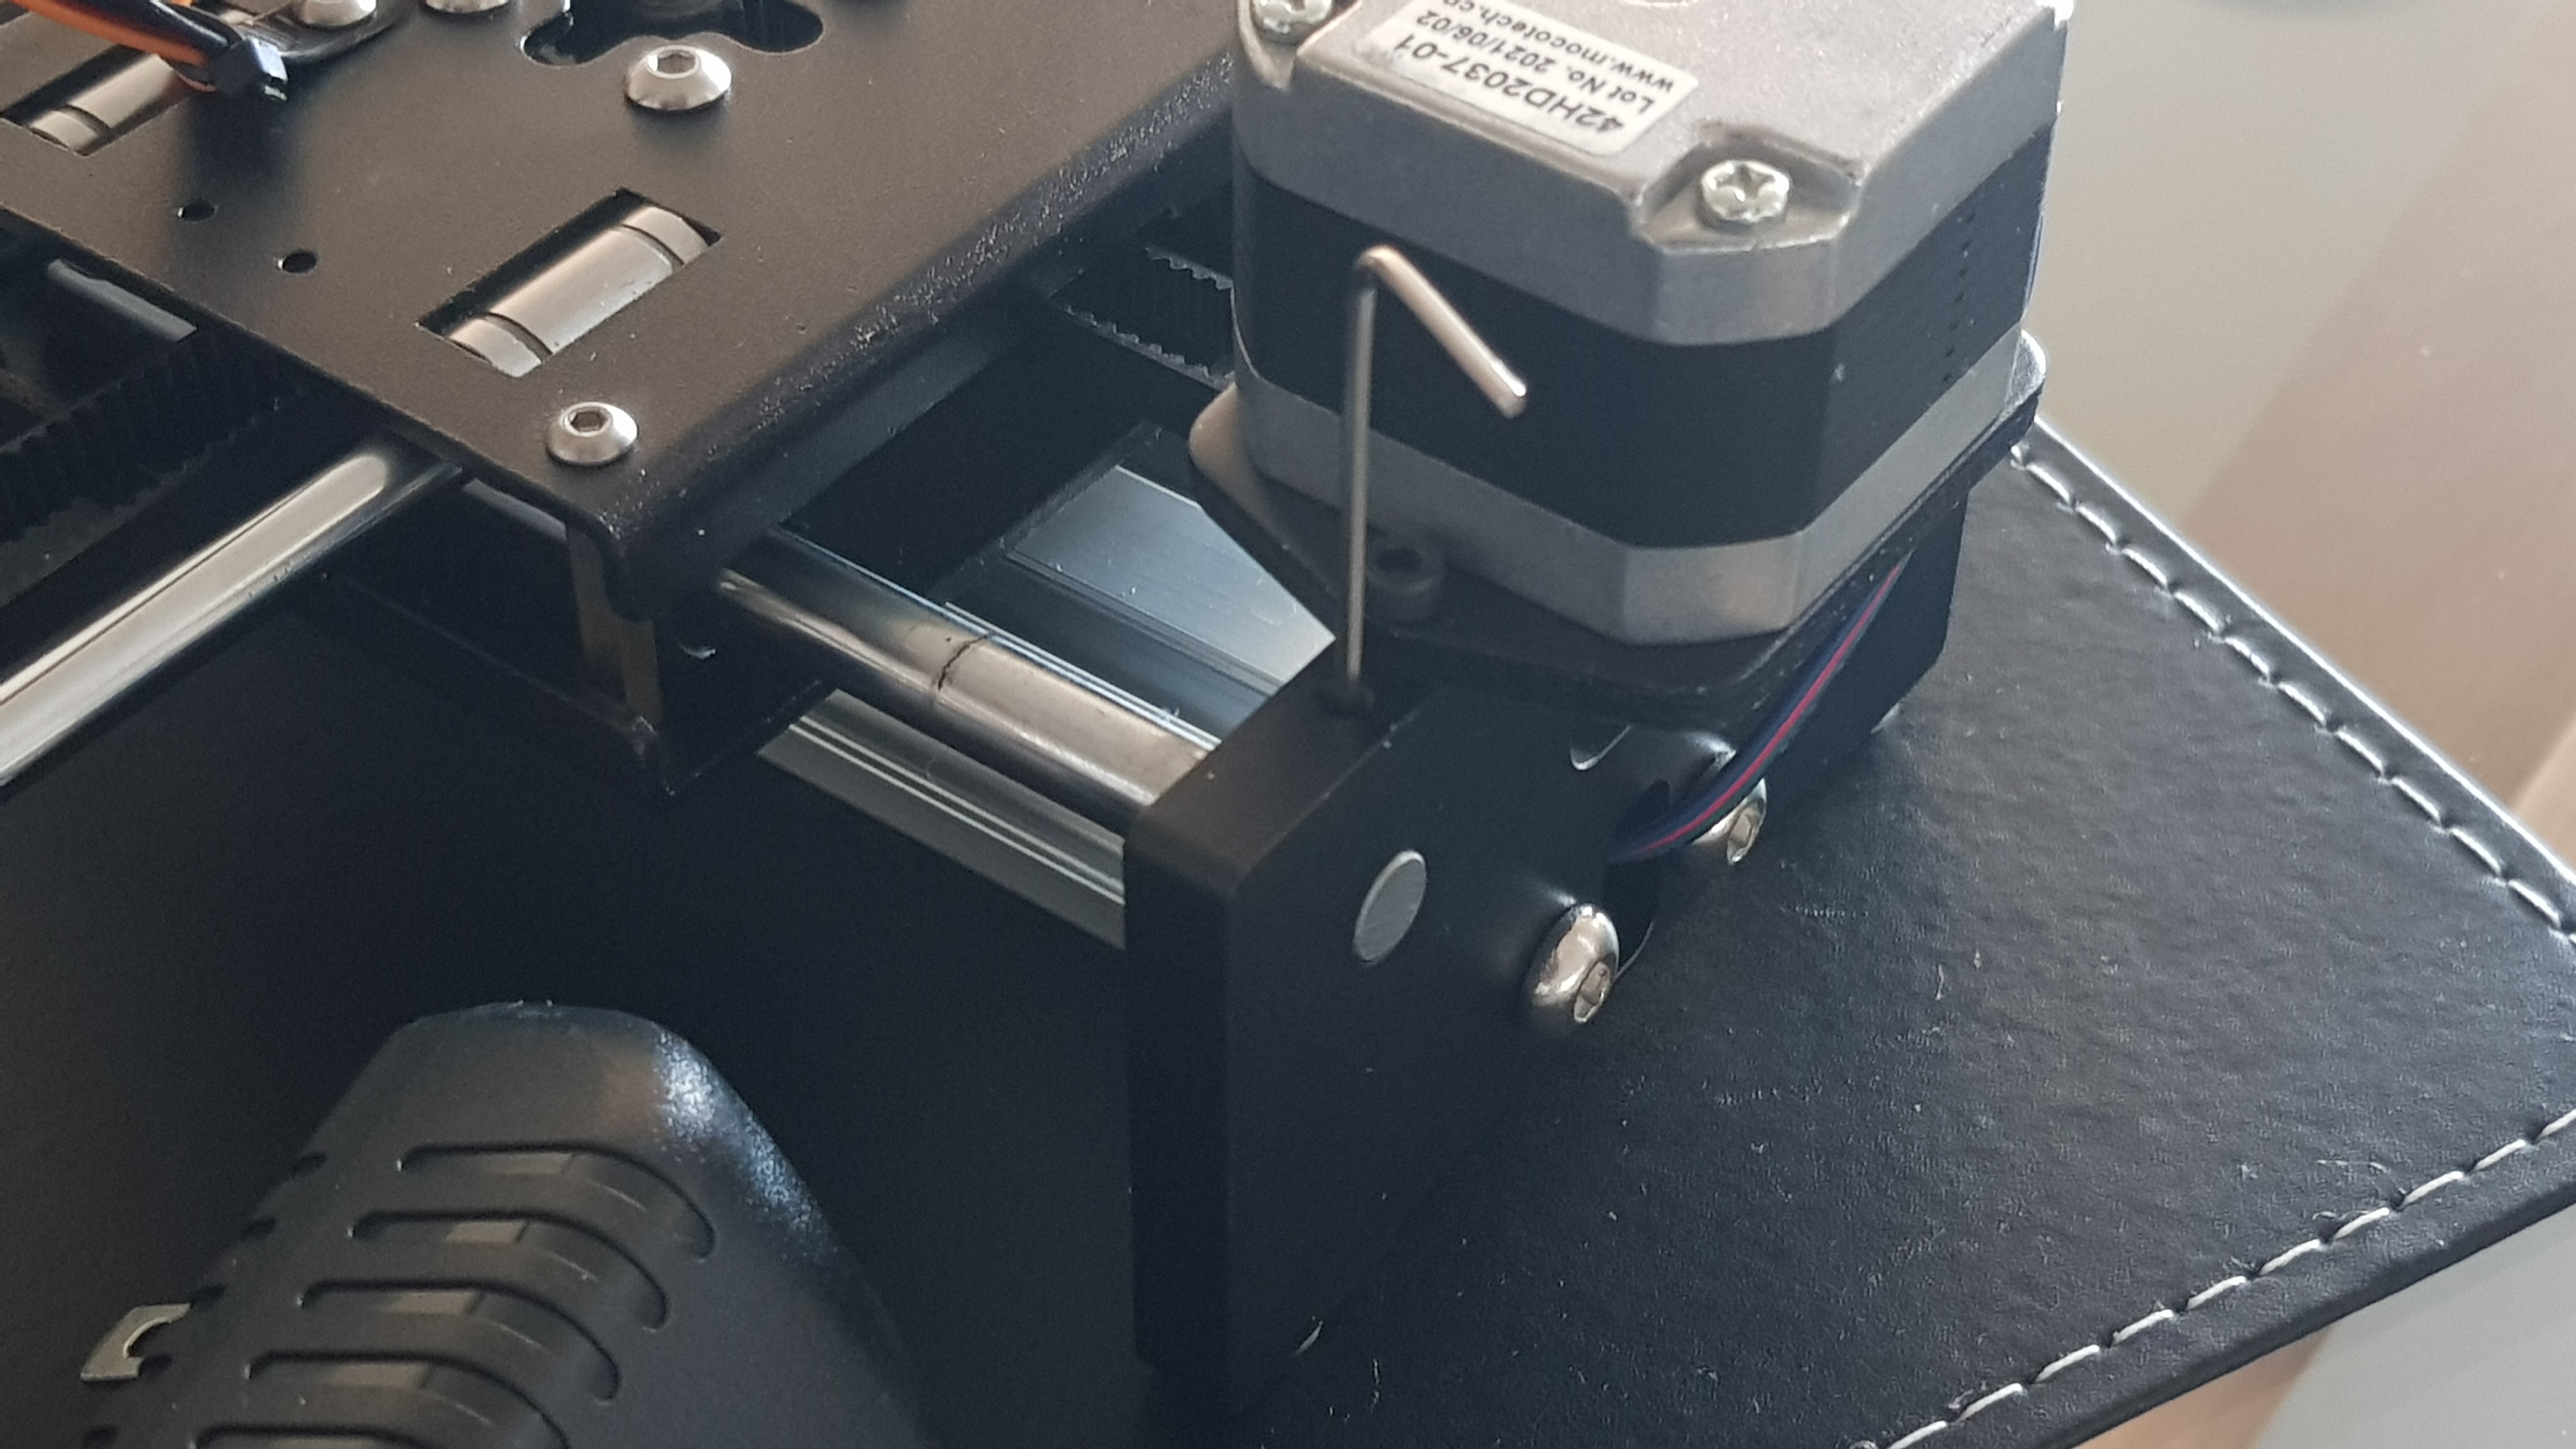
Now we secure the pulley block onto the free end of the X axis carrier arm and loop the GT belt protruding on the free end’s side of the centre block. Secure with the recessed screws on the top of the block using the provided allen key. Make sure it is the right way up and the notches on the belt are contacting the pulley.
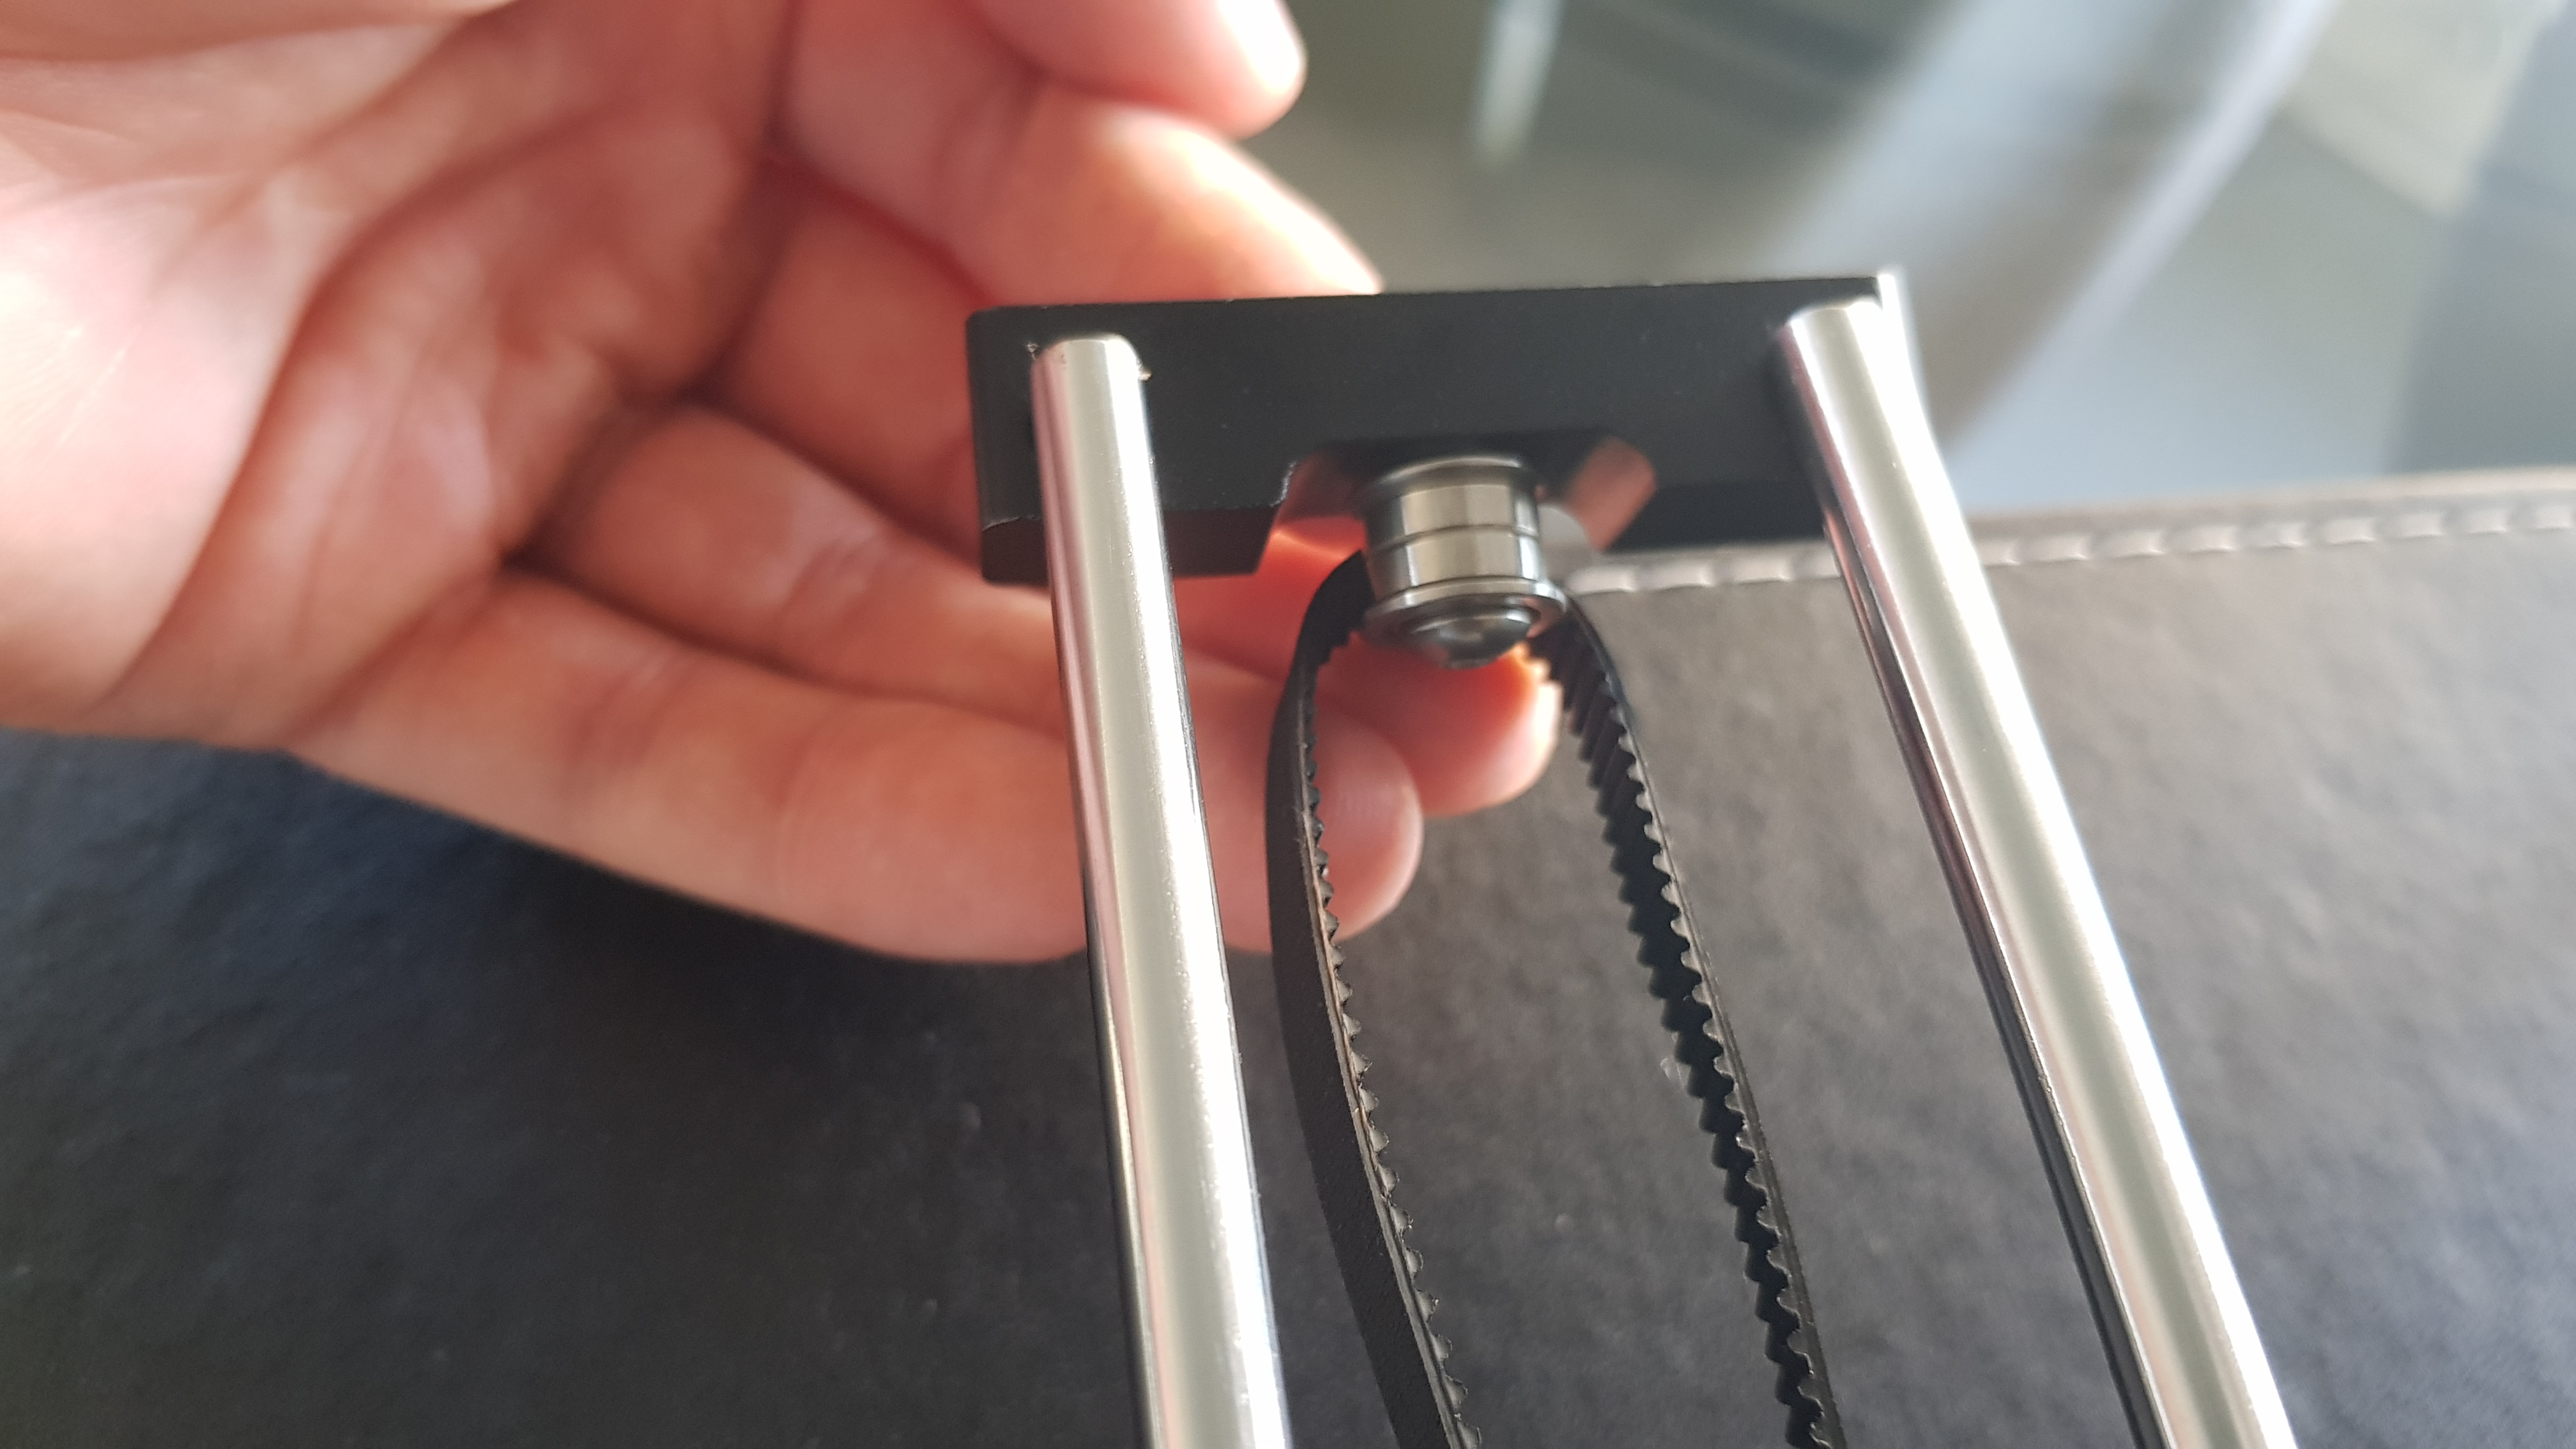
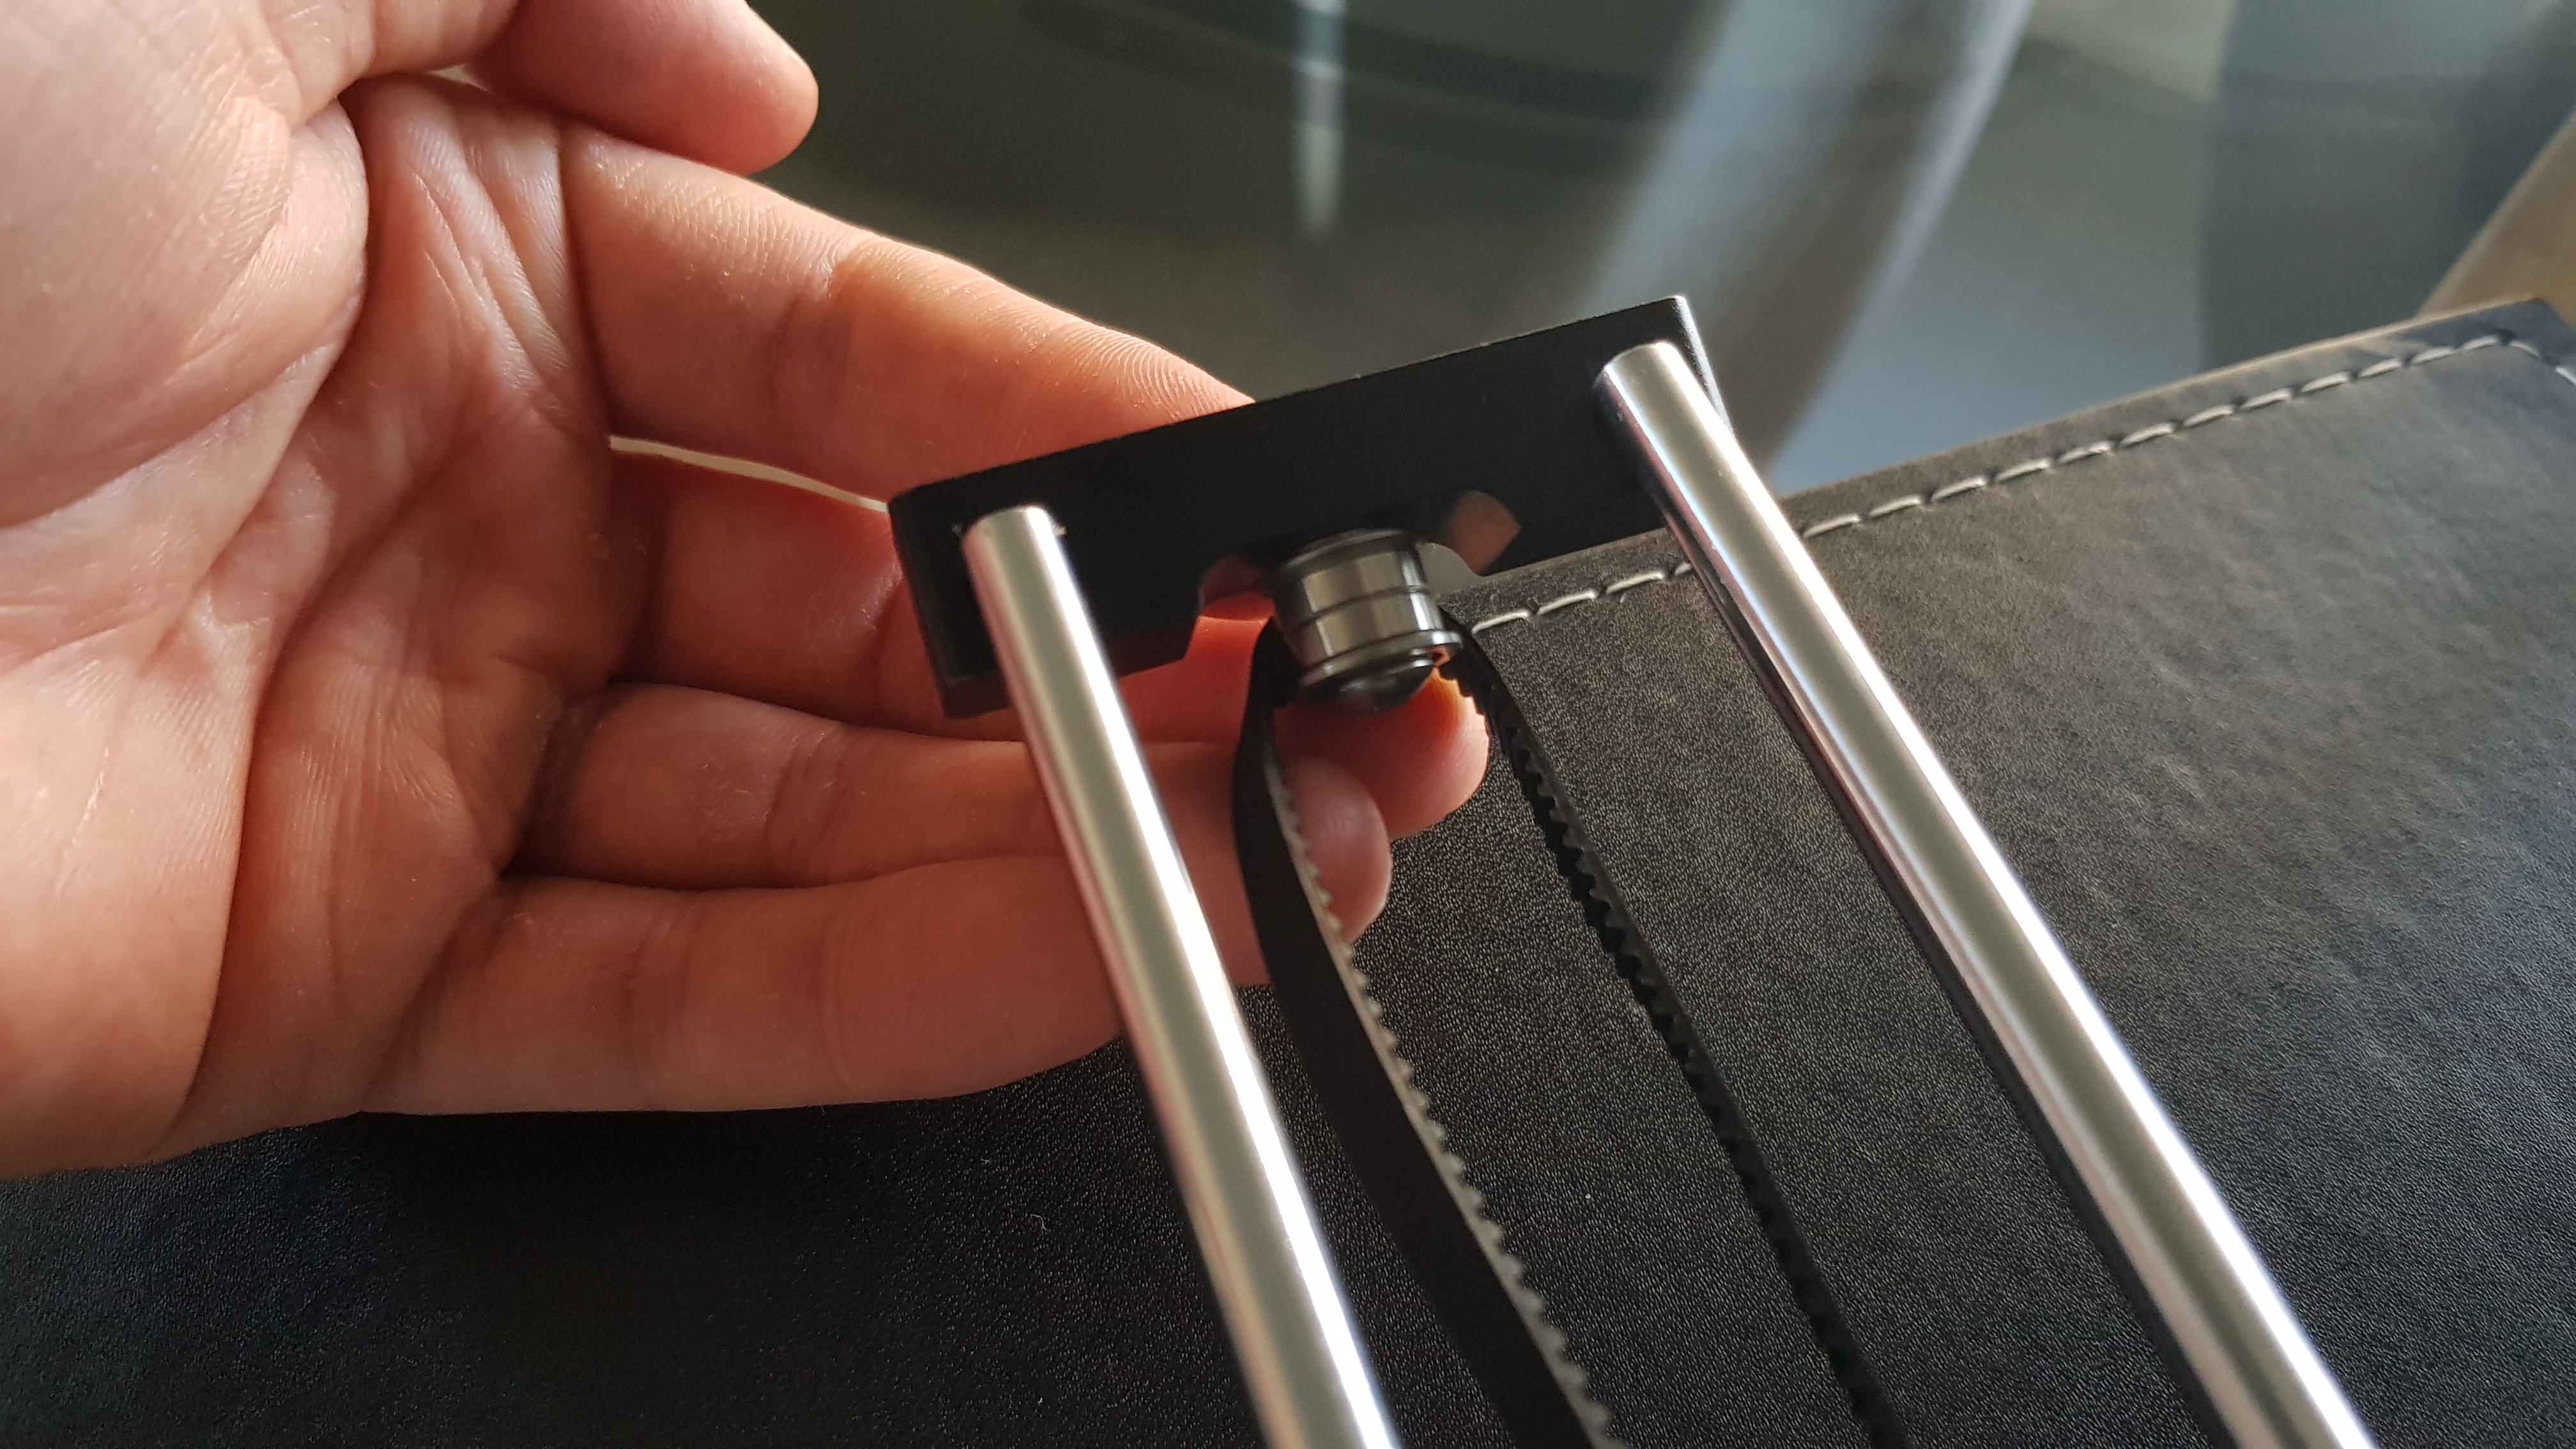
Now lets tidy up the belts. Ensure that all belts have their notched side facing their respective pulleys, these will already be where they need to be, we are just making sure none are twisted. Pay close attention to the centre carrier and make sure all belts are pull tight and are contacting their respective pulleys.
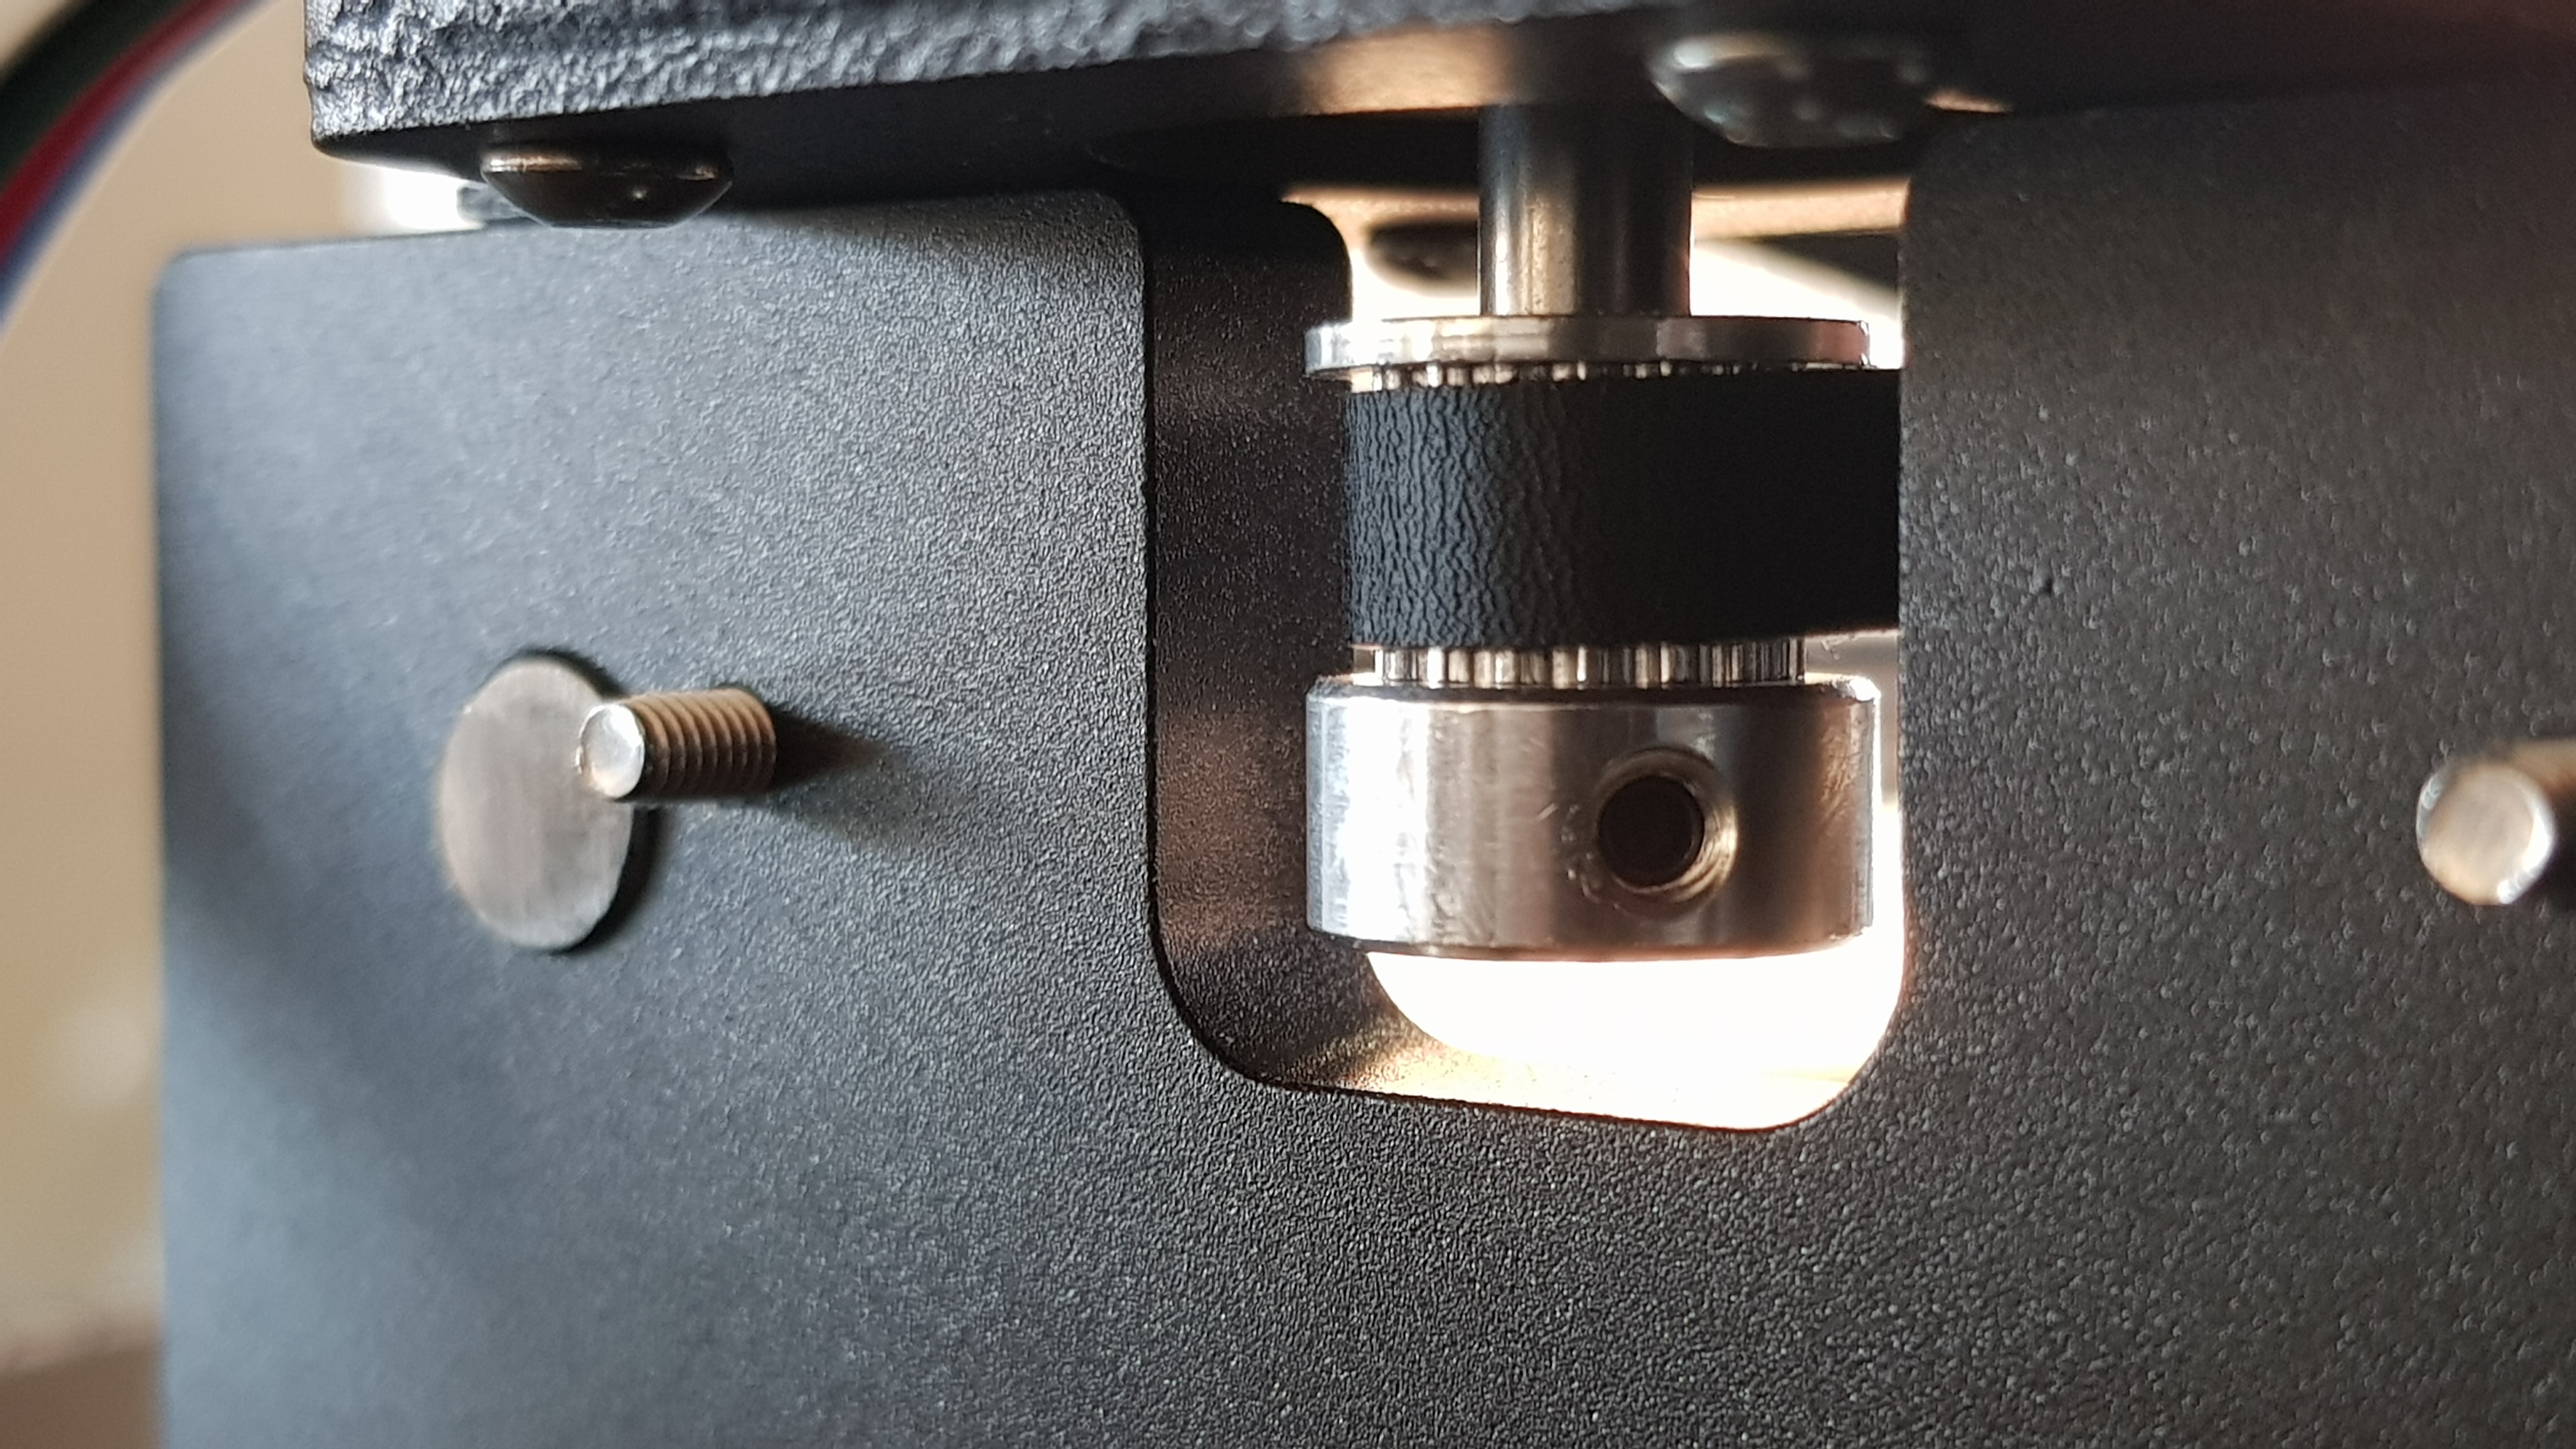
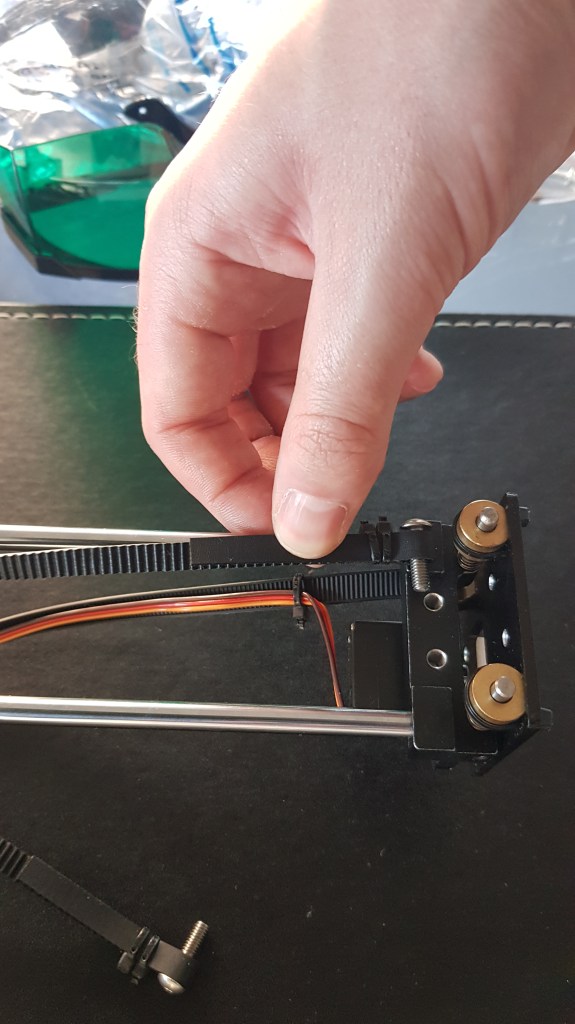
Time to get some tension going. This was the only tricky part of the assembly, only because we need to keep the belt very tight. Turn your IDraw upside down, take the two ends of the belt and screw them into the block on the X axis arm that holds the servo. These are pretensioned, so don’t be afraid to gradually pull on them until the screws alight with their respective holes. Having this belt pretensioned from Uunatek was brilliant, it saved me a lot of time trying to get it right myself.

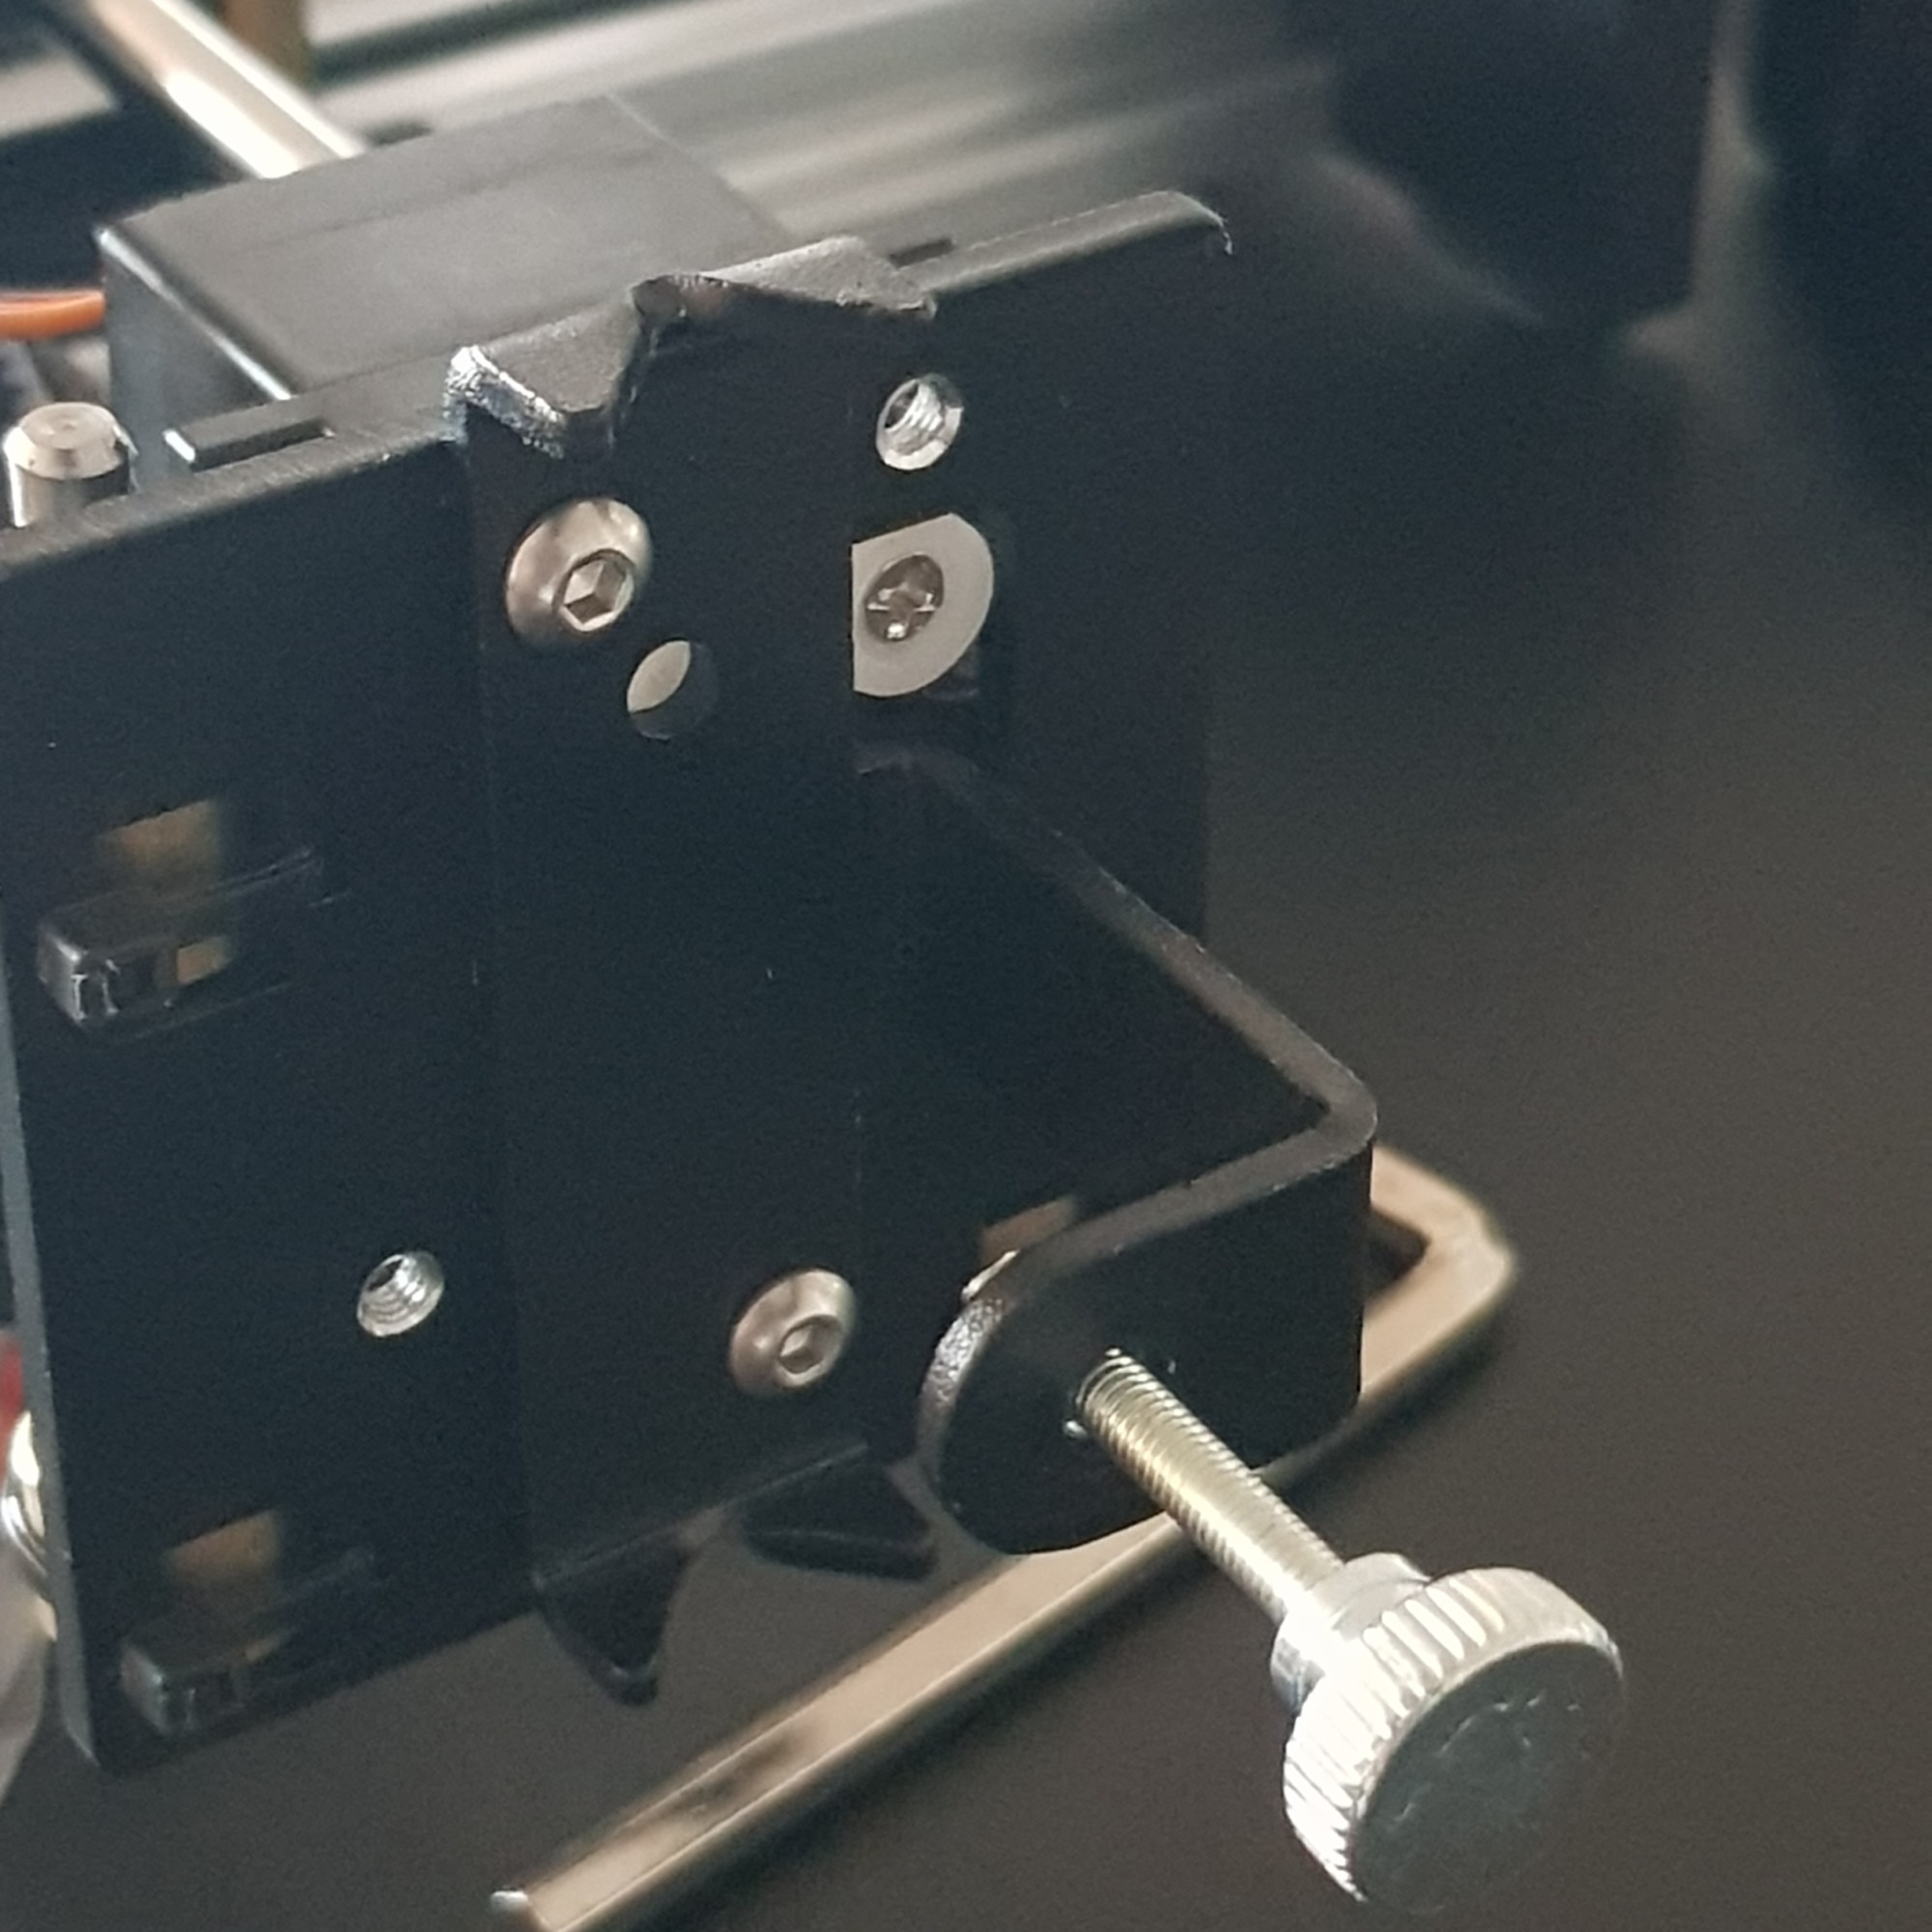
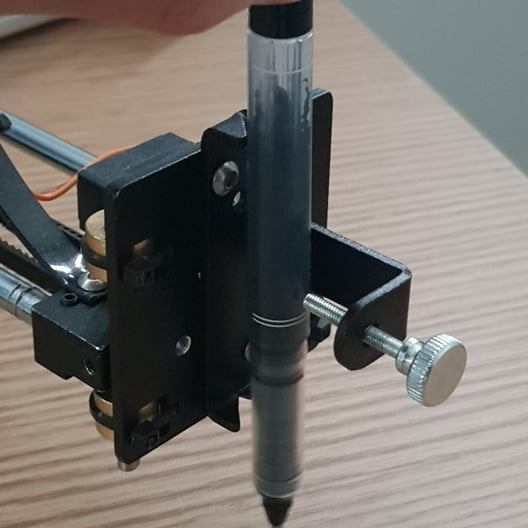
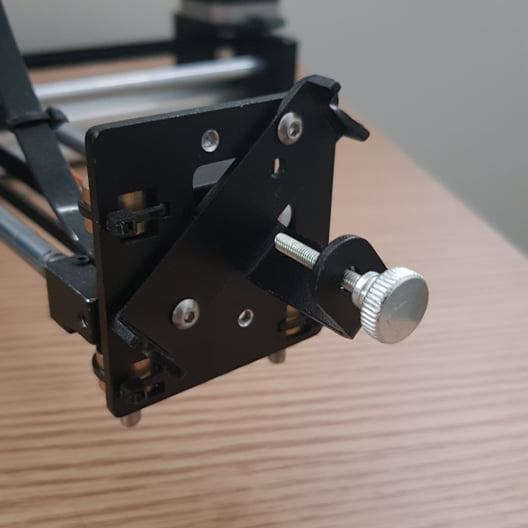
Now we add the pen mount to the servo. There are two configurations, vertical and angled, depending on your writing style and pen. Generally, vertical is where it will be position most of the time.
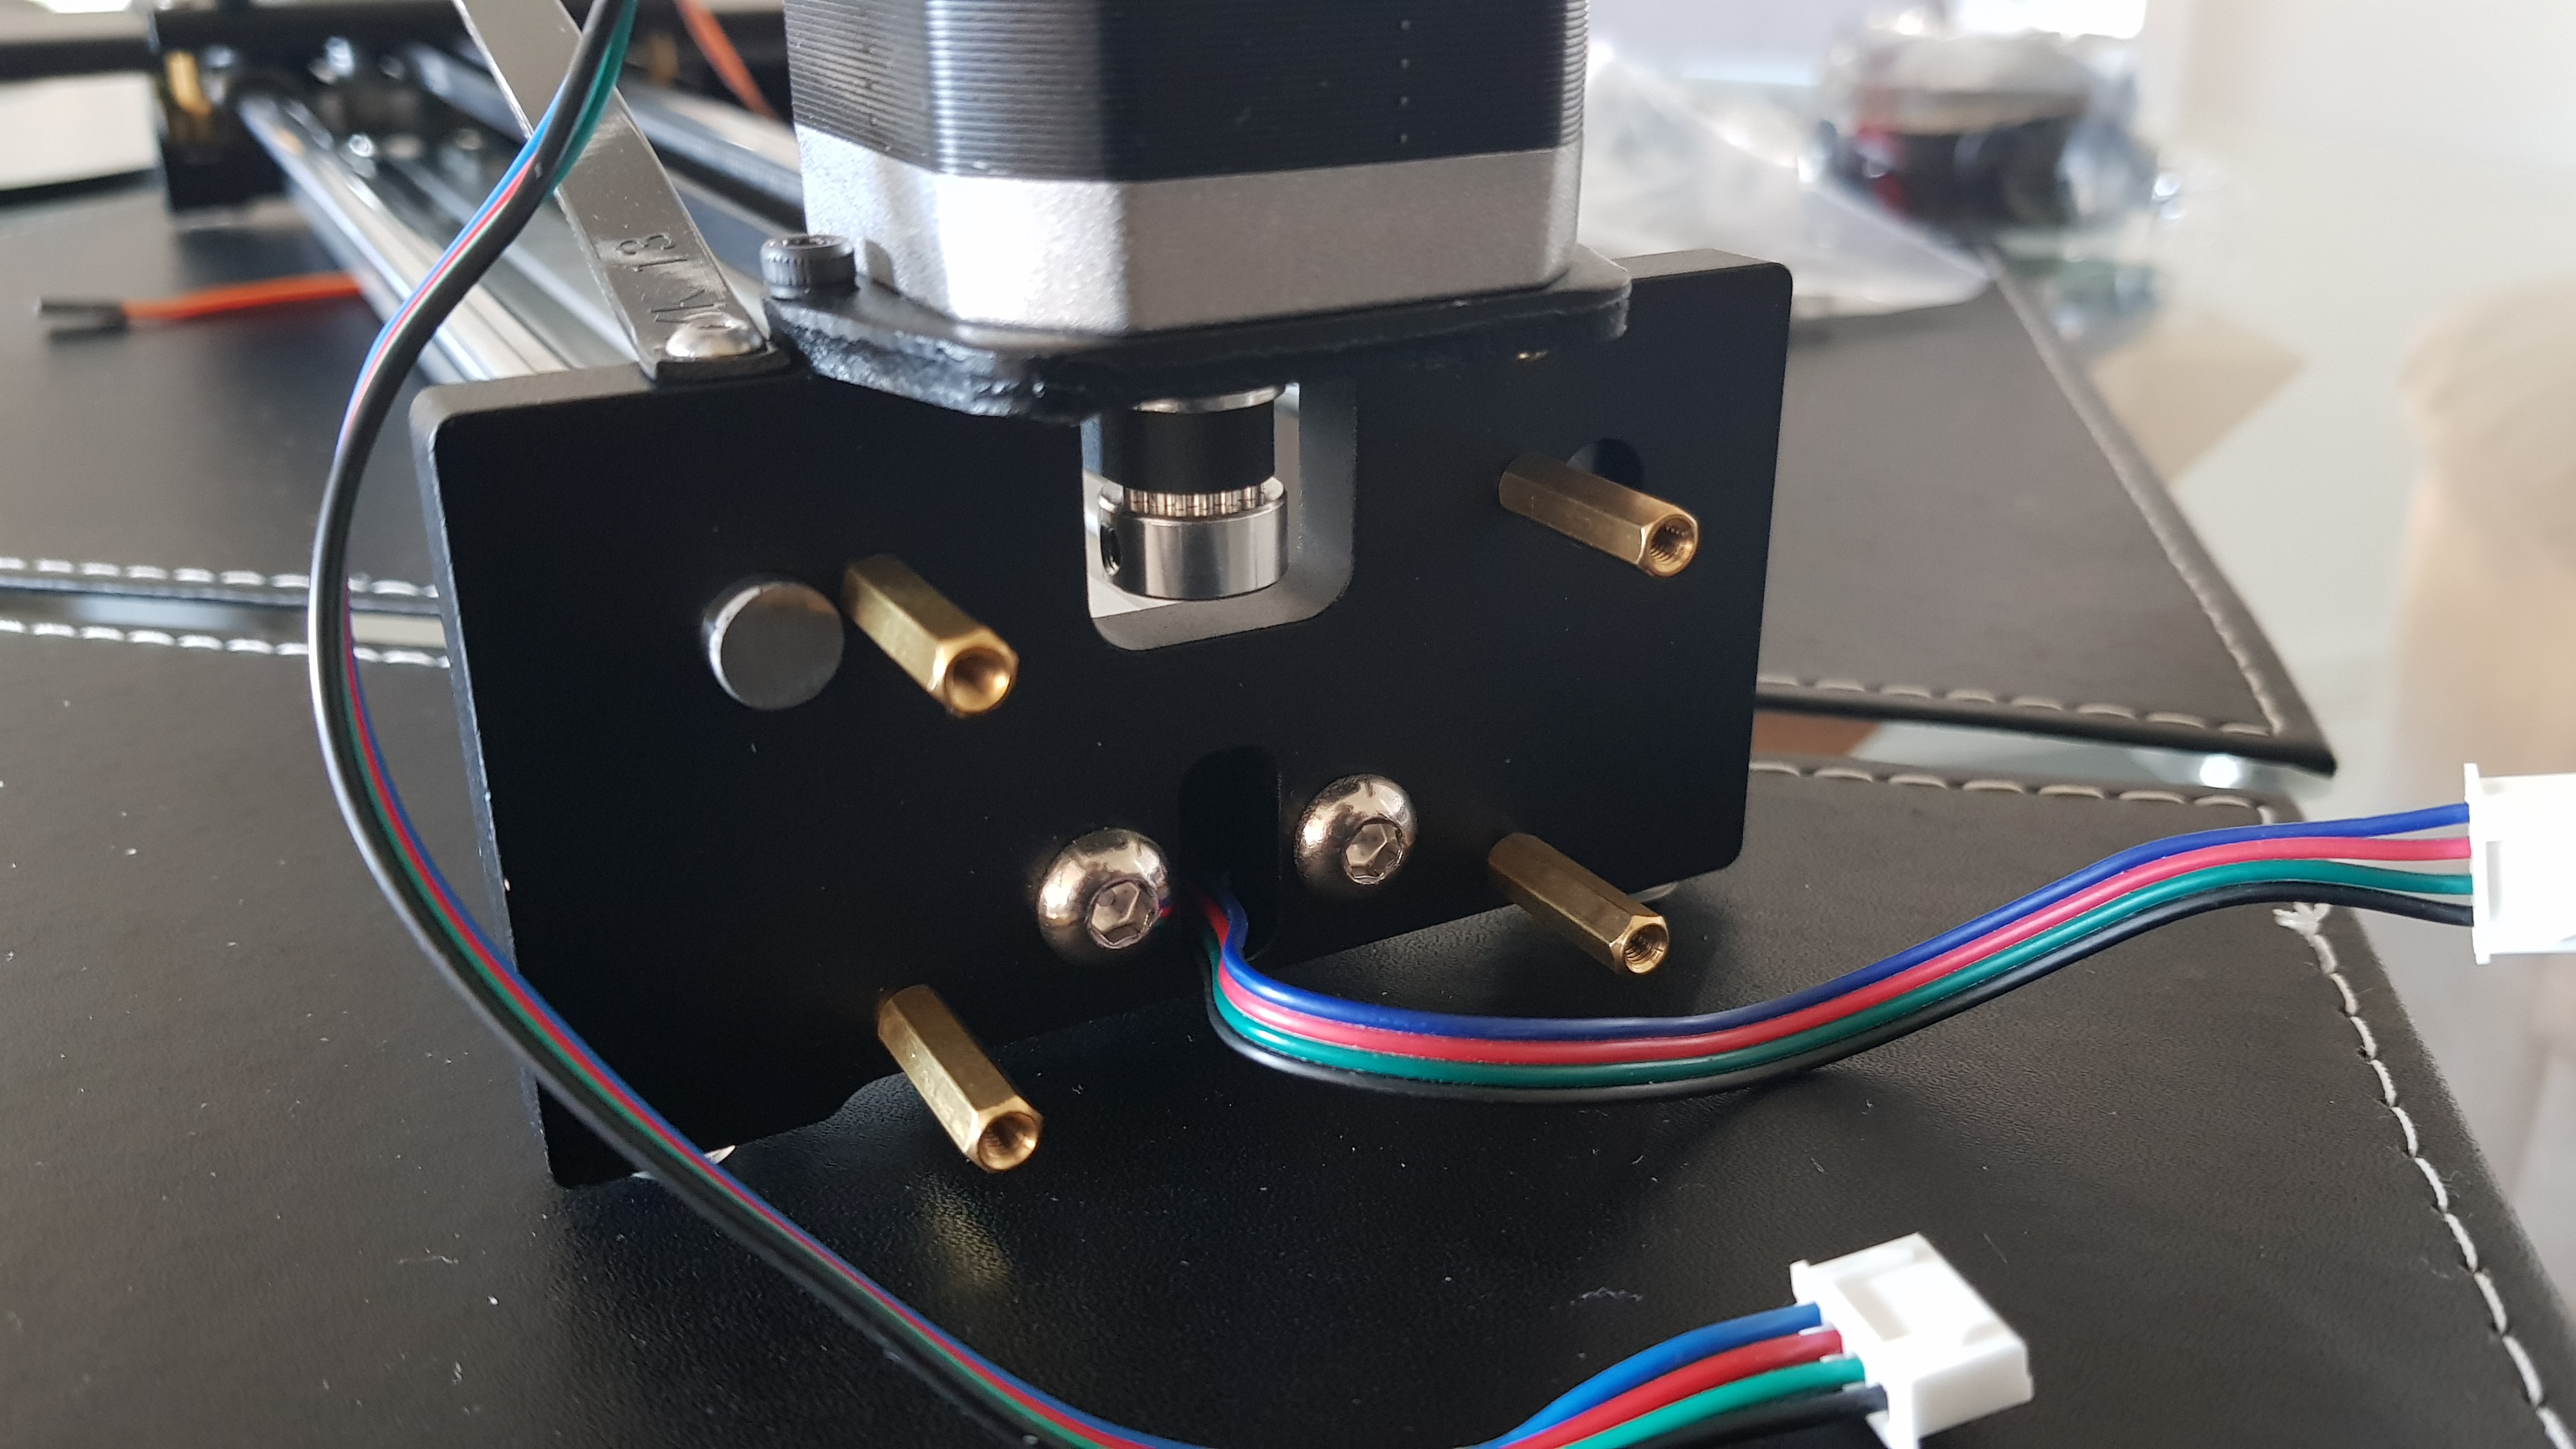
Now for the brains of the IDraw, the board. This has been conveniently labelled, first screw in the stand-offs and the first acrylic plate with it’s spacers.
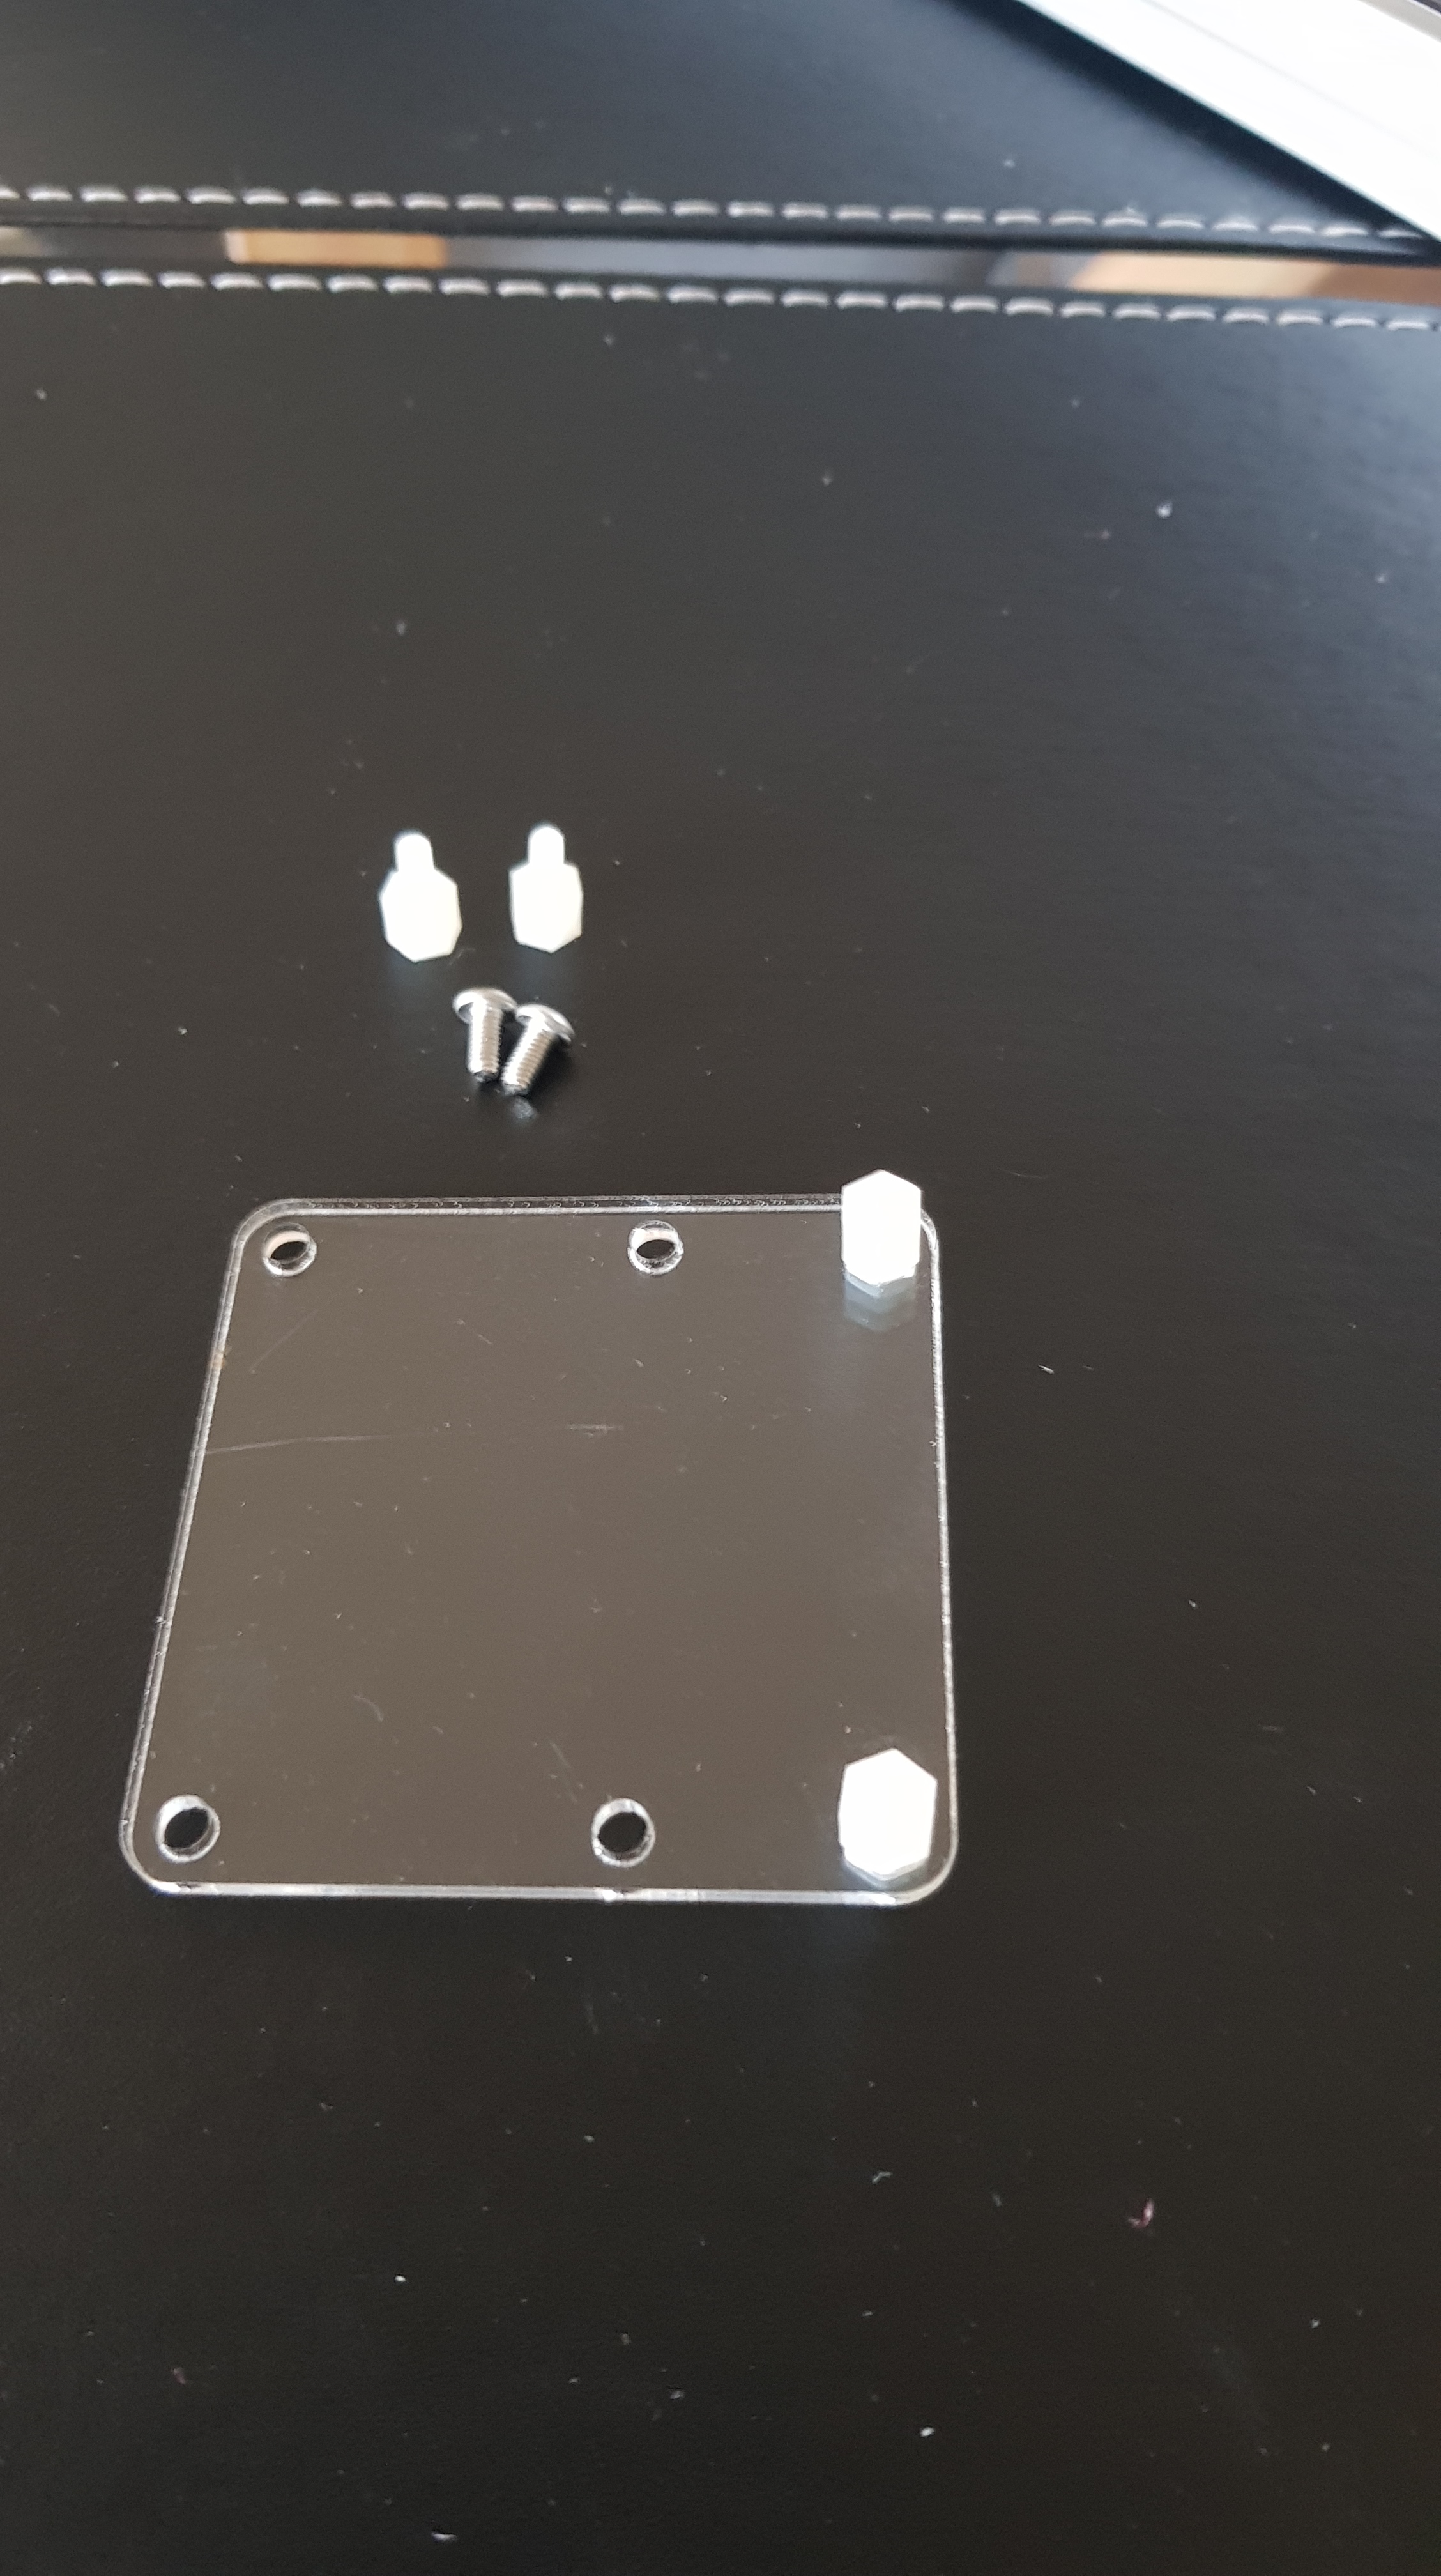


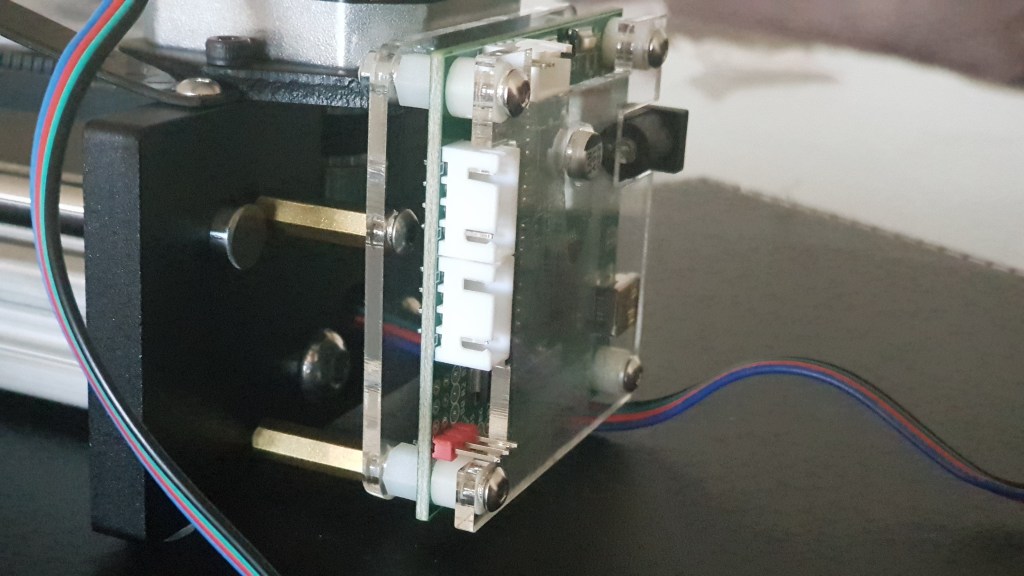
Attach the IDraw board, another set of spacers and the acrylic face plate on the stack with the provided screws
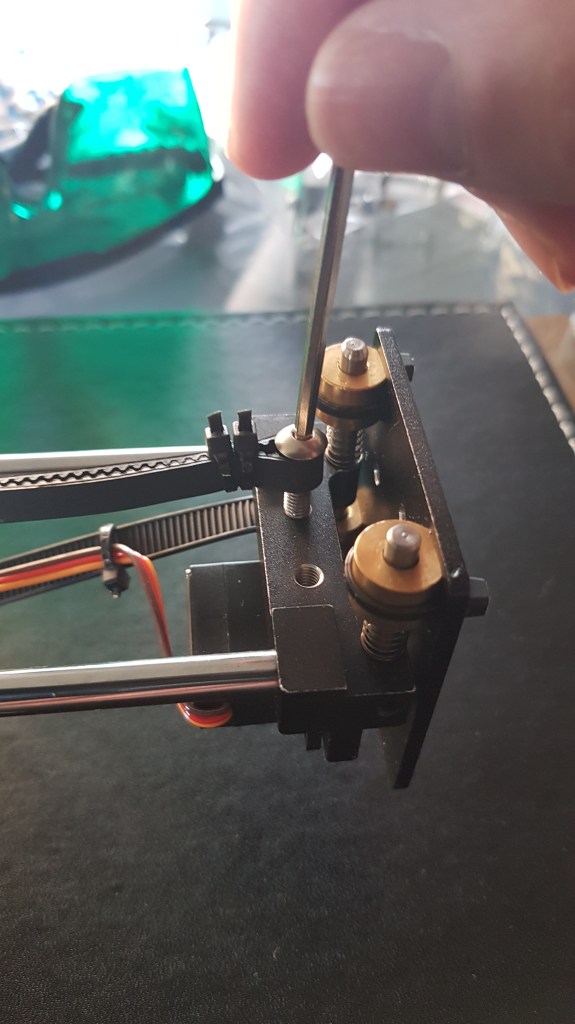
Ensure the rails on both X and Y axis are tightly fitted into the bases on each side and flush with the outer surfaces. The lead screws to tighten these are in the small holes on the top of each block.
Lets secure the cable guides, these are the long plastic strips we can can cable tie to our motor and servo wires to keep them out of the workspace.

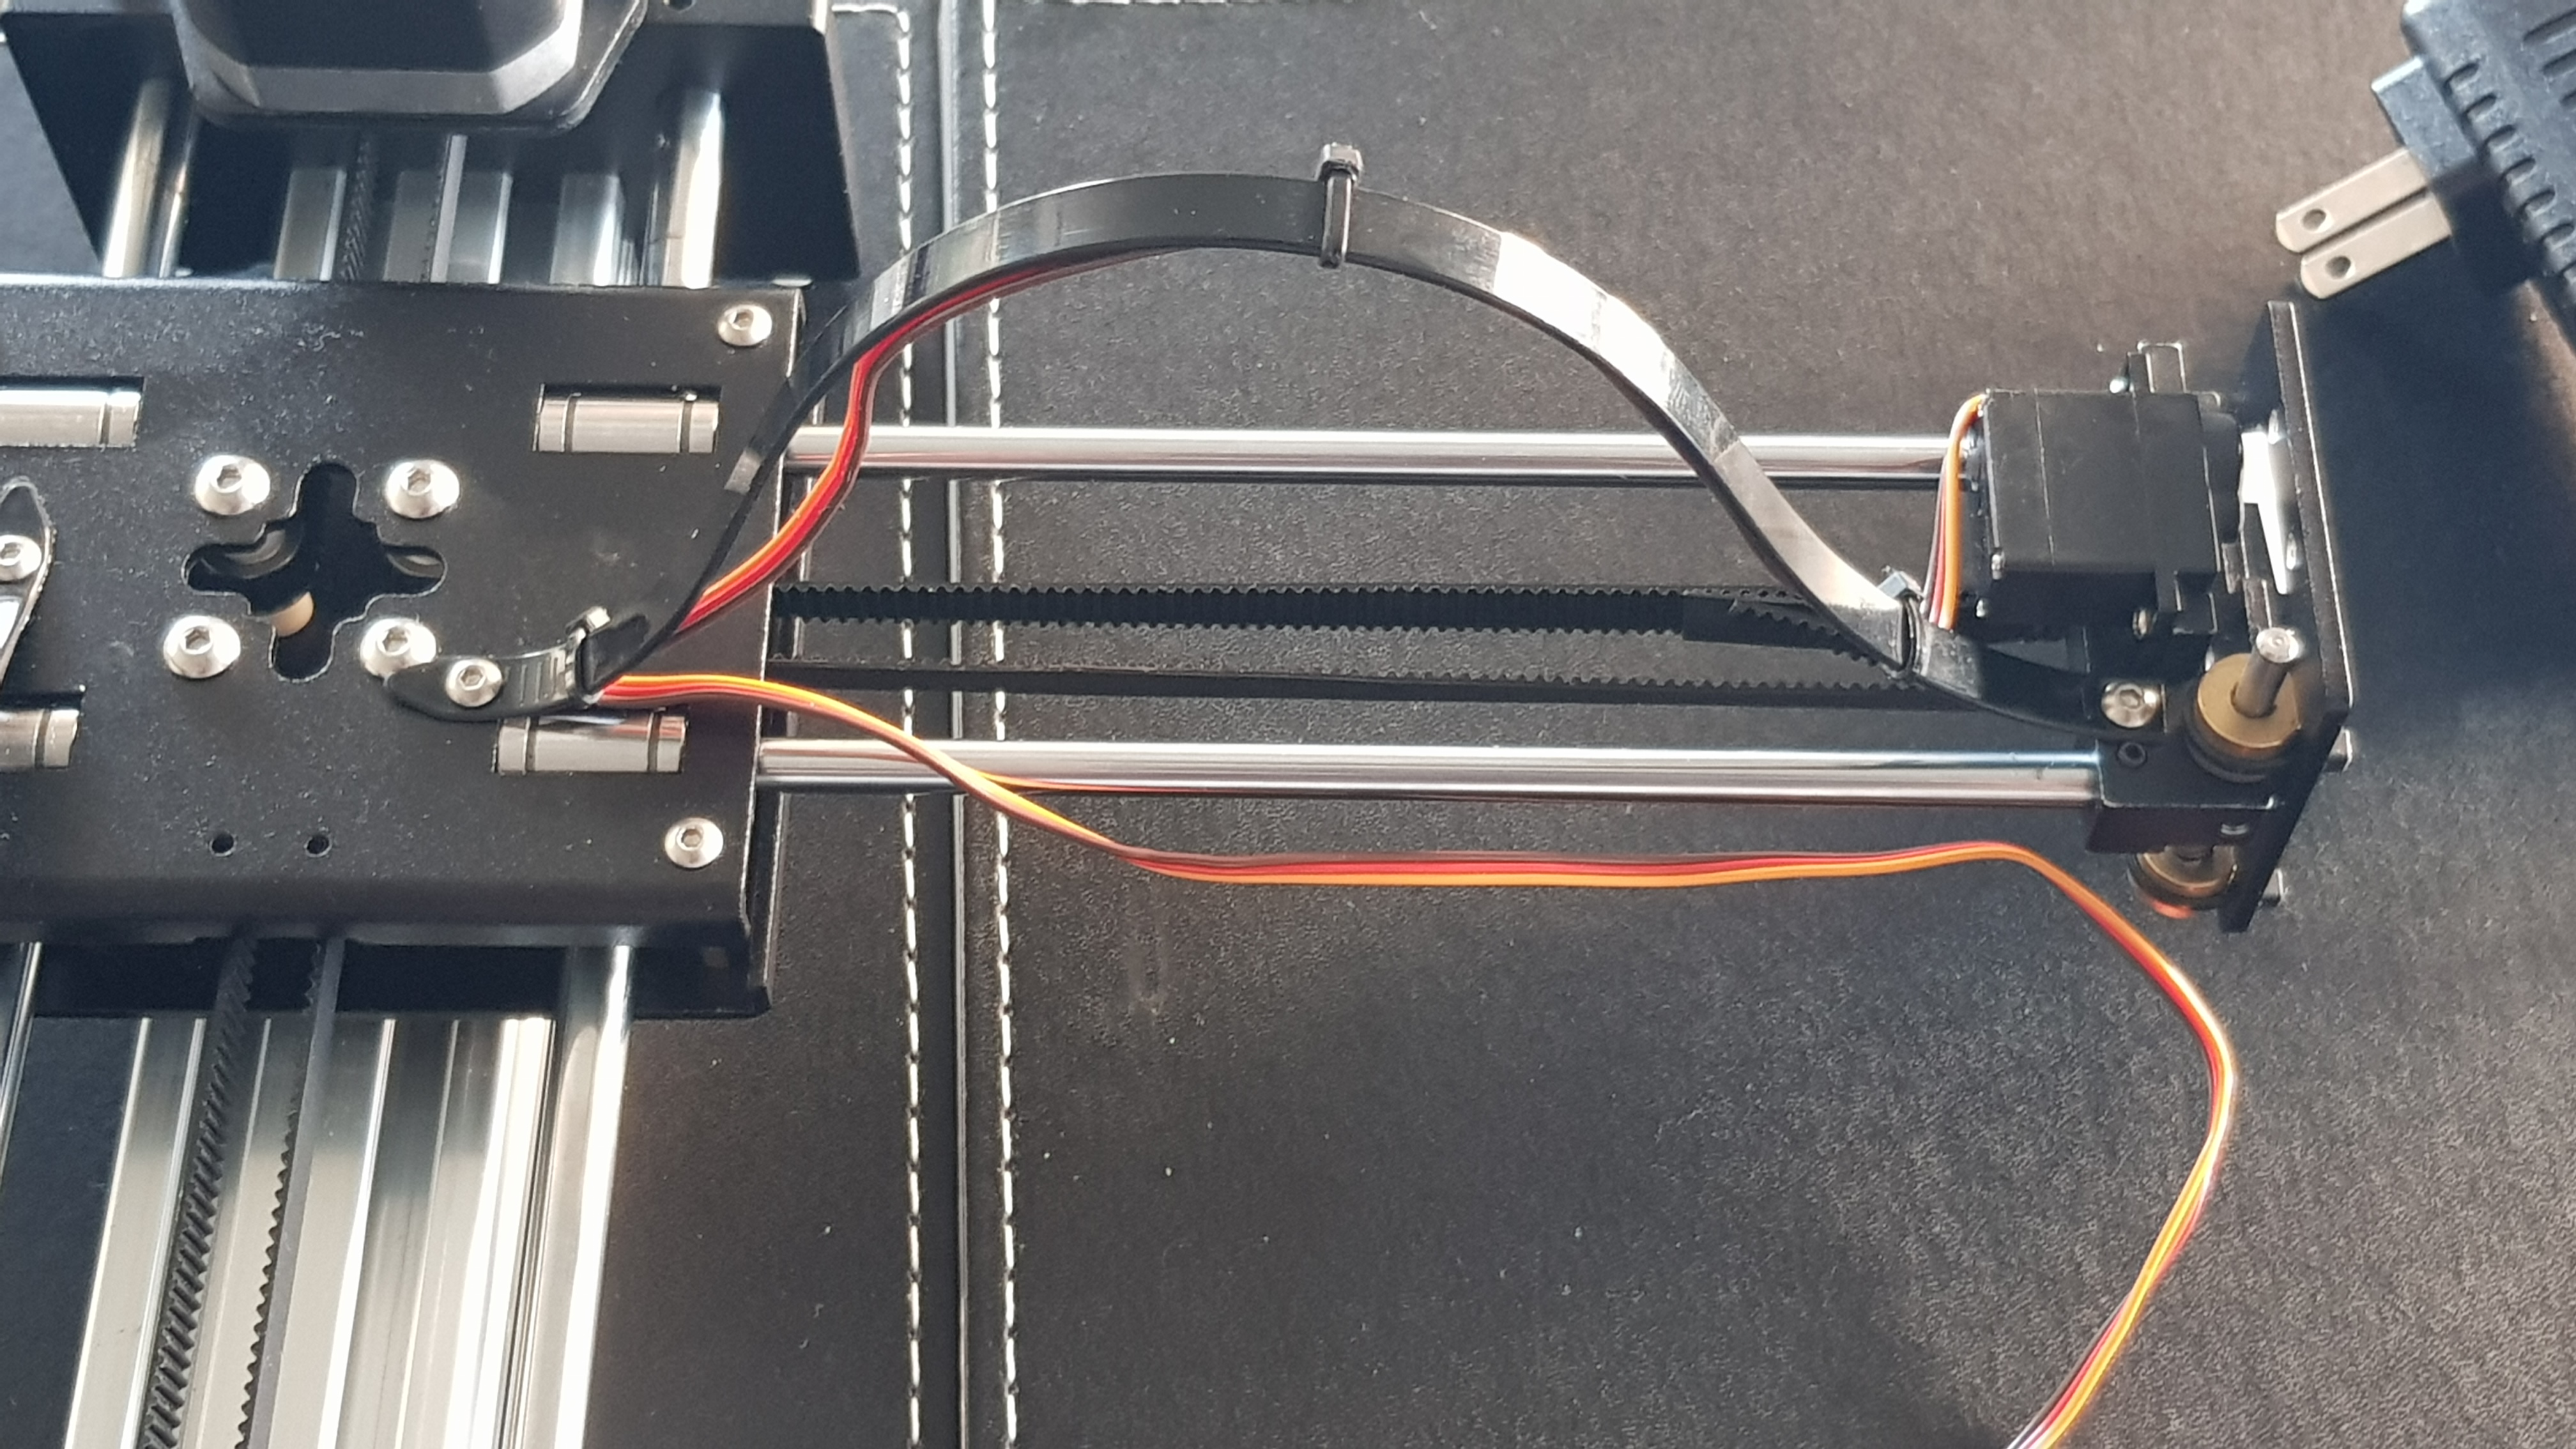
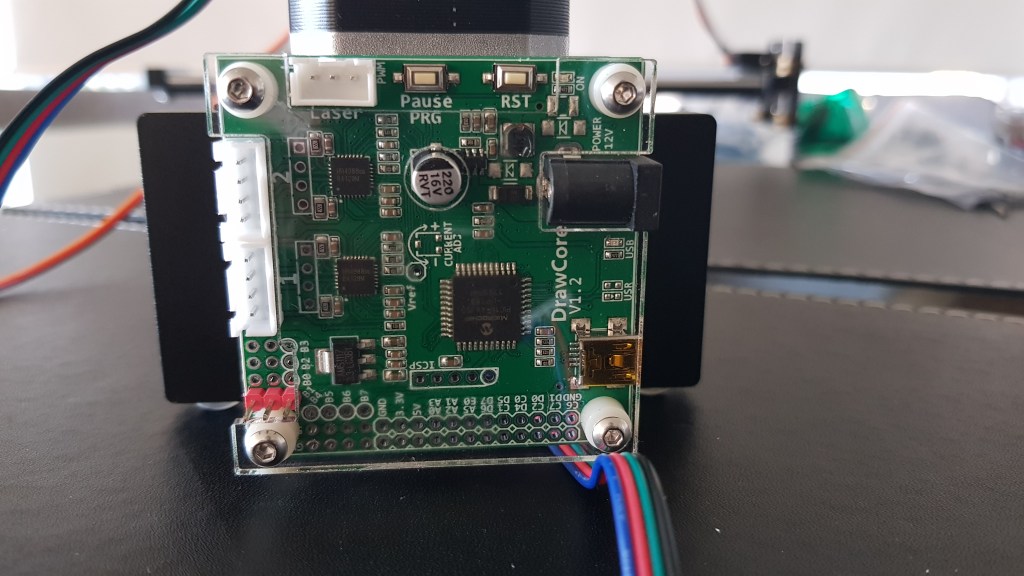
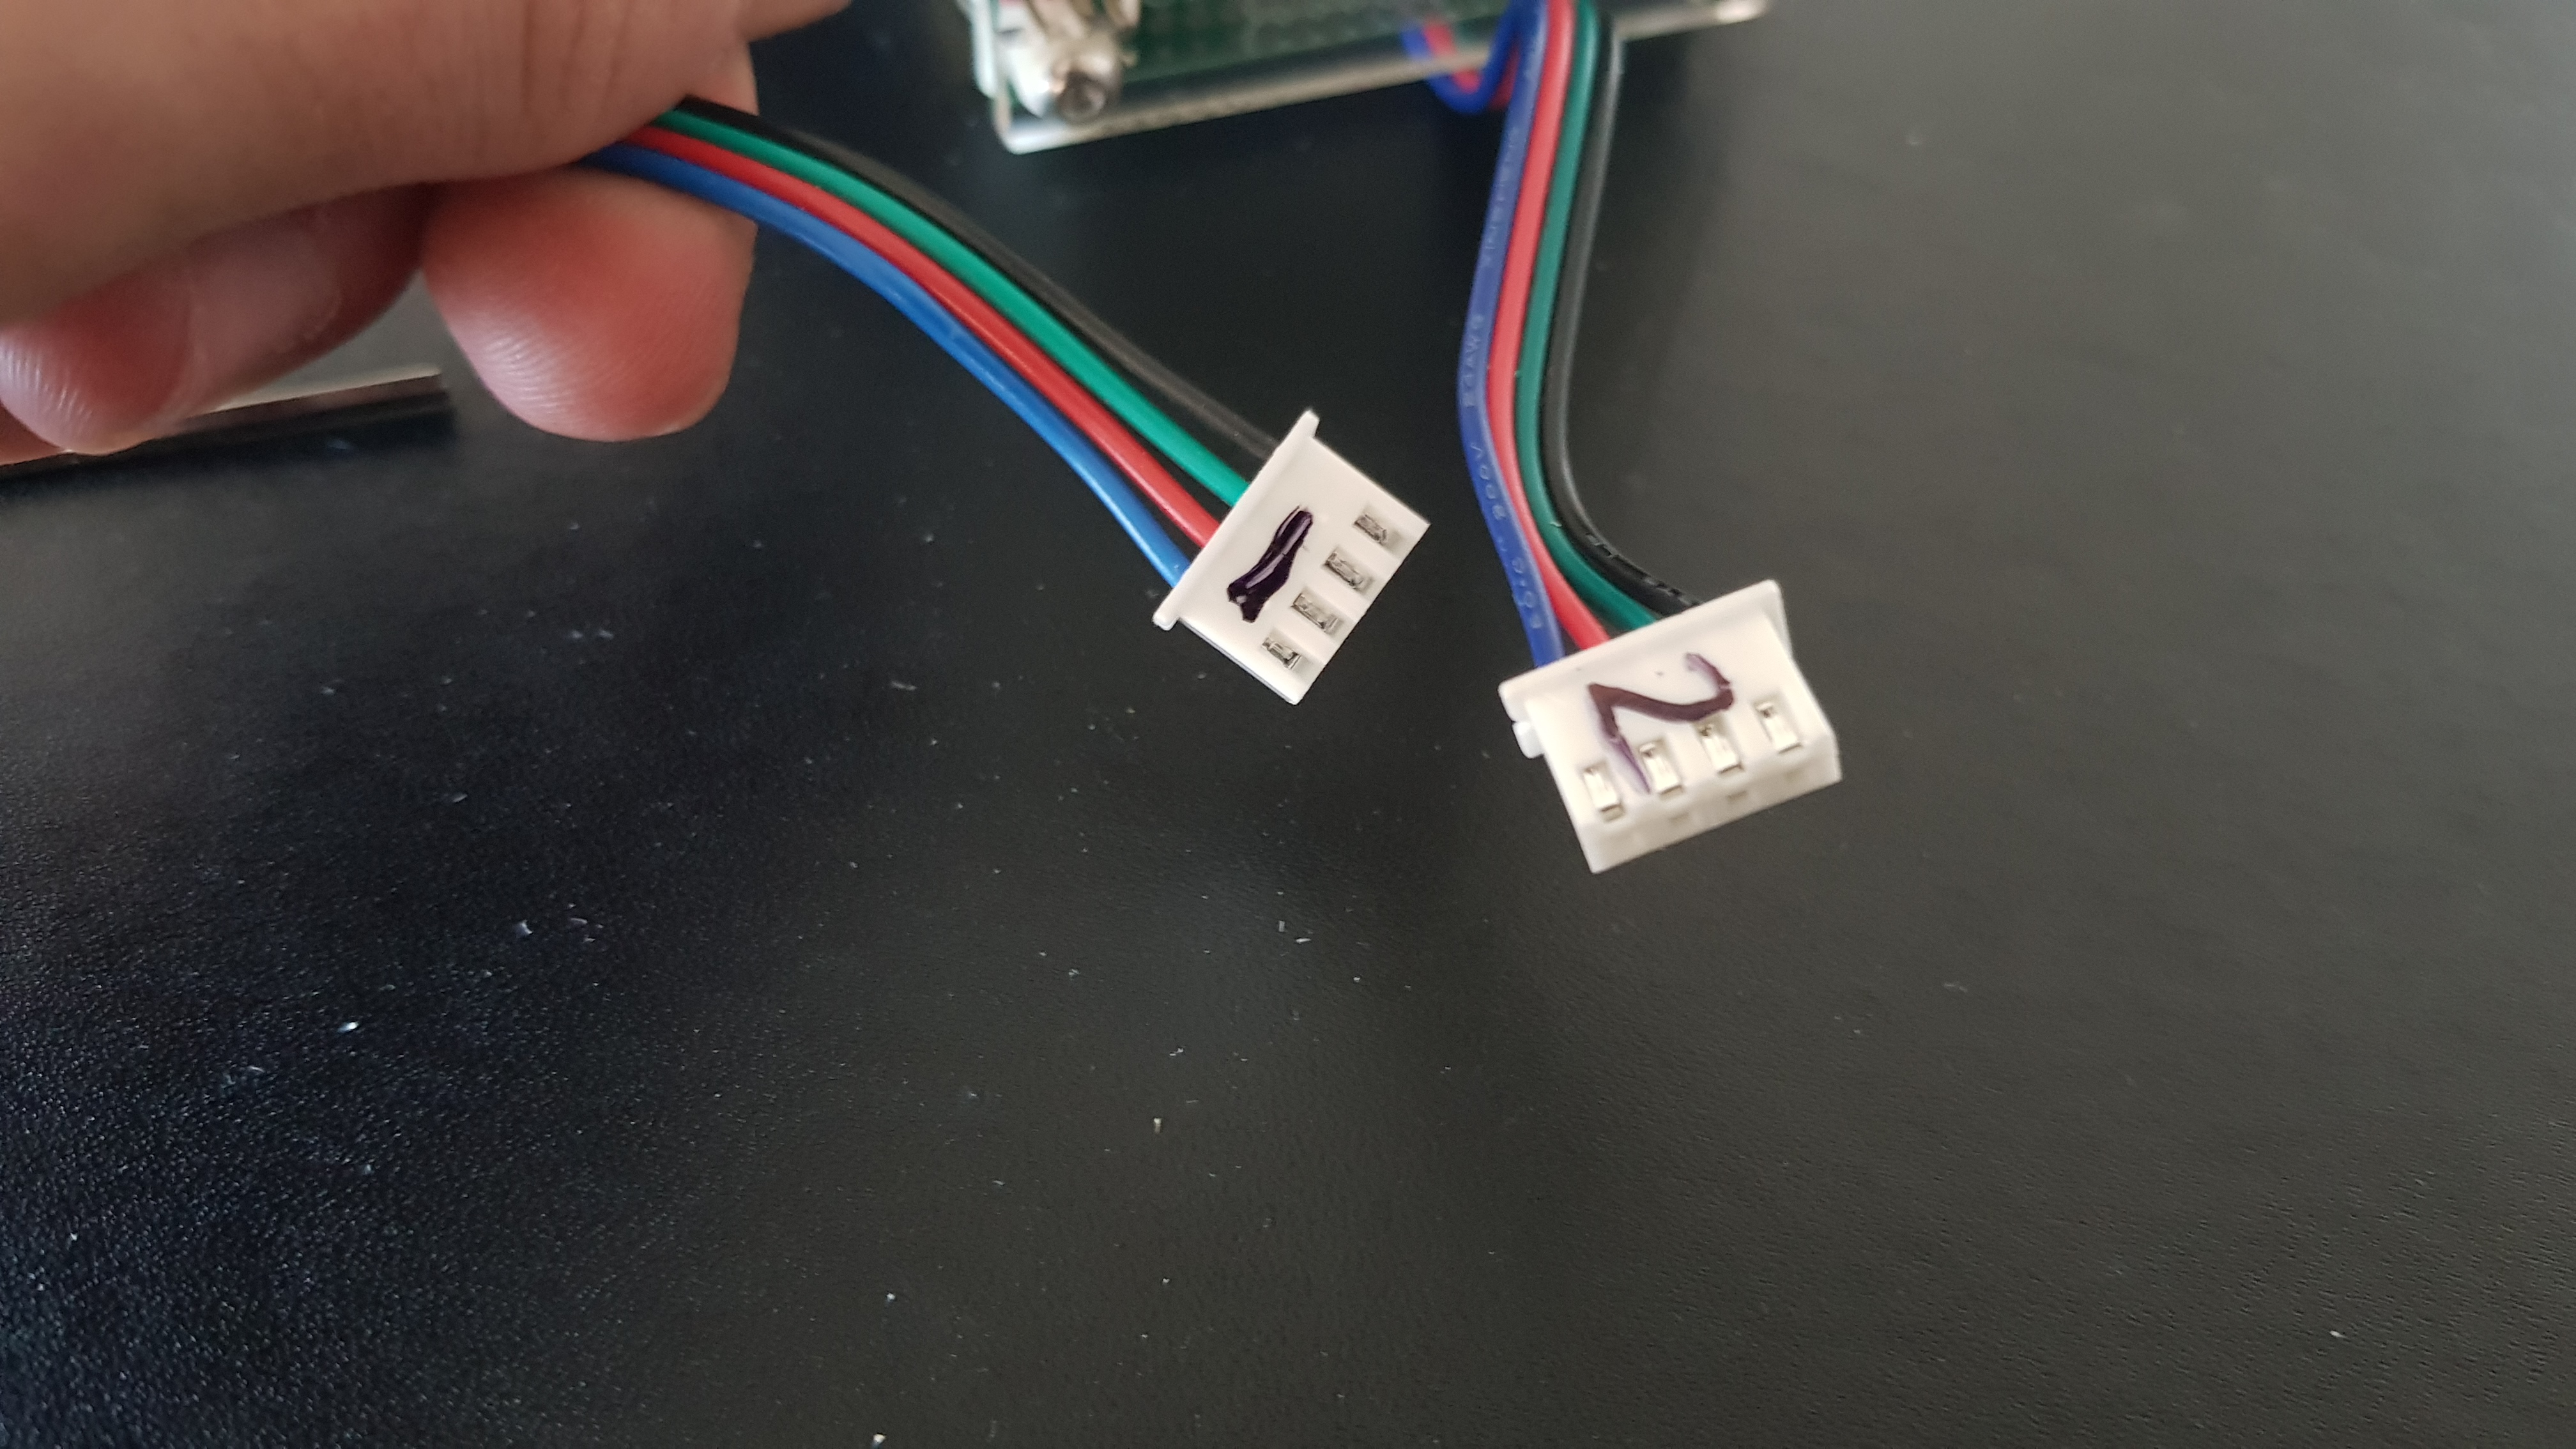
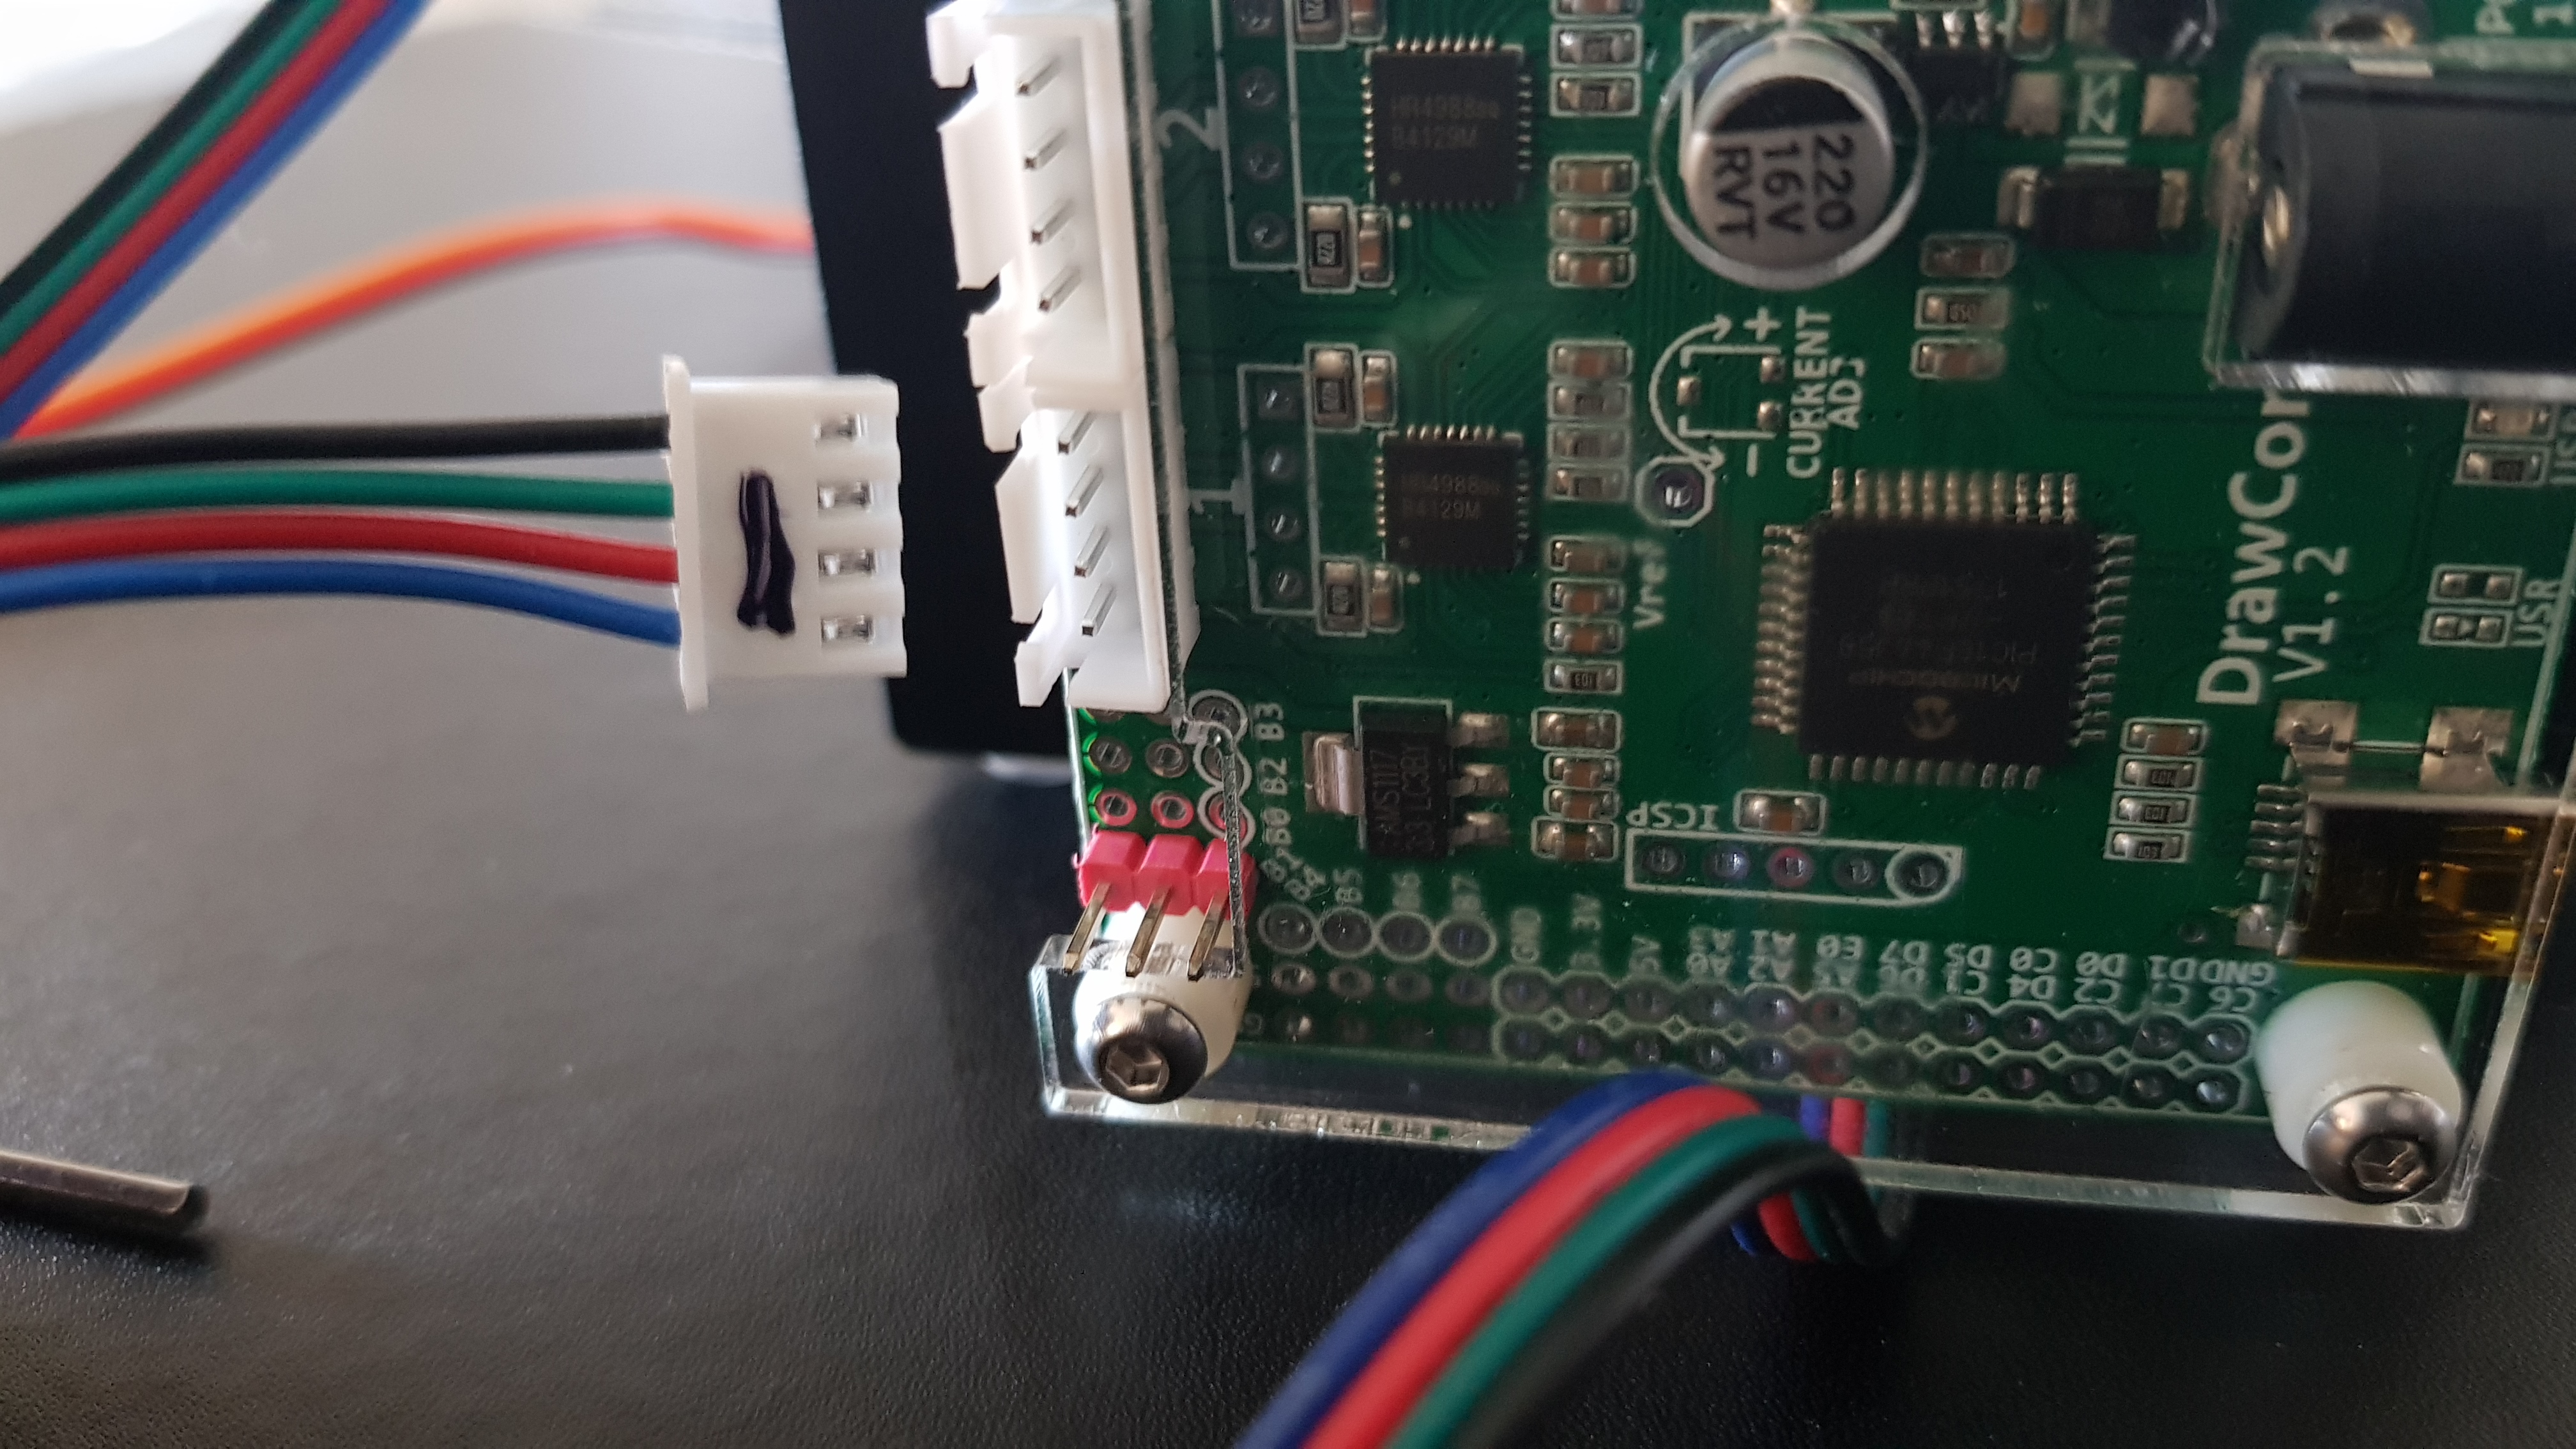
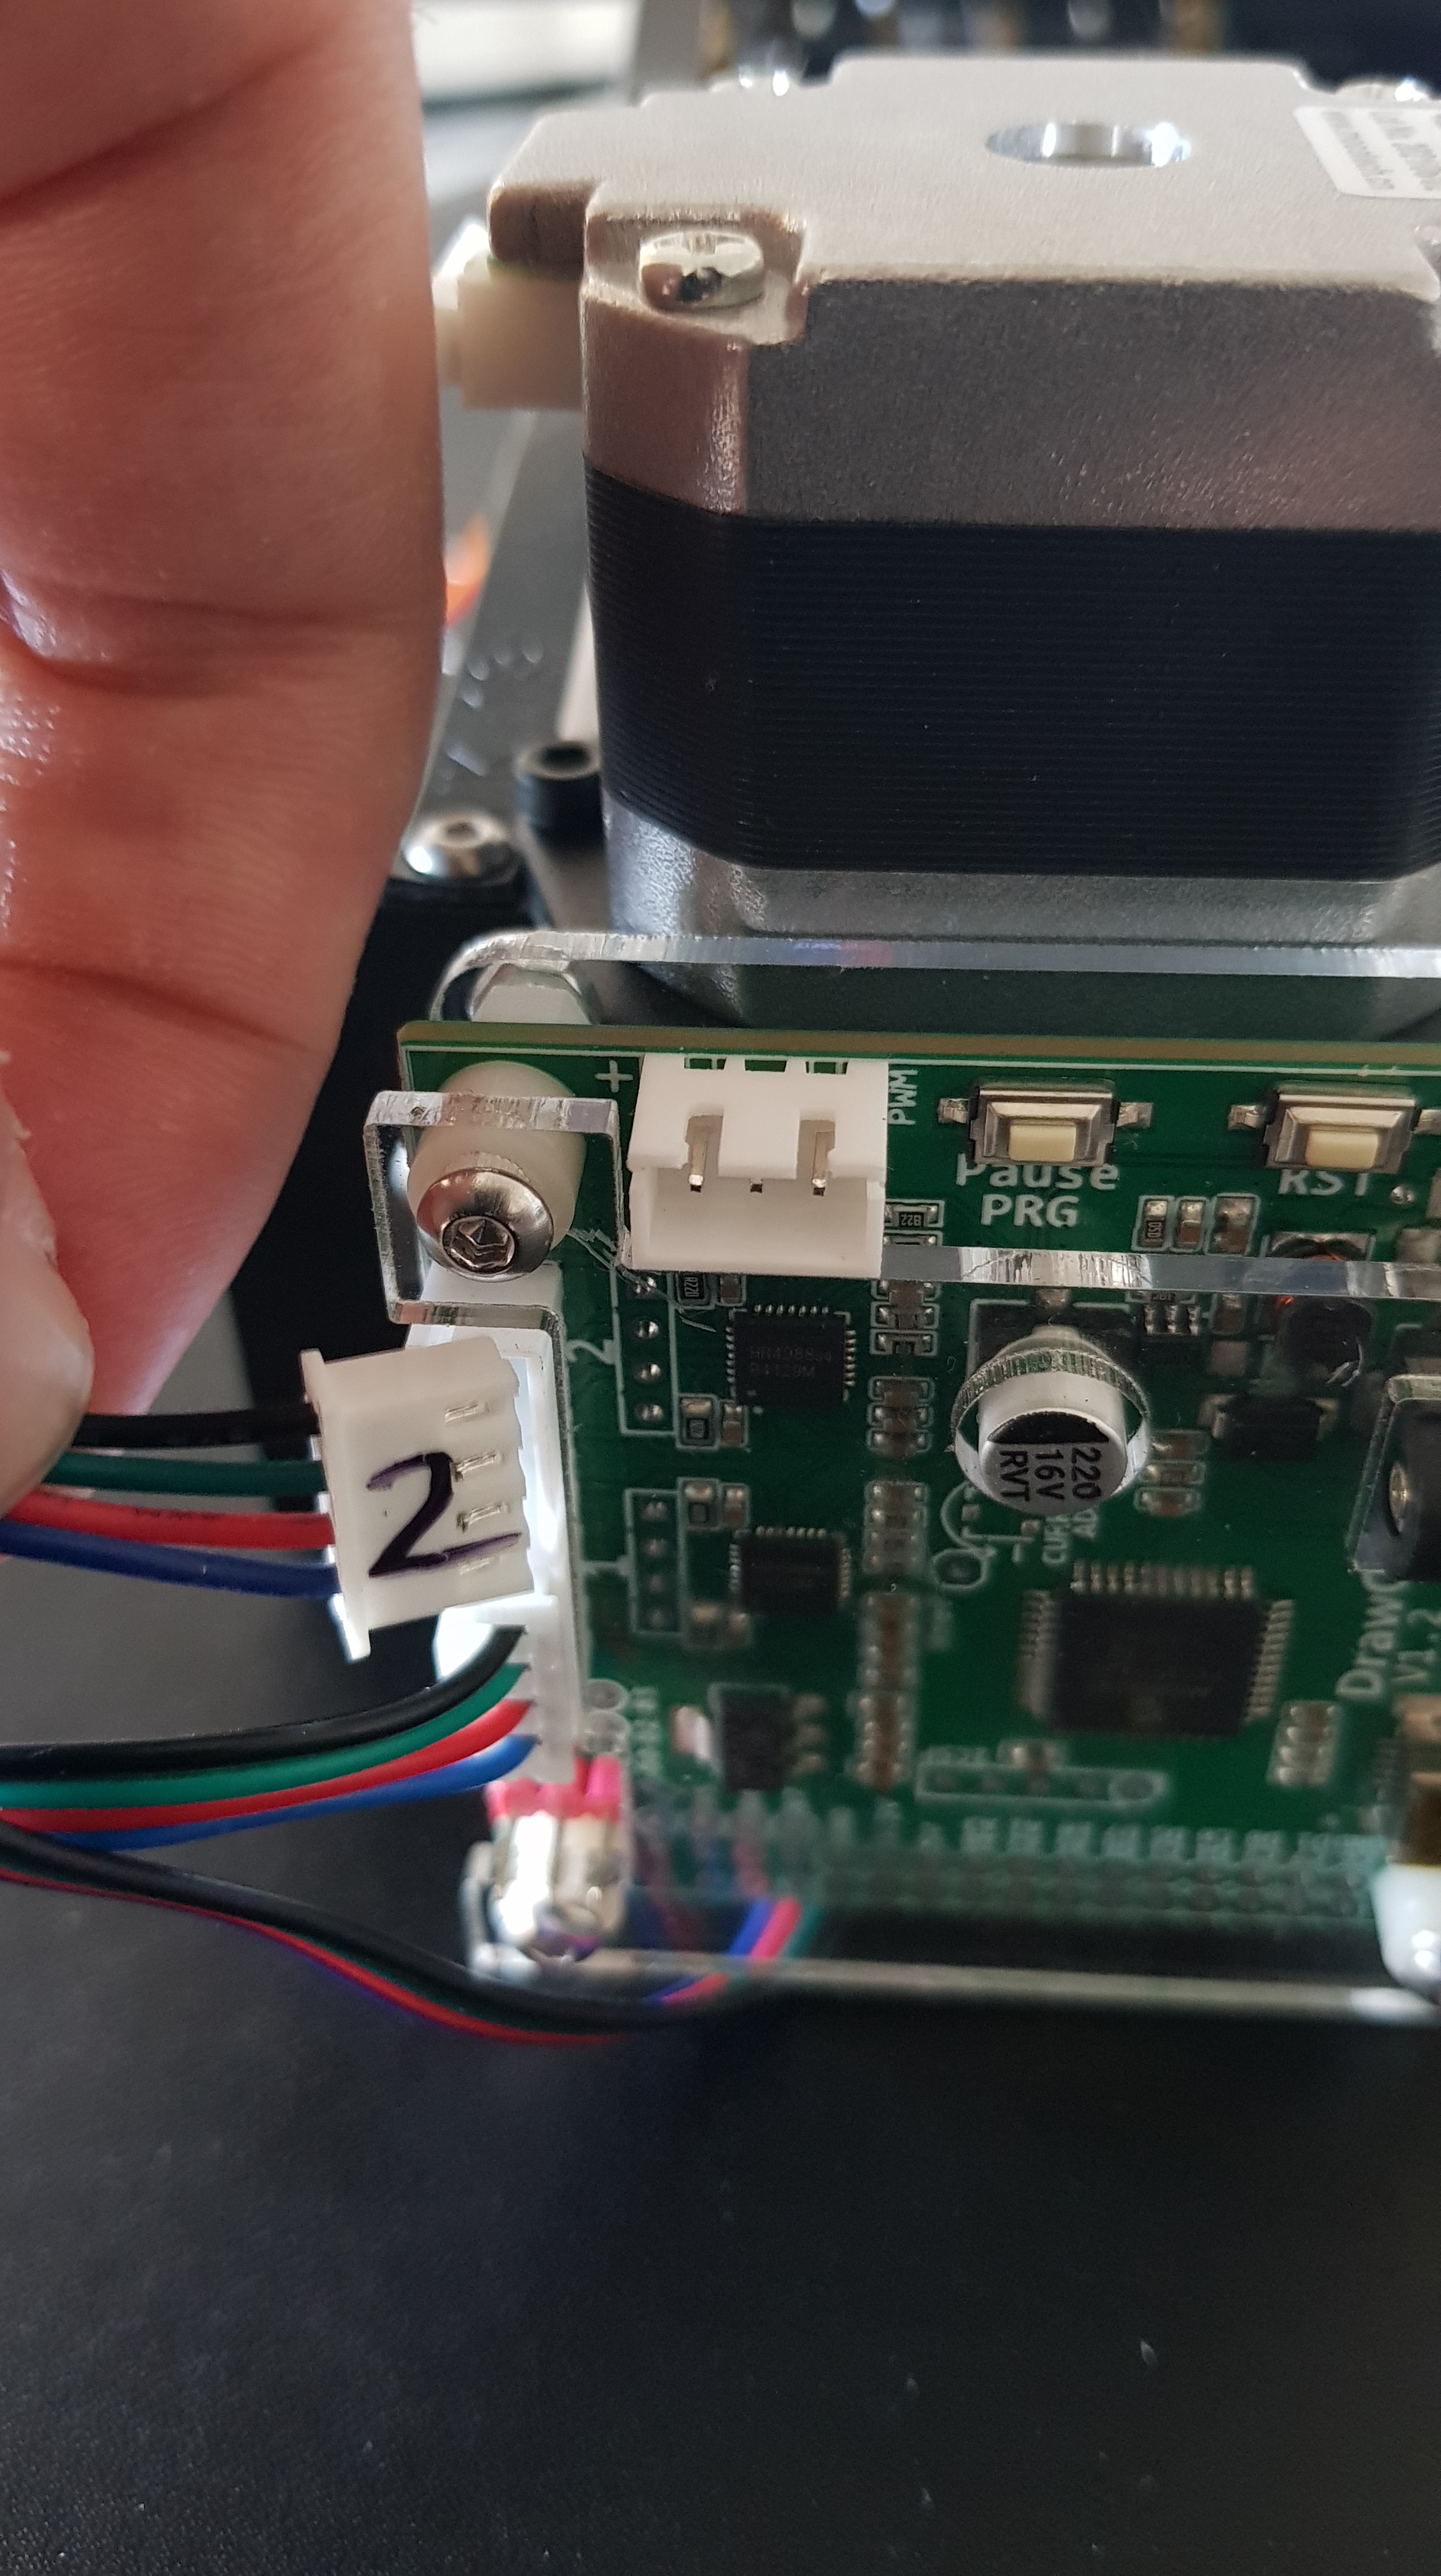
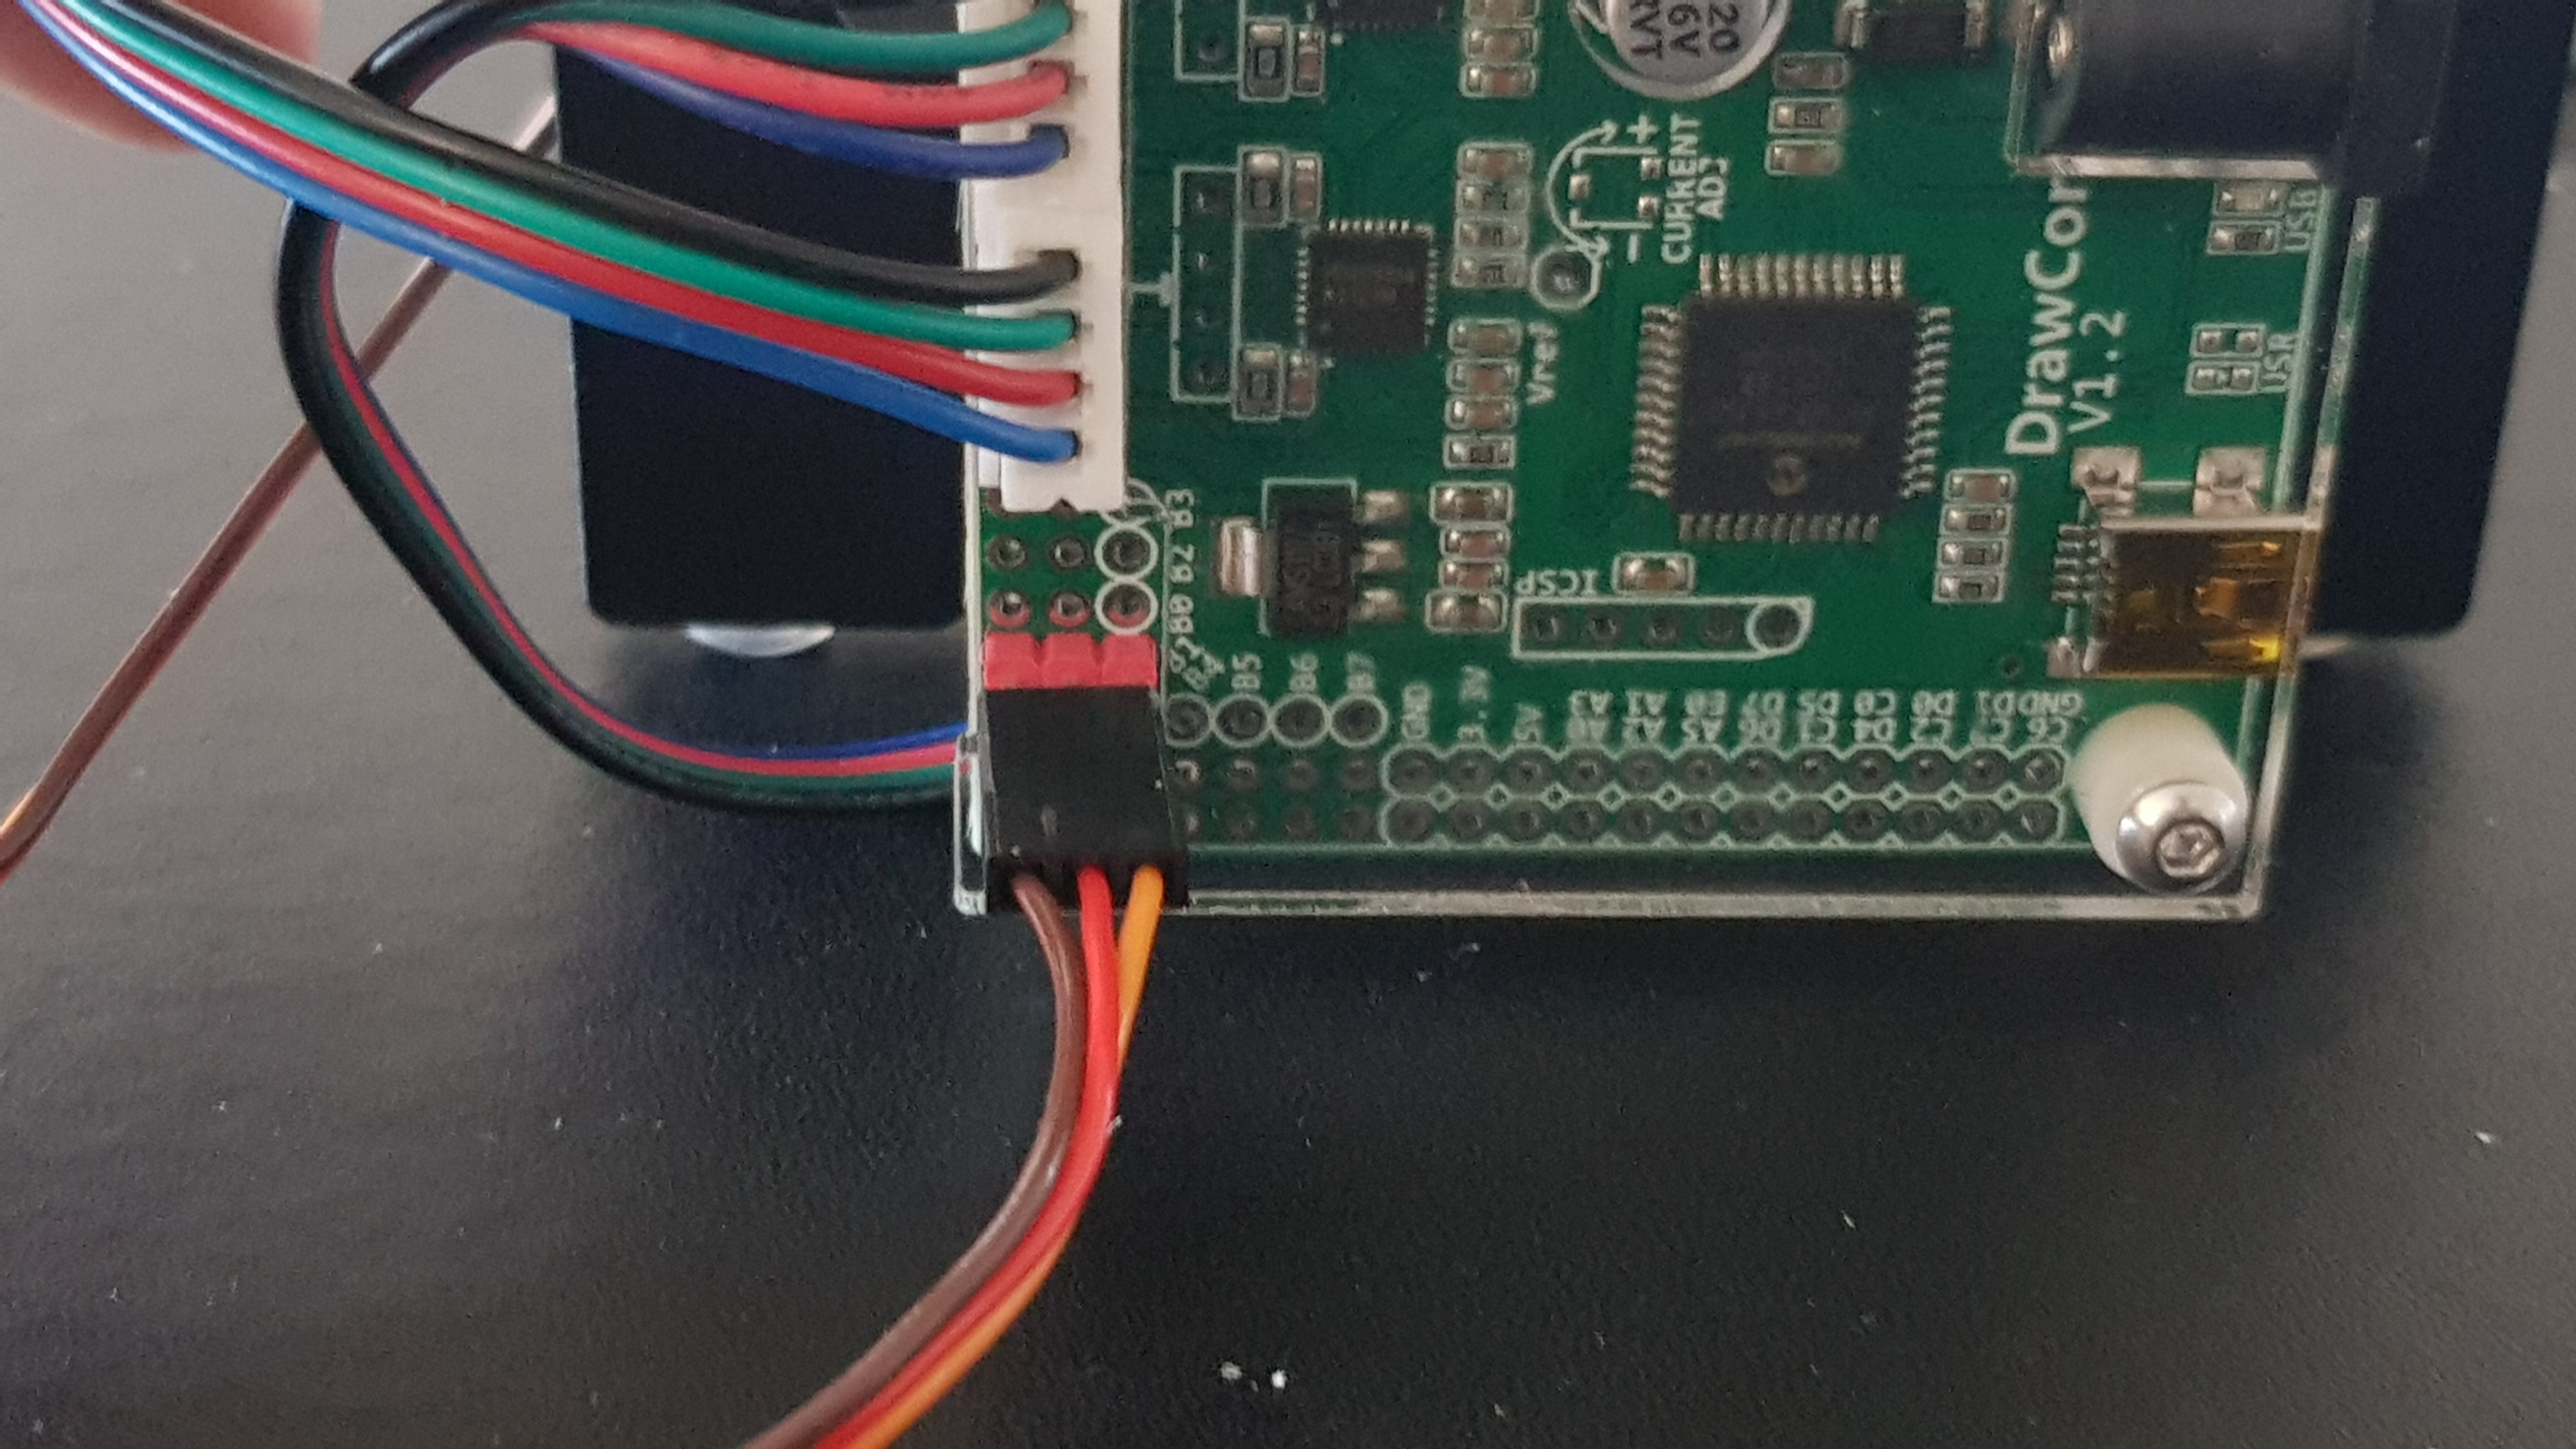
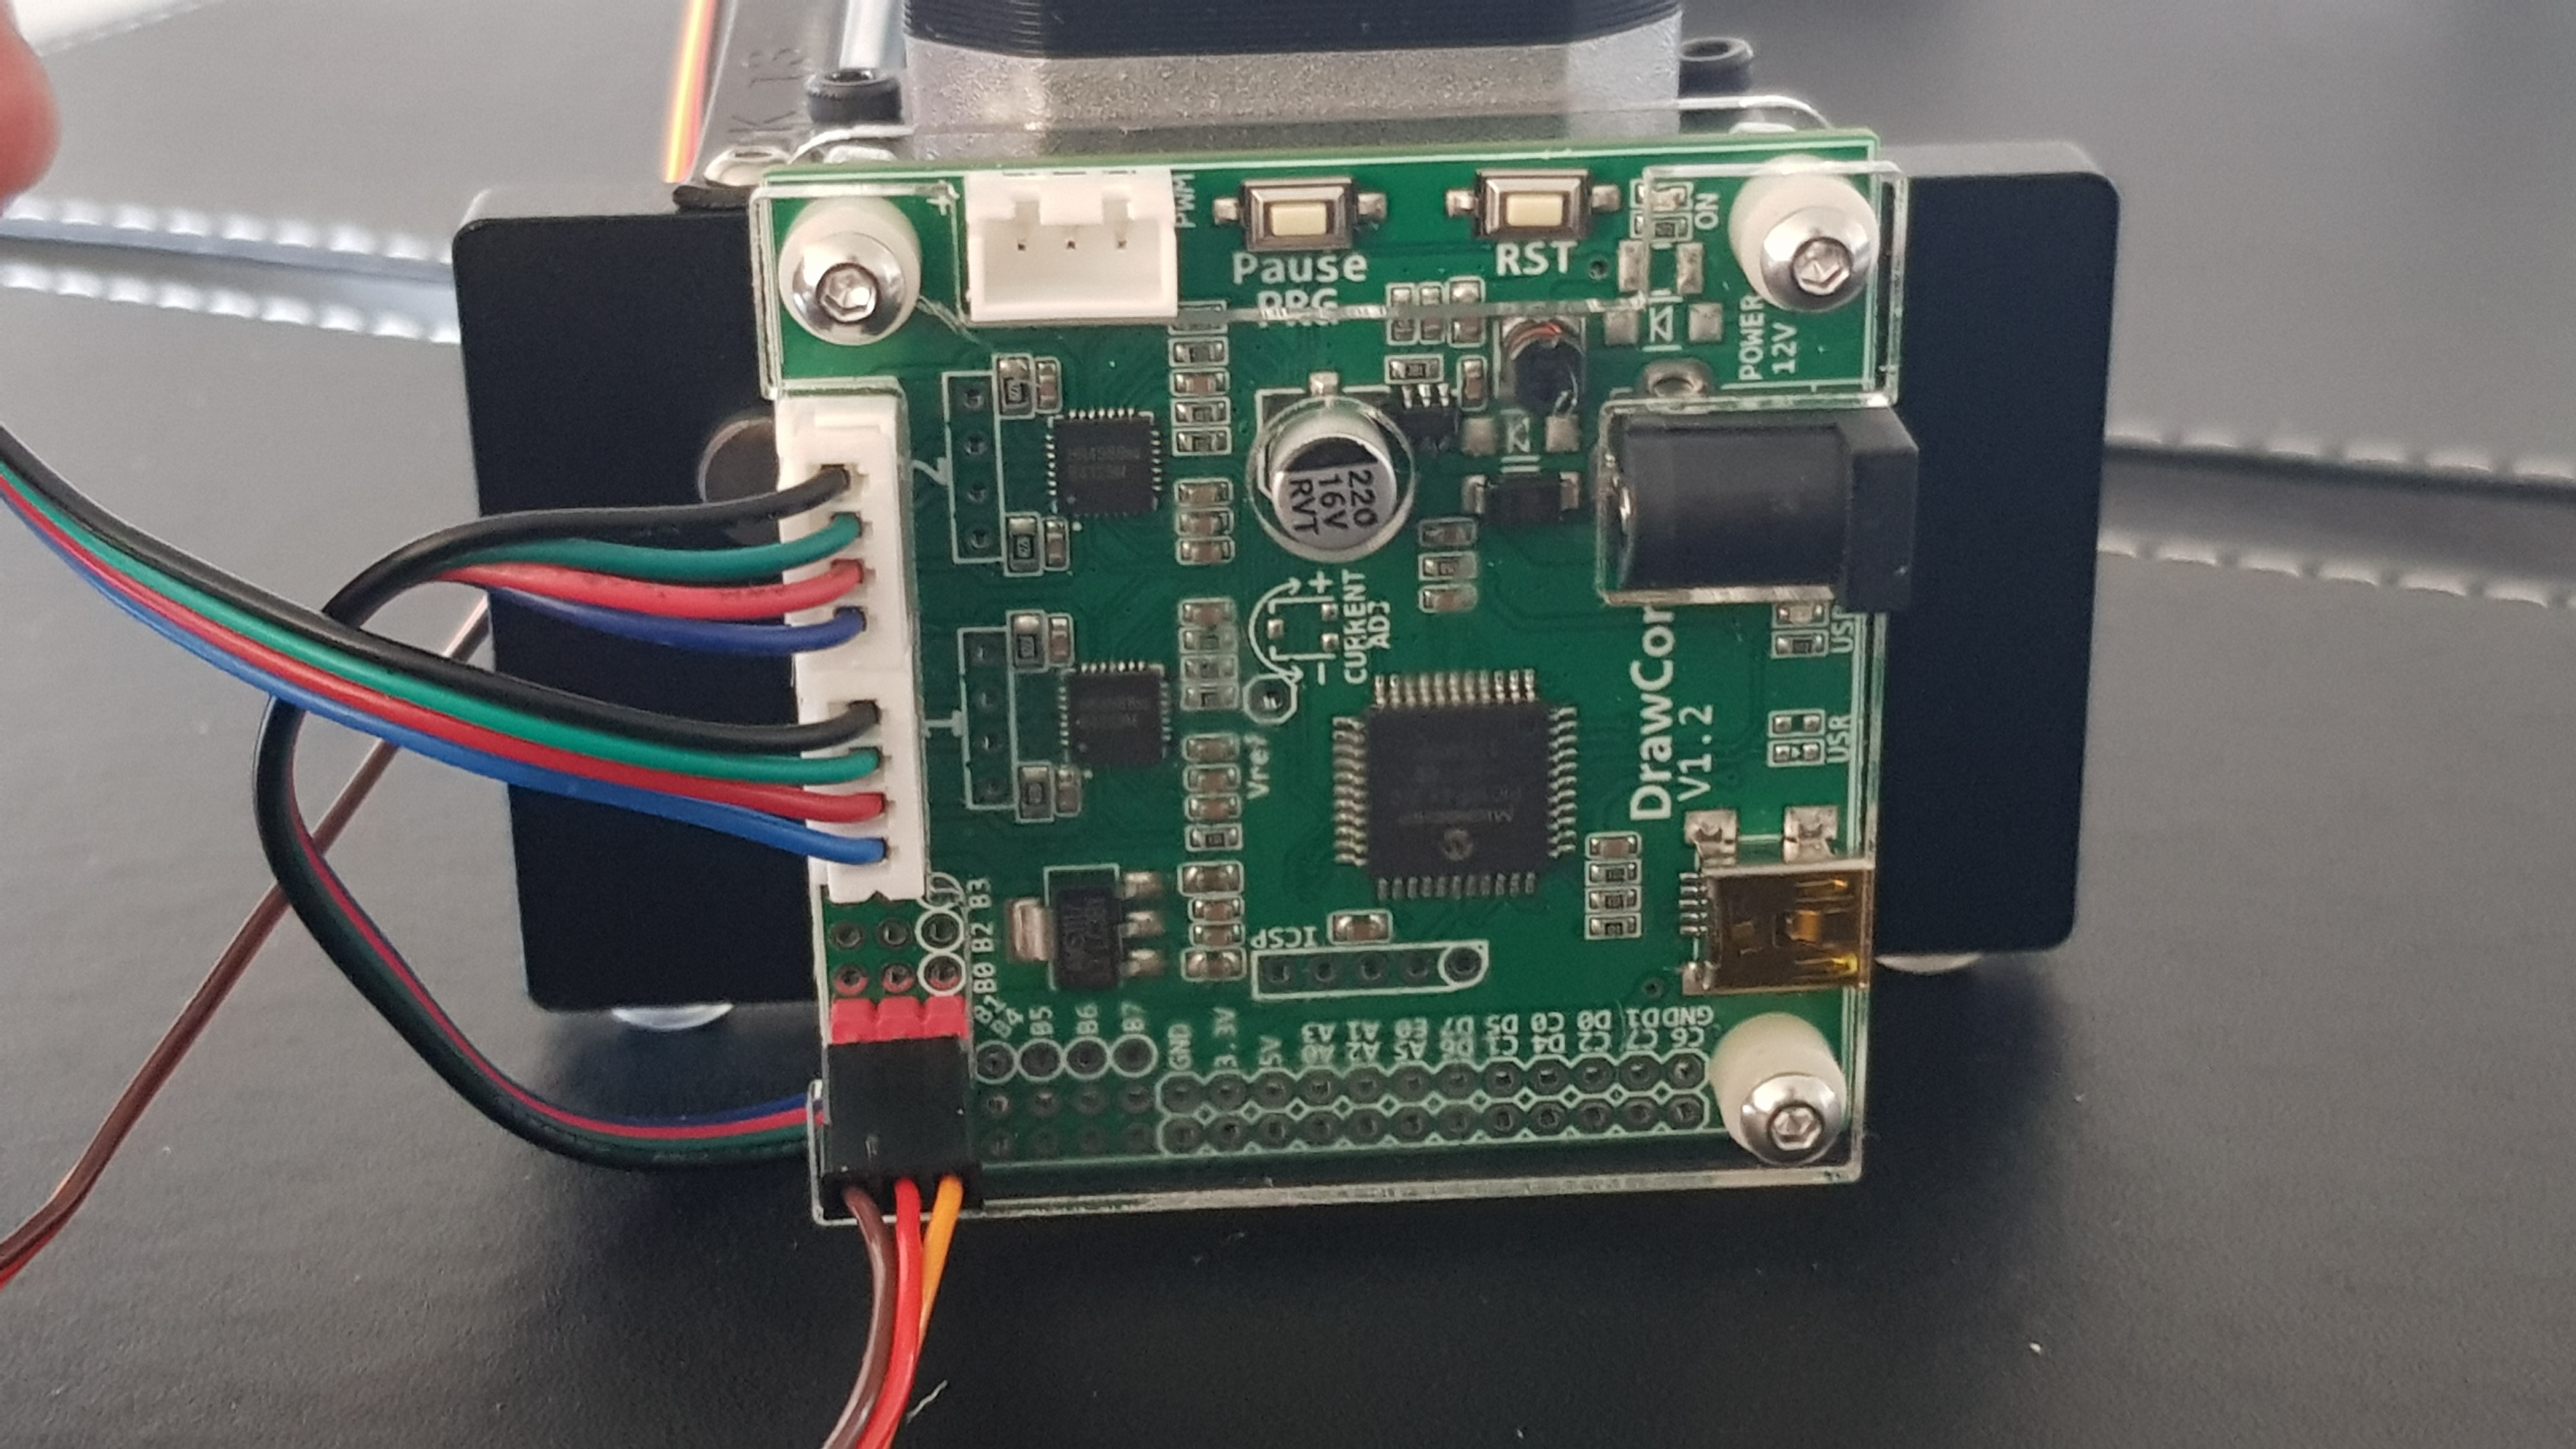
Lets start plugging everything in! All of the cables are labelled, you cannot go wrong. The connecters for the two stepper motors 1 and 2 are labelled on the connecter itself, and on the board with a white 1 and 2. The servo connector (small motor that controls the pen position) plugs into the three pins on the bottom left. Orientation matters! The brown wire on the connector should be on the left side. The last remaining port on the top left is for the laser engraving head, if you have it. More detail on this in my blog post on the engraver itself.
All done!

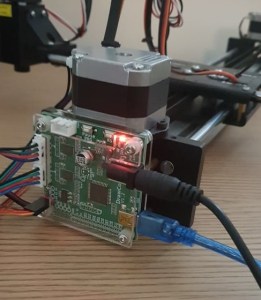
Now lets get connected, IDraw comes with a MiniUSB data cable and a standard 12V DC power supply. Connect the power, and then connect the data cable to your PC.
Software install and setting up the IDraw
IDraw uses Inkscape V1.0, which is a great open source vector graphic editor. You can download Inkscape 1.0 for your respective OS: https://inkscape.org/release/inkscape-1.0/
Generally, with a modern PC, your existing software drivers should automatically detect the IDraw. If they don’t, try updating your OS, or reconnecting the IDraw once or twice after a delay and checking your device manager.
Uunatek provides links for all versions of their firmware and drivers on their store page: https://uunatek.com/product/idraw-handwriting-drawing-machine/
Within Inkscape 1.0, IDraw is controlled by the open source Axidraw extension available from Evil Mad Science Laboratories. Installation is simple, on the store page, the extension for Mac and Windows can be downloaded from google drive https://drive.google.com/file/d/1xgyajpfDt4vcPDzFssmCyv4yubXg8fzn/view
Download the extension and install into Inkscape by copying the file contents into your Inkscape extension folder. This folder will be found in the extension folder at the actual install location of Inkscape. The filepath can be found by launching Inkscape, navigating to the toolbar, Edit -> Preferences -> System: User extensions. Once copied, restart Inkscape to complete the extension install. A more detailed guide can be found on the Inkscape website: https://inkscape.org/gallery/=extension/
Now, open Inkscape, open the extensions tab, and you should see Axidraw control and Axidraw Utilities!

Time to configure the pen raise and lower positions
Place a pen into the holder and the paper you will be drawing on underneath. Your workspace surface must be level and uniform for consistent pen pressure across the whole working envelop. Also make sure to secure your paper down, either tape the corners, use a spiral bound book (not as stable) or something heavy/magnetic on each corner.
You need to adjust the height of the pen in the holder, in addition to the raise and lower point of the servo. The servo raises the pen off the surface of your workspace as it travels to different parts of the drawing, then it will lower it to the surface once it is ready to draw again. Setting this height is important. If it is on a lower setting, your pen may press hard into the paper, causing bleeding effects, thicker lines etc. On the higher end, lines will be thinner, but if you have low points on your table, you may not get contact between the pen and workspace throughout the drawing.
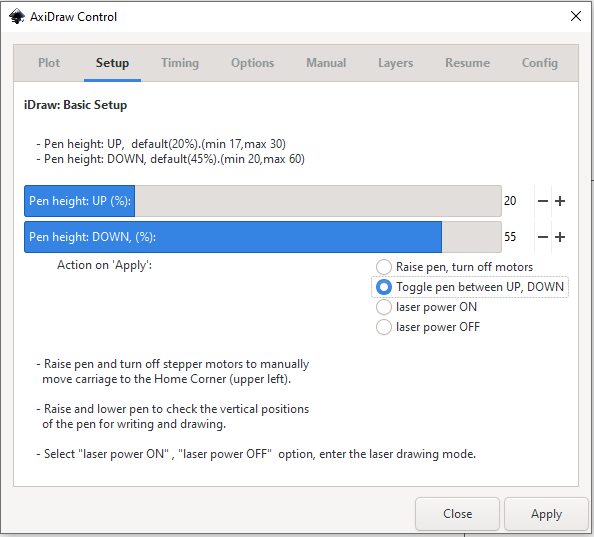
Start by securing the pen into the holder at a relatively high position. Then, access the AxiDraw control extension and select the setup tab. Ensure you have selected the toggle pen up and down, and press apply. This will lower the pen into the low position, which is the position it will maintain while drawing. Now physically adjust the pen position in the holder until it contacts the paper at the pressure you need. Note, all pens are different! Different pressures will produce different effects during drawing. Once finished, press apply again, this will toggle the holder to move into the raised position. Check to make sure this is higher than the paper. By adjusting the “Pen height UP %” and “Pen height DOWN %”, you can vary these levels precisely. I found it good to add a single increment to the pen height down to apply a touch more pressure.
Talk about speed, generally, XY plotters are slower than printers, but we can play around with how fast the plotter travels during drawing and while the pen is raised. Generally, I would recommend below 50% writing/drawing speed, higher than this and you will gradually increase the vibration of the pen as it reaches the limits of the working envelope. If you want super smooth lines and are not pressed for time, you can lower it. Keep in mind the pens you are using, the slower the writing speed, the longer your ink has time to bleed.

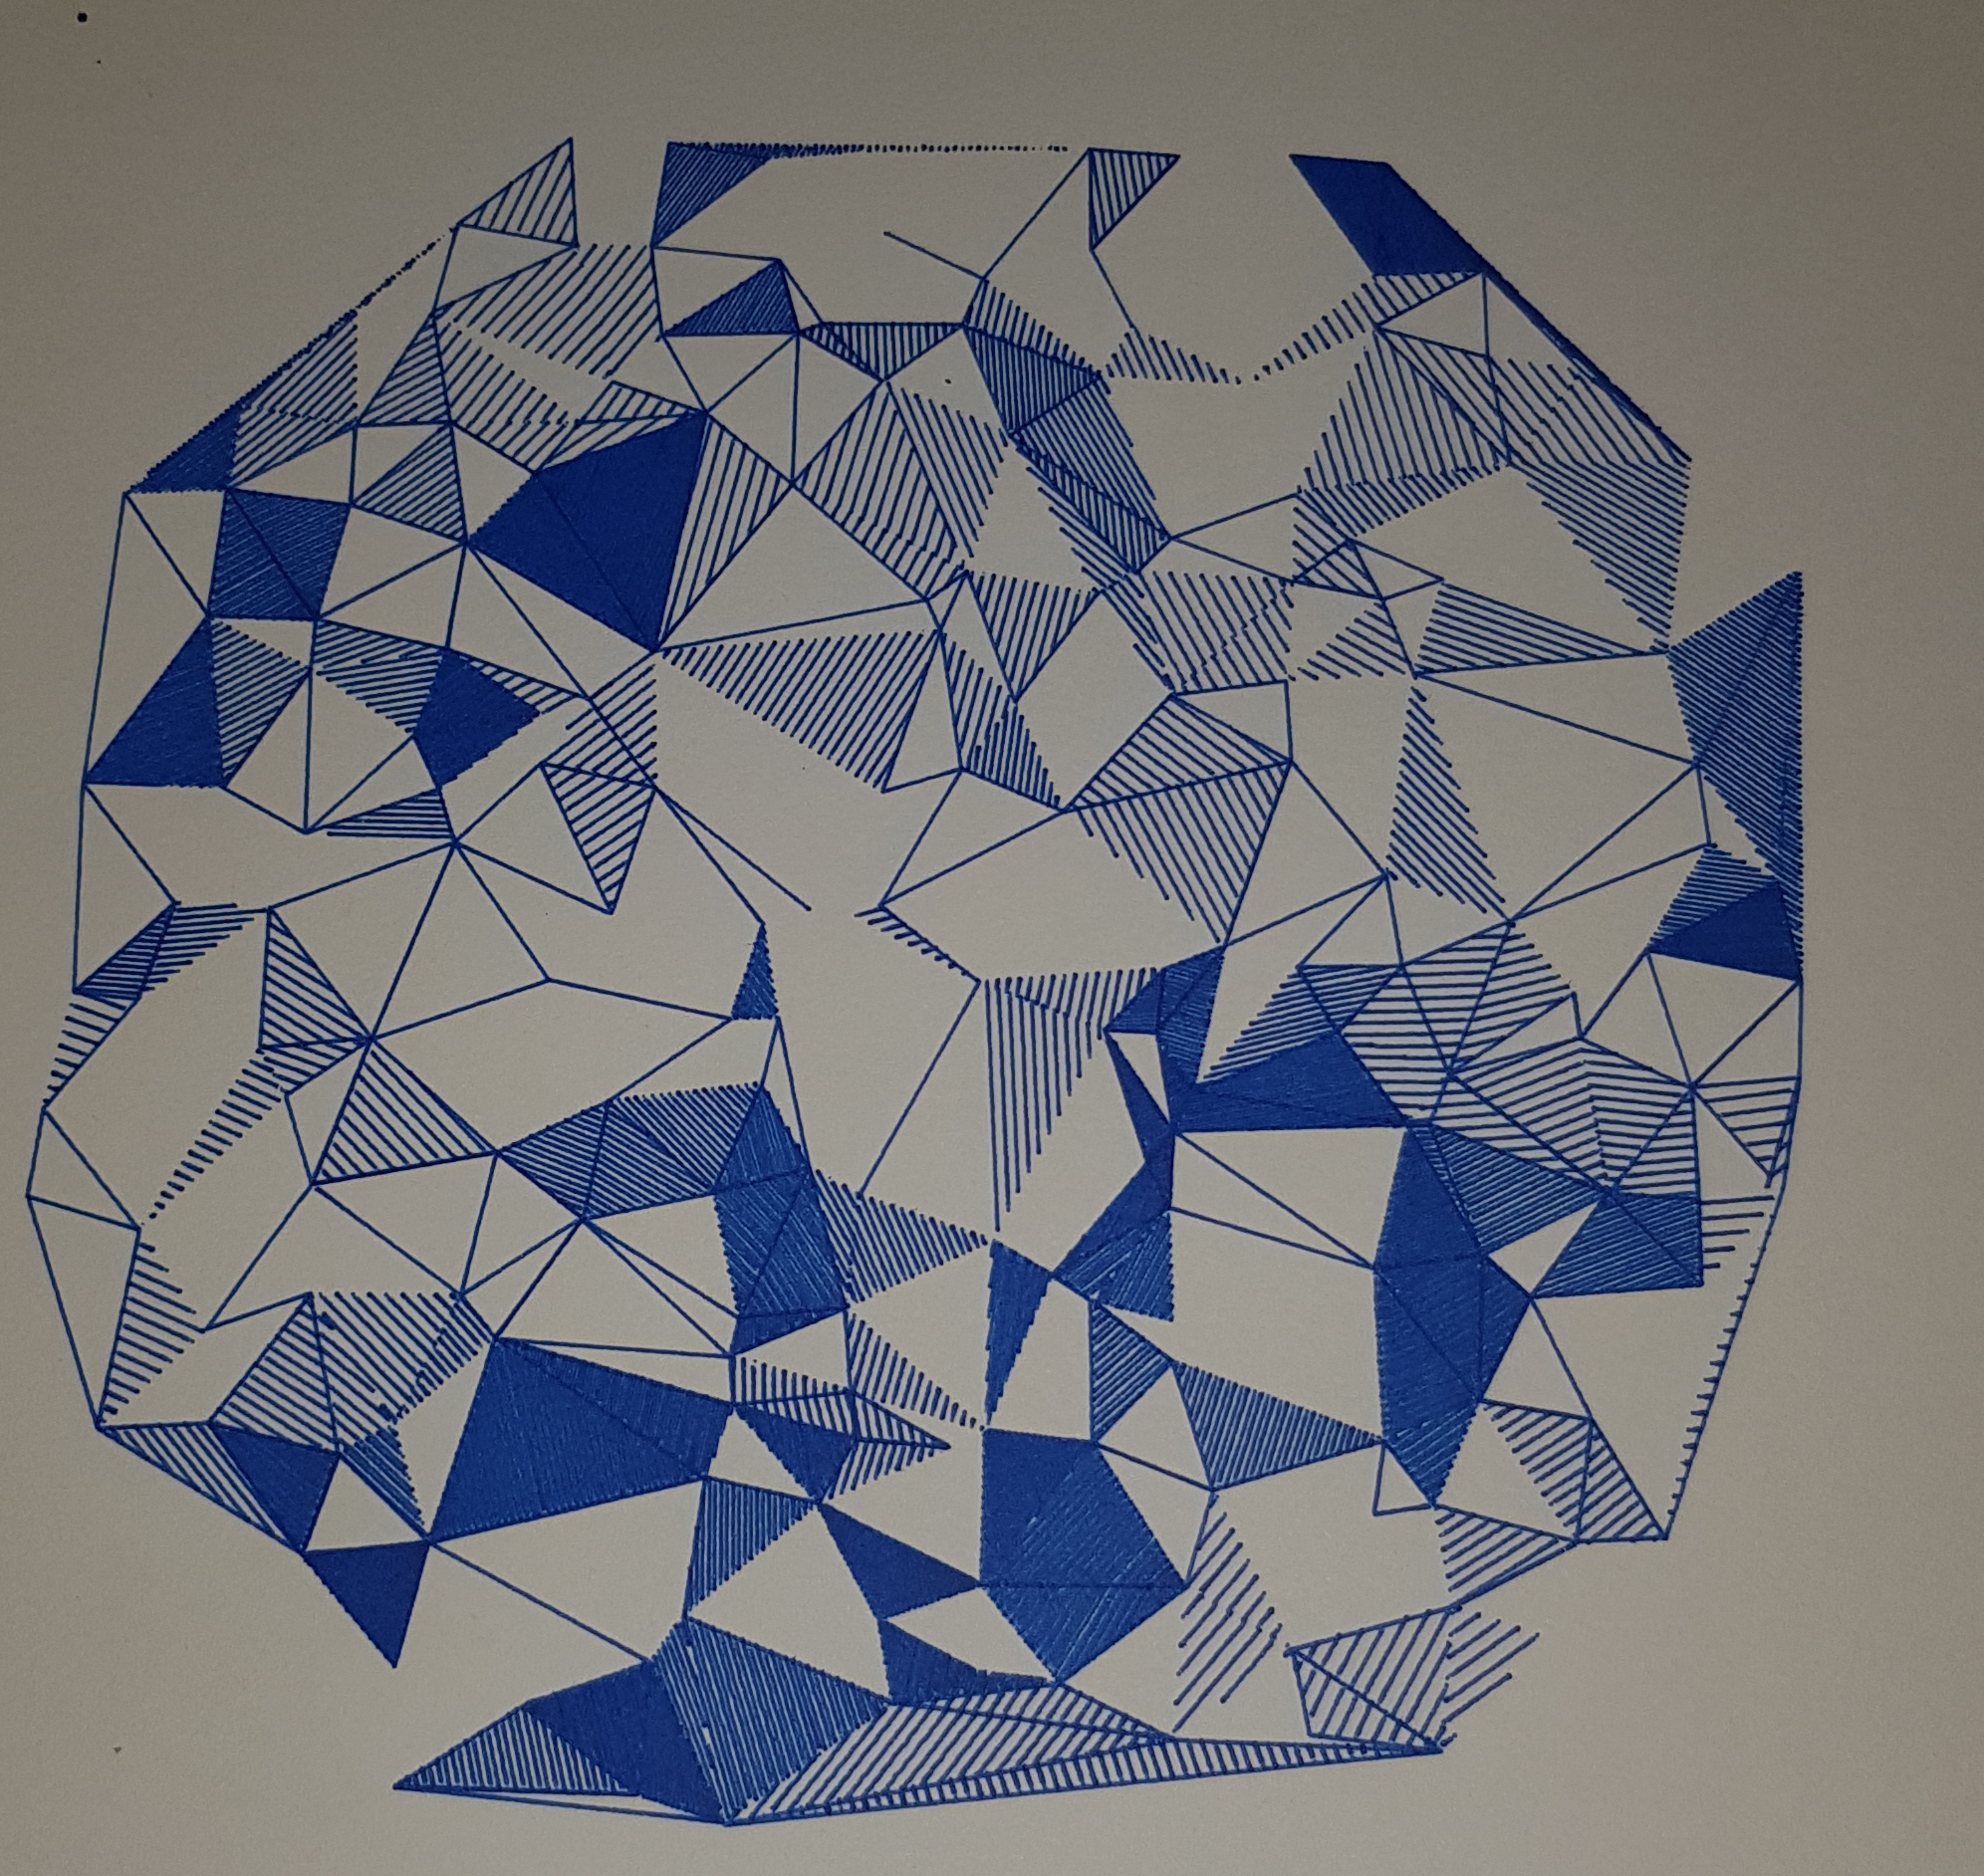
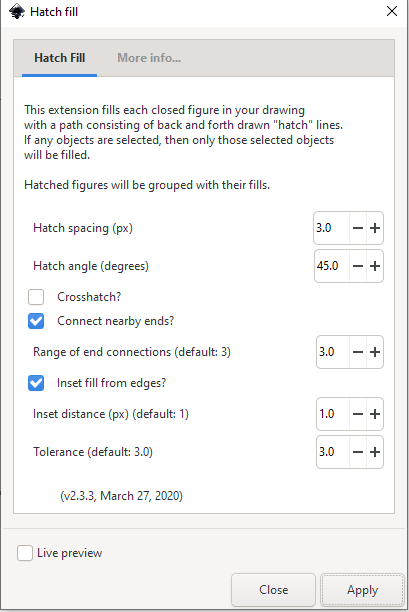
Lets take a quick look at the AxiDraw Utilities, this menu allows you to name your IDraw and a number of other advanced features. There is however, a cross hatch menu in Extensions -> AxiDraw Utilities -> Hatch Fill. This allows you to control the ‘shading’ of the IDraw, i.e how much your plotter will fill in solid objects. In the more info tab, there are handy explanations of all of these settings.
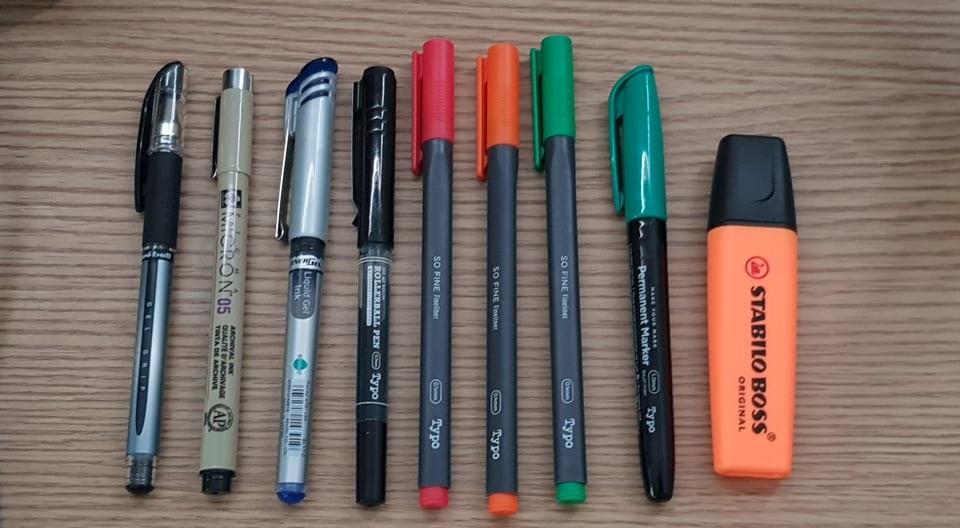
Lets talk quickly about pens. Get creative! Think about the content you are drawing, does the pen bleed? What is the opacity? What is the thickness? What about the texture? How does pressure affect the pen? I found that really any pen or can be used with the IDraw, but my choice really depends on the content I am trying to make. Naturally, going cheap on pens isn’t going to make great drawings, so pens a Bic ballpoint for example will not do well. Ballpoints in general only need some dust or a hair to stop working mid drawing! I found that a nice high flow pen, gel pens or felt pens worked great, even highlighters.
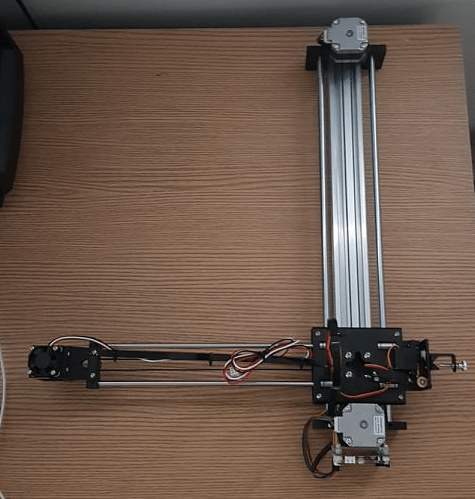
Now we are all ready to go, move the axis into the home position as pictured. This is IDraw’s starting position/origin:
Getting something to draw!
The IDraw will draw whatever you like, so long as it is in .SVG format: https://www.freecodecamp.org/news/svg-basics-what-are-scalable-vector-graphics-and-how-do-you-use-them/
SVG’s are vector formats, meaning they don’t store colour or intensity exactly, but instead a mathematical representation of the graphic they represent. Since we are talking math now, the IDraw can use the AxiDraw extension to create GCodes, which represent the all movements required by the IDraw to mimic the SVG’s paths.
This concept of pathing is important, that is all SVG’s really are to us here, the path we want to draw.
- SVG’s can be made from text in Inkscape using Path -> Object to Path https://www.educba.com/inkscape-text-to-path/
- Images can be converted to SVG using Path -> Trace Bitmap, which allows you to define which parts and edges of the image you want to trace https://inkscape.org/doc/tutorials/tracing/tutorial-tracing.html
- Turtletoy projects, premade SVG’s using Js https://turtletoy.net/
- Or, you can create SVG’s from scratch using you own Turtletoy in Python/Js, as well as with Processing https://processing.org/
- Additionally, many of the members of the plotting community have their own tools for creating easy SVG’s right in your browser https://drawingbots.net/knowledge/tools
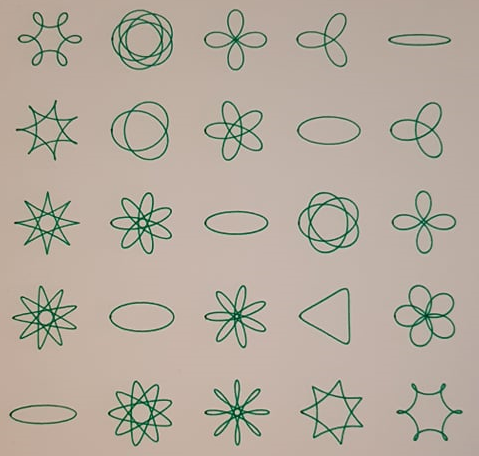
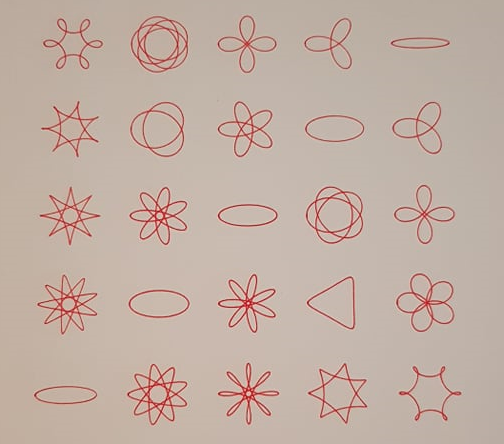
For testing the IDraw, I made a compilation of some of my favourite testing patterns:
- Text generated by https://www.calligrapher.ai/
- Spirograph Turtletoy by Reinder 2019 https://turtletoy.net/turtle/d07d0009b3
- Trigonometric Identities Turtletoy by Jurgen 2021 https://turtletoy.net/turtle/4c633554fa
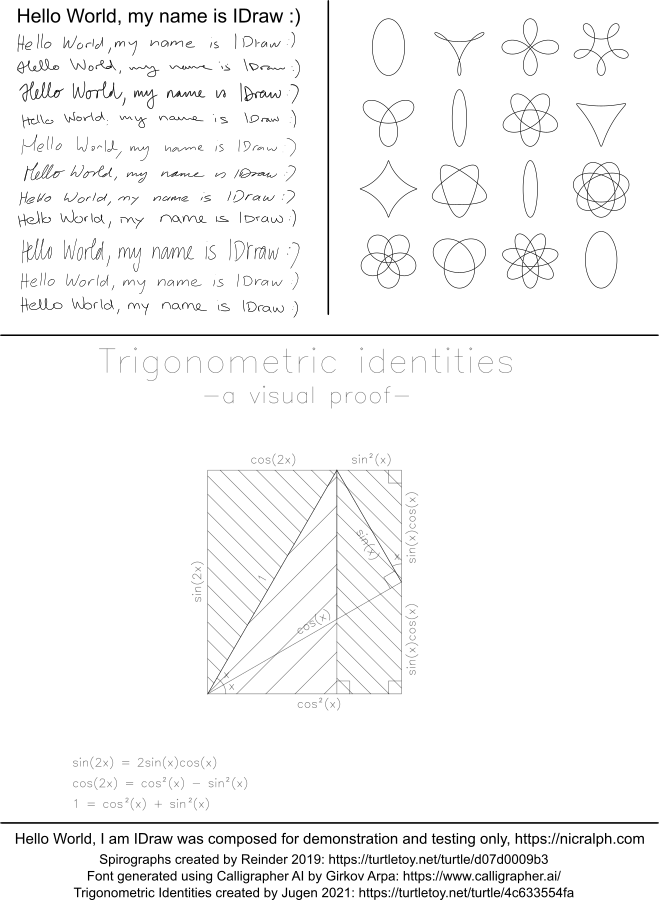
You can download this compilation here: https://drive.google.com/drive/folders/1MpJcXhJ8H38MgjWQ_B-L0CiTM_znuITP?usp=sharing
It went fantastic! Picture perfect, precise and with flawless handwriting replication as advertised.
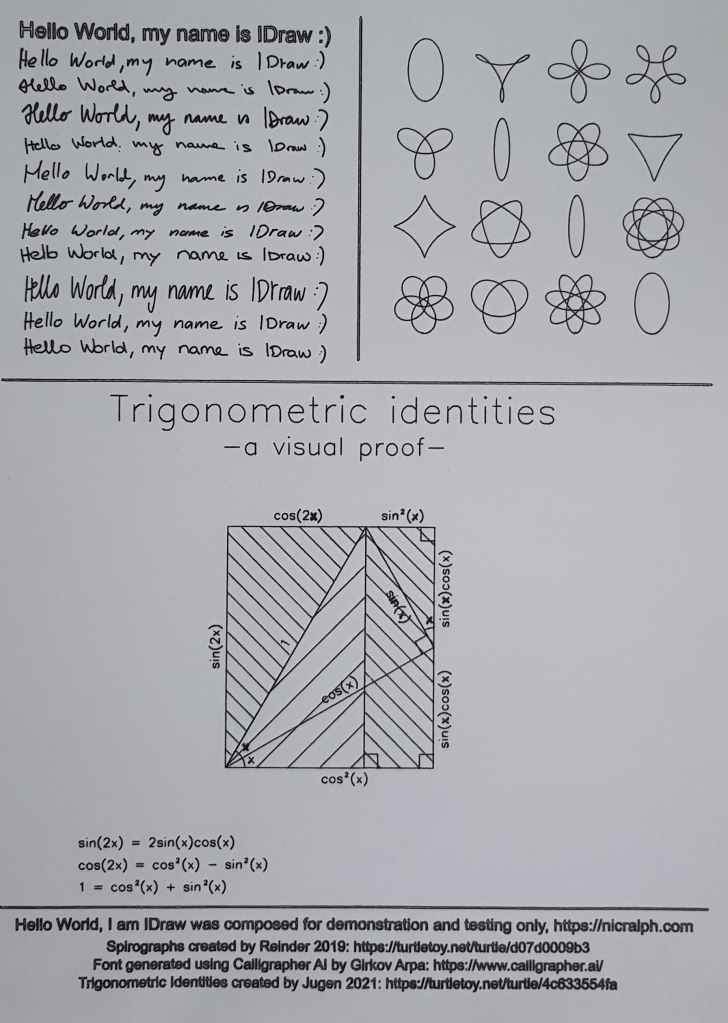
What about trying some colours and different pen combinations?
Final Verdict
Overall, I found the IDraw A4 XY plotter and engraver combo (metallic), to be the ideal place for educators, engineers, artists or general novices to both start their plotting journey and progress into advanced territory. The workflow is seamless, it took me 30 minutes to assemble and it takes only 30 seconds to setup a new drawing. With the incredible accuracy and repeatability, I have found myself successfully pushing this machine to its limits and producing some amazing art works. The high quality composition and sleek appearance makes this a perfect desk companion in my office. Be sure to look into the IDraw A4 over at Uunatek: https://uunatek.com/
For my deep dive and review on the laser engraving attachment that came with my IDraw A4, head over to my other blog post: https://nicralph.com/laser-engraving-with-the-uunatek-idraw-a4/
Keep an eye on this space! I am planning to post some of my latest work and some more reviews of similar products!
