Recently, I reviewed the IDraw A4 plotter from Uunatek and laser engraver combo with a heavy focus on the plotting aspect. Similar to the IDraw plotter performance, the laser engraving on the IDraw is easy to use, accurate, precise and an excellent place for beginners and advanced users alike to explore laser engraving. Lets take a deep look into this impressive laser engraving solution available from https://uunatek.com/.
If you have not read my IDraw plotter review and guide, check it out here: https://nicralph.com/a-deep-dive-and-user-guide-the-uunatek-idraw-xy-plotter-and-laser-engraver-combo/

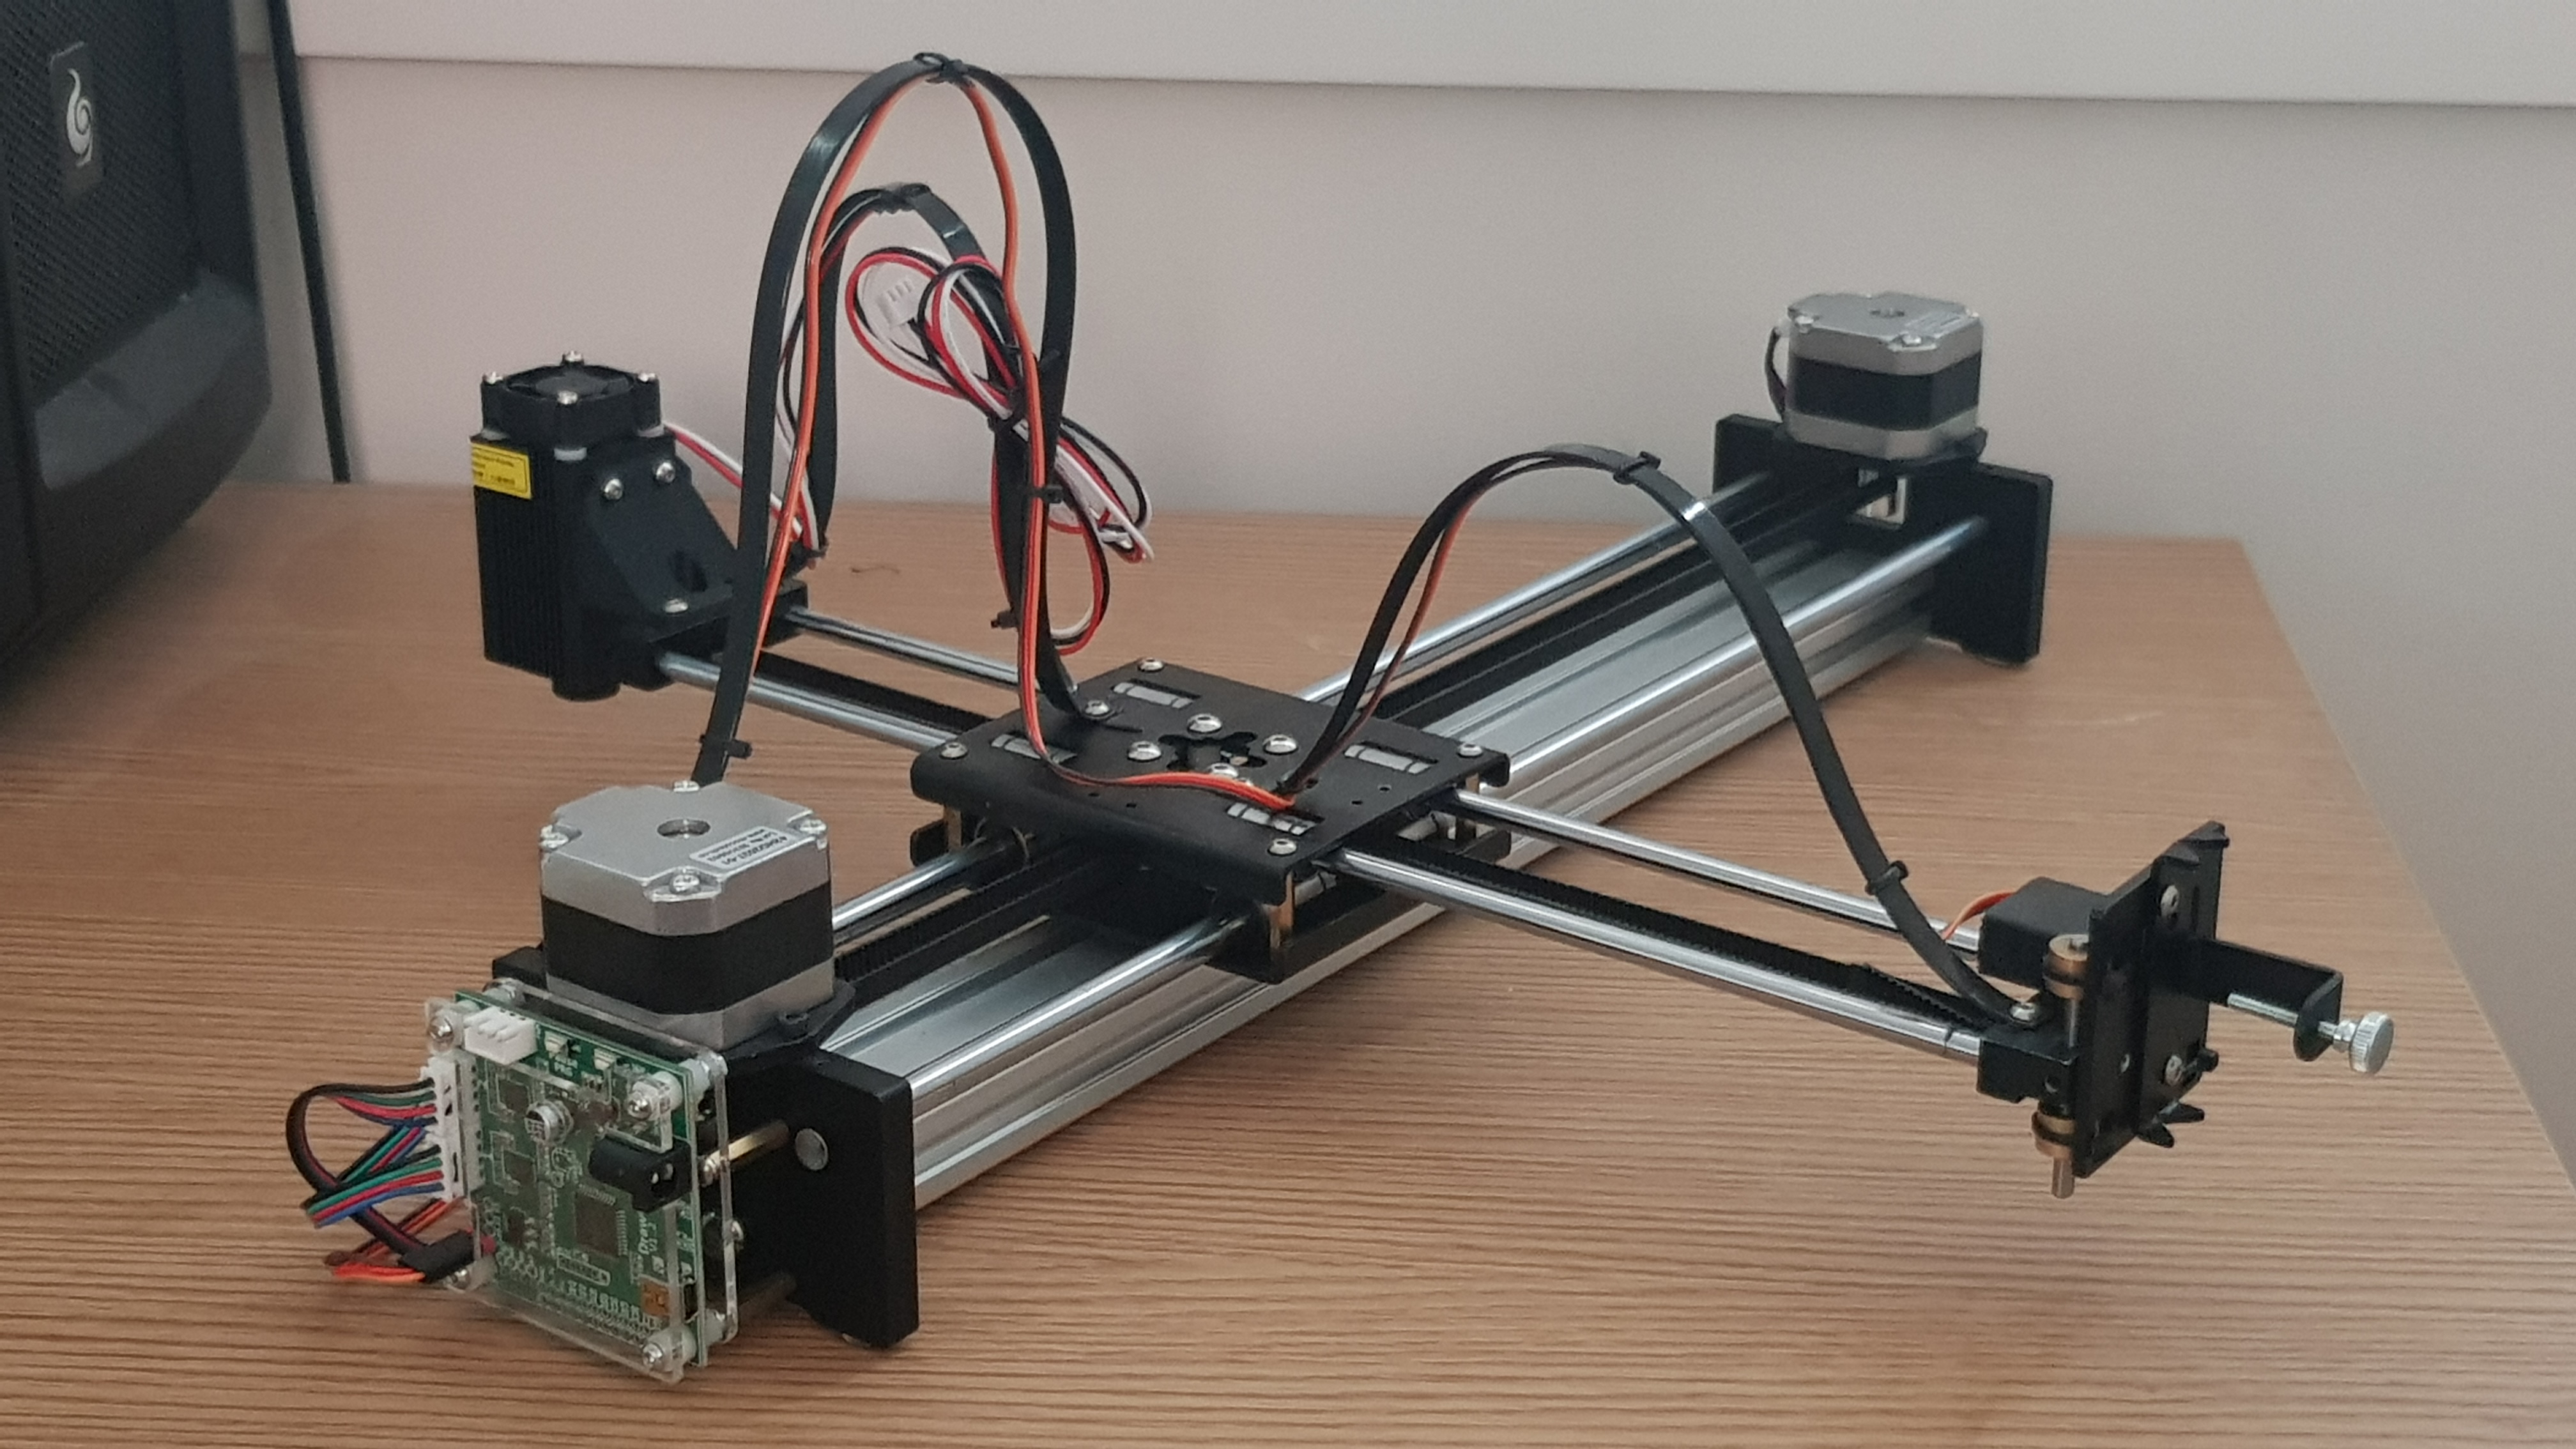

For only $49.90, the IDraw can come with a 500mW laser diode capable of engraving paper, cardboard, wood, leather, even stone. Perhaps one of the most clever aspects of this attachment, however, is how it seamlessly fits onto the free end of the plotter without needing any adjustment or change when swapping from laser engraving to plotting. This design approach means using the laser engraver is as easy as plotting. Currently, the engraver cannot vary the laser power for different shading/engraving depth, but travel speed can be used achieve the same effect.
Laser safety time!
Before we go assembling the engraver, a quick word on safety.
Lasers are bad news when handled incorrectly. At 500mW, this laser will cause immediate and possibly perminant eye damage if shone into the eyes of a person or animal. Even if not directly shone into the eye, serious injury can result simply by looking at what the laser is directed toward. There are an number of precautions you should take:
- Assume the laser is always powered and never look into the diode, even if it is not plugged in.
- Be aware of where the laser is pointing; immediate and serious eye damage will result from exposure.
- Also be aware of what surface the laser is pointing at; never point at a reflective surface, this causes the path of the laser to be unpredictable and can end up pointing at a person or animal.
- While ever powered on, always wear the protective goggles provided by Uunatek.
- The best amount of exposure is no exposure. Even with goggles, avoid looking at what the laser is directed at. Even the reflection of the laser off a non reflective surface will cause eye damage. So if possible, during operation, only look through an digital camera (not advised for a camera you care about, I am uncertain how much damage you could inflict even looking at what the laser is directed to), or even just turn away, but keep close and aware in case of a fire.
- Do not allow any child or animal in the room while using the engraver, use in a sectioned off area.
- Lasers are hot, do not use near flammable surfaces and operate in a well ventilated area.
- Always be present during engraving in case of fire.
- Eyes are not the only thing to worry about, skin can be easily burned by the laser.
- Leave the laser engraver unplugged if you are not using it.
- Do not rely on safety features.
- Read the warning label on the laser and do your own reading, this is not a comprehensive guide into laser safety.
Attaching the laser head is very simple with only three components, the diode itself, the chamfered mount and another cable guide. Once attached, cable tie the laser engraver’s wires to the guide and trim.

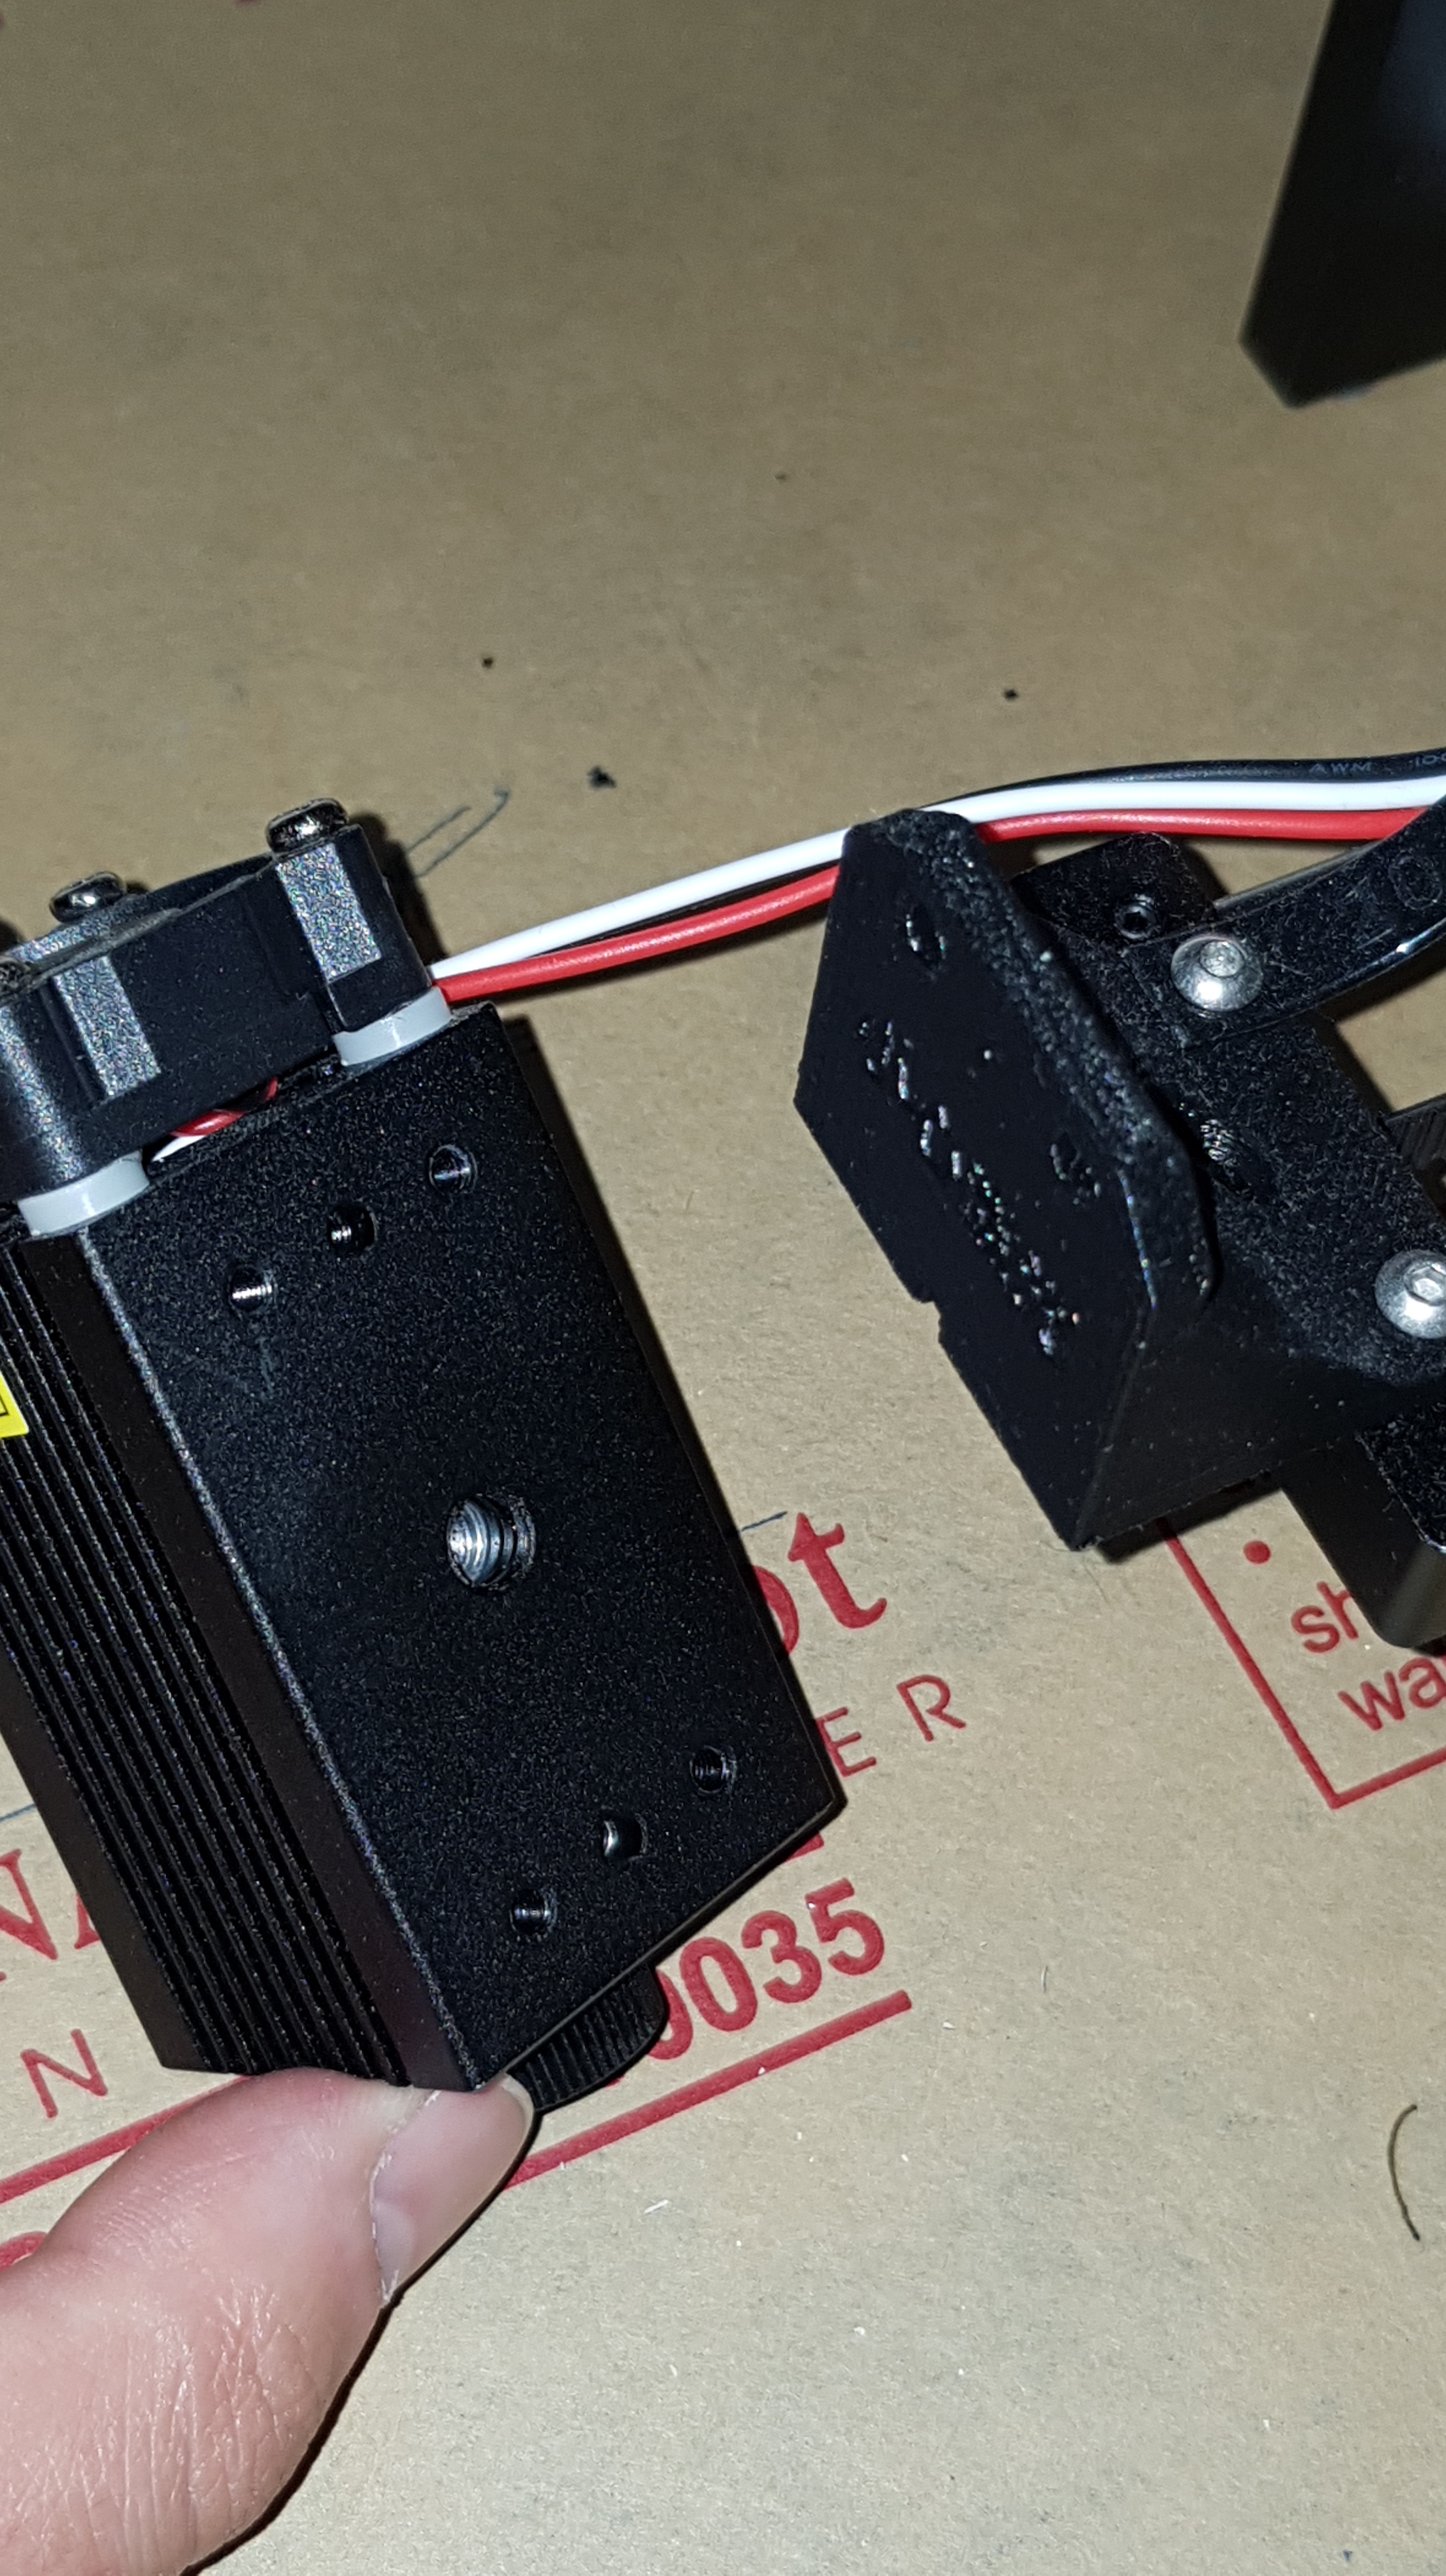
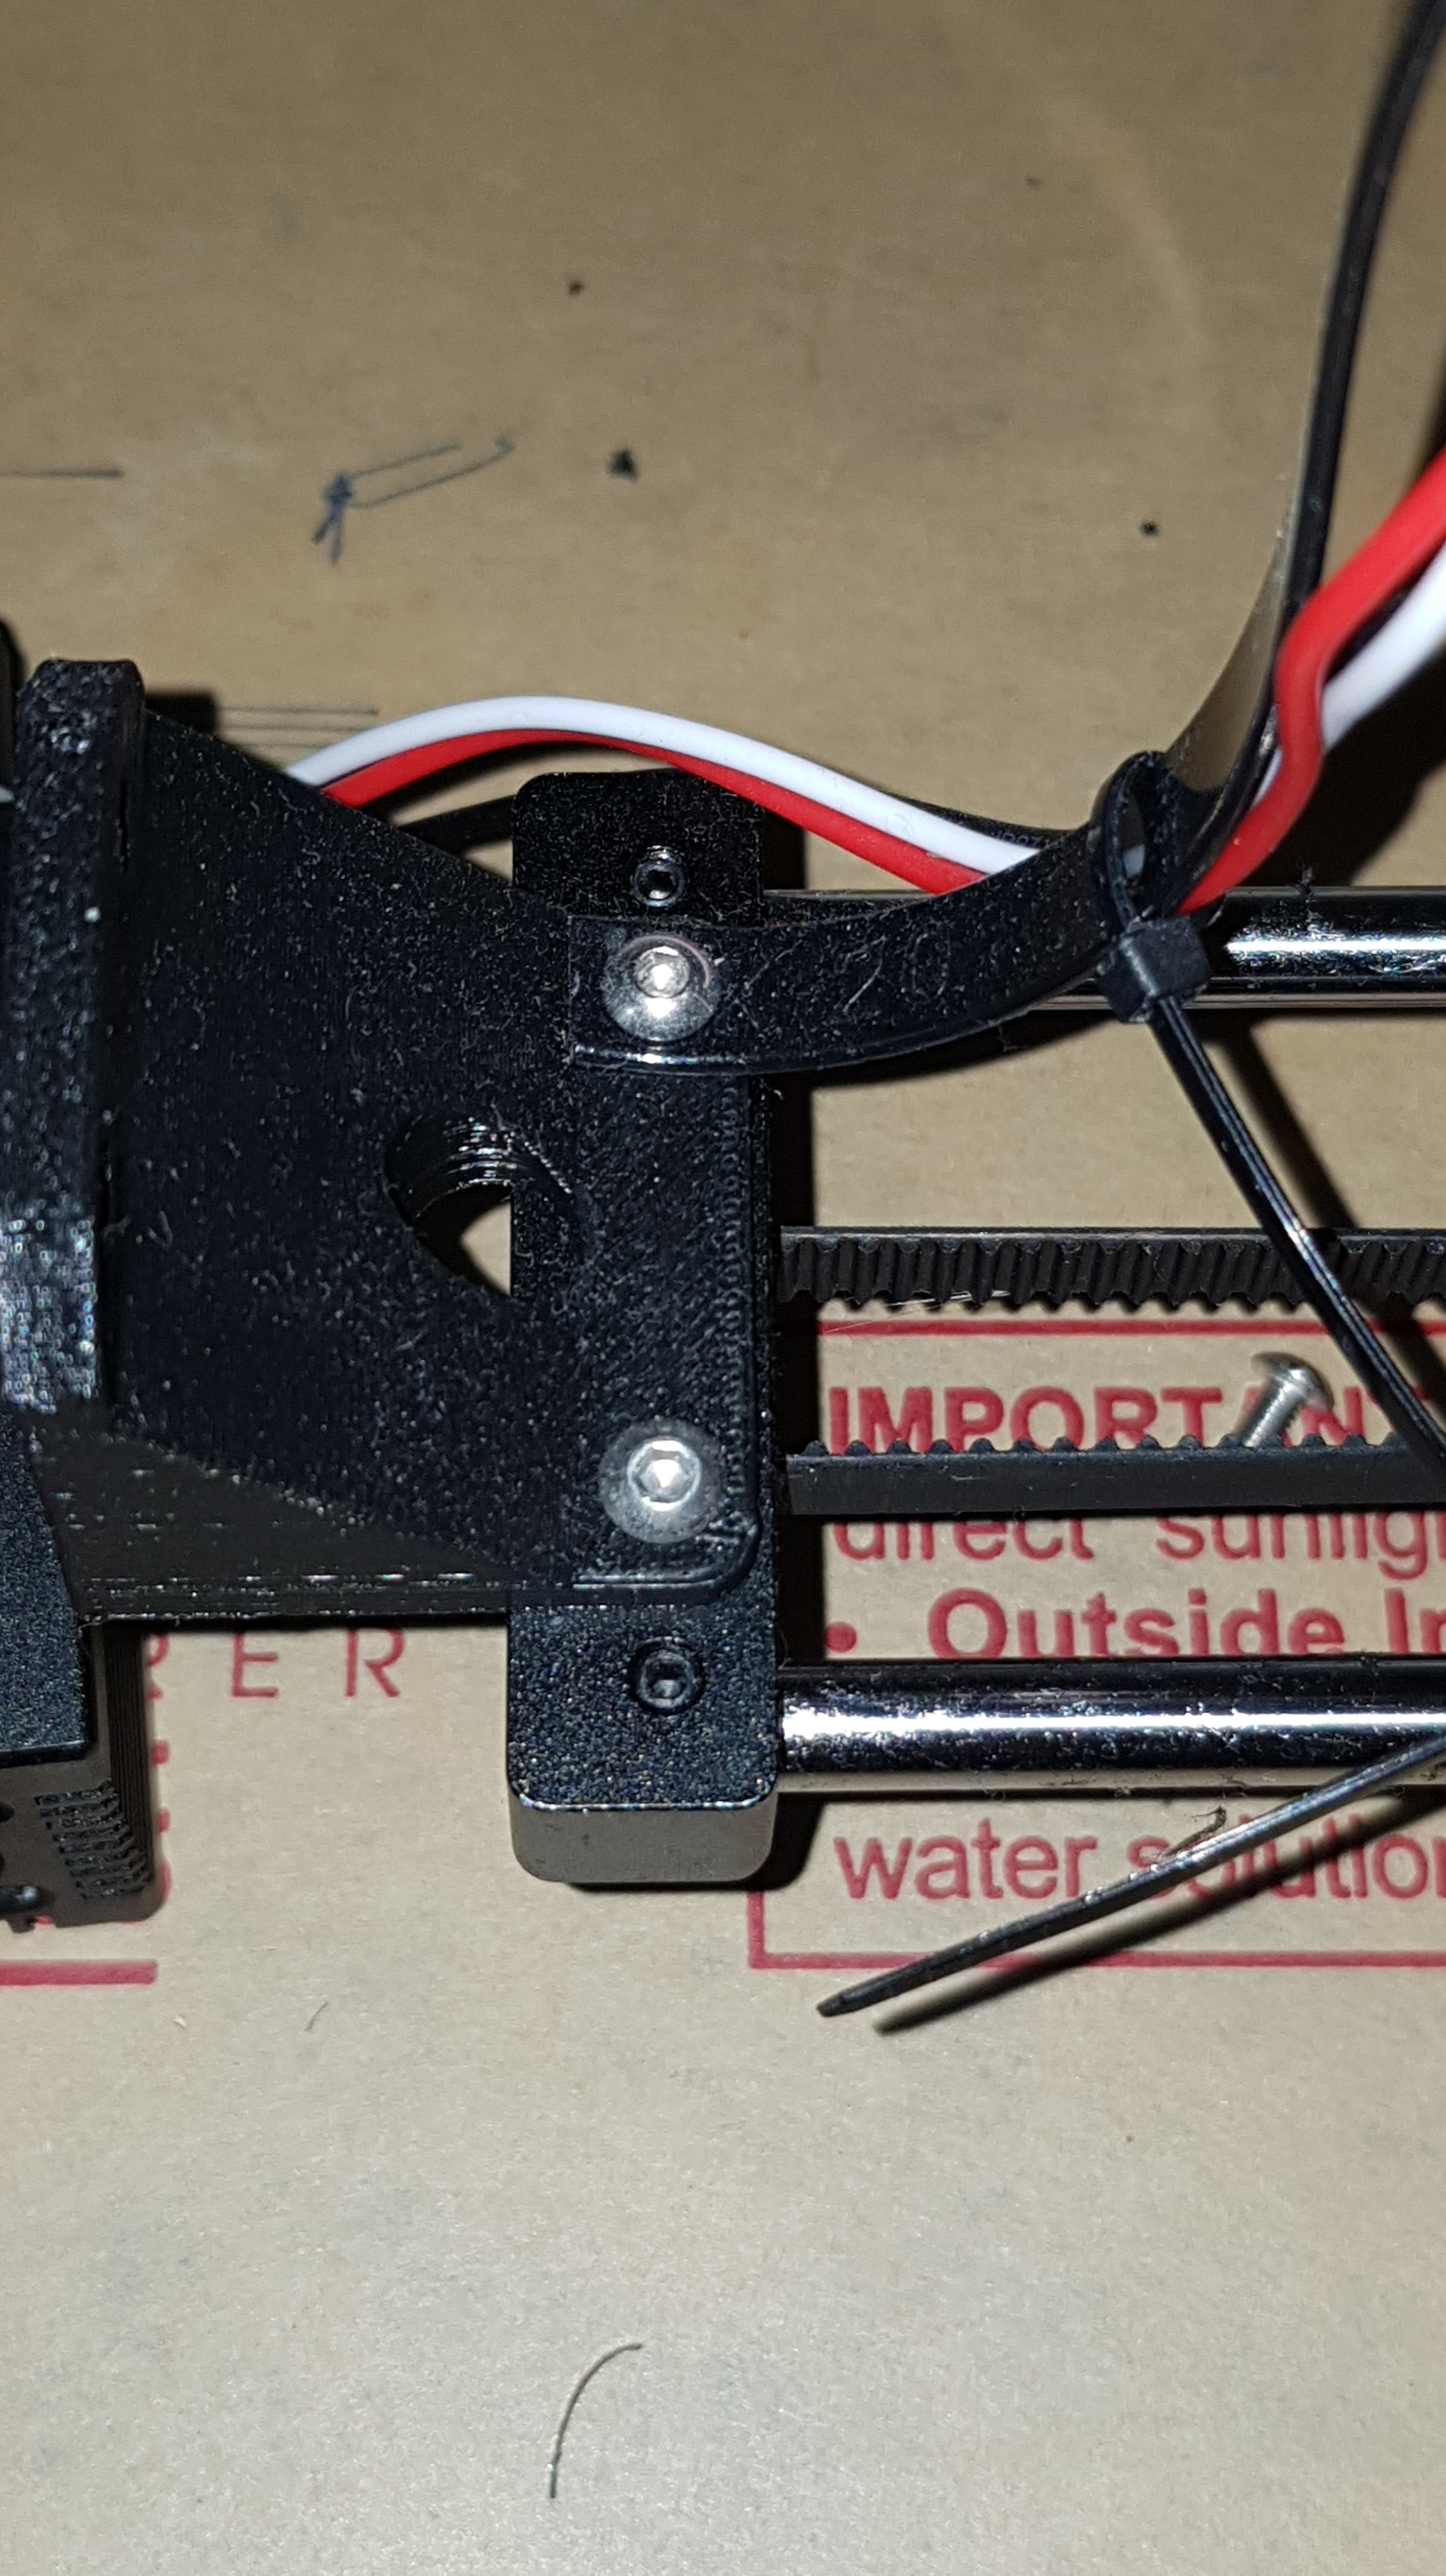


A little quality of life change I made was to not cable tie the laser engraver cables to the second guide leading from the centre block to the board, but instead using a flexible wire tie. This means I can unplug the laser engraver when I am not using it as a safety preauction.

Now to operation! The laser engraver just mimics the operation of the IDraw as a plotter, just from the other side of the Y axis, and by toggling the laser when the pen would normally be lowered. So operation is as before, using Inkscape and the AxiDraw extension.
How does laser engraving work?
Lets understand laser engraving before we proceed, this will help you get the most out of your engraver. There are just a few things to understand:
- Lasers engrave simply by vaporising the material that the beam is directed toward. This is a completely thermal process, meaning we are just using the laser to get the material hot enough to burn/vaporise. In engraving, we only want to vaporise a small amount of the surface, but in cutting we want depth. This is an engraver head since it 500mW is not hot enough for cutting thicker than paper.
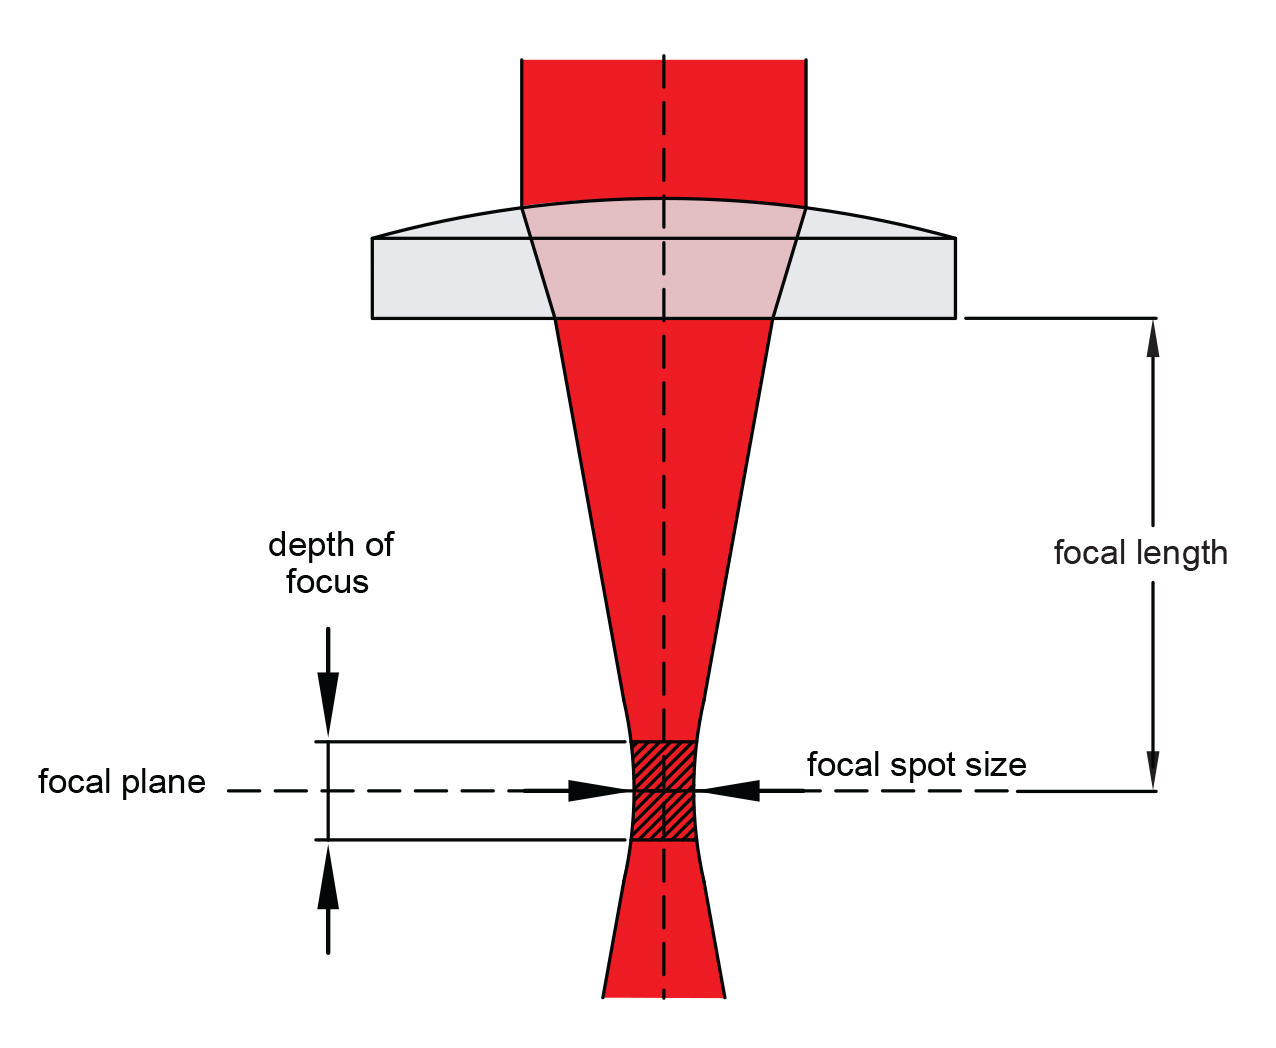
- Focus matters.
- How concentrated the beam is on the paper determines how hot the material will get, but also how fine the engraving beam will be. An unfocussed beam will be wider and cooler.
- See below, you want to focus the laser so the narrowest part of the focal point of the laser to be the distance between your laser and the material you are engraving. Focus image source: https://lasergods.com/laser-lenses-optics-and-focus/
- Speed matters.
- The slower the travel speed of the laser, the less time the material underneath will have to heat up. You can effectively change the depth and darkness/amount of engraving by how fast the engraver travels.
- See below for a typical laser engraving reference material test. Speed testing image source https://www.instructables.com/Test-your-material-to-determine-laser-speed-and-po/
- Colour can vary the required laser exposure.
- Simply put, a white coloured surface will reflect more light than a darker surface, which means whiter surfaces will need longer exposure to the laser beam to get hot enough for engraving. White paper for example needs very slow travel speeds (but also because it is partially transparent).
- Transparency, paper for example is partially transparent, so some of that light and heat is just going straight through.

Before we get engraving, we need to focus the laser. First, put on your safety glasses and plug in the laser on the top left of the board.


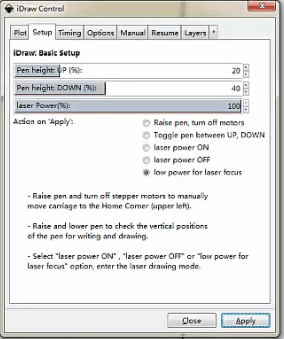
Now, in Inkscape -> Extensions -> Axidraw Control, open the setup tab, and select the “Low power for laser focus” setting. When ready, place a piece of cardboard under the laser hear and press apply to turn the laser on. Rotate the dial on the bottom of the laser to adjust to focus so that the beam is a small as possible. This focus may need to change if you use a material that is thicker, since it may be closer to your laser than when you focussed it initially.
Finally, lets tune the travel speed in the Axidraw control timing tab. Don’t forget, we are trying to heat up what we are focussed on, so we need the engraver to travel much slower than the plotter would normally. I use around 2%-5% travel speed based on the material and darkness. At 1% travel, you can cut paper! Also consider setting the acceleration to be quite low.

Lets do some tests! I am using the Spirograph Turtle Toy from Reinder 2019 https://turtletoy.net/turtle/d07d0009b3, and we get some very impressive results and lines even finer than when using a pen!


Lets see the laser in action:

After some quick tests, I was also able to cut paper at a 1% travel speed


Next I use a bitmap traced the outline of Pusheen the cat:


Since the cardboard is darker than the white paper and somewhat more flammable, I could use faster travel speeds.

If you want to fill in the lines, make sure to use the cross hatching setting in the Axidraw Utilities -> Hatch fill extension.
Final Verdict
Much like the Uunatek IDraw as a plotter, the IDraw as a laser engraver has shown itself to be a competitive, accurate and easy to use engraving solution. By seamlessly integrating the engraver into the IDraw, I can swap between drawing and engraving with ease. At such a low price point, the engraver attachment has let me delve deeper into my generative plotting with a whole new medium.
Be sure to look into the IDraw A4 https://uunatek.com/products/idraw-1-0-pen-plotter-handwriting-drawing-machine-xy-plotter with laser attachment: https://uunatek.com/collections/laser-engraving-heads over at https://uunatek.com/
Keep an eye on this space! I am planning to post some of my latest work and some more reviews of similar products!
